This is page 17 of 22. Use http://codebase.md/id/docs/get_started/create/basic_markup.html?lines=false&page={x} to view the full context.
# Directory Structure
```
├── .ci
│ ├── check-markdownfmt.sh
│ ├── check-metadata.sh
│ ├── check-pr-no-readme.sh
│ ├── check-required-files.sh
│ ├── check-short.sh
│ ├── check-ymlfmt.sh
│ └── get-markdownfmt.sh
├── .common-templates
│ ├── maintainer-community.md
│ ├── maintainer-docker.md
│ ├── maintainer-hashicorp.md
│ └── maintainer-influxdata.md
├── .dockerignore
├── .github
│ └── workflows
│ └── ci.yml
├── .template-helpers
│ ├── arches.sh
│ ├── autogenerated-warning.md
│ ├── compose.md
│ ├── generate-dockerfile-links-partial.sh
│ ├── generate-dockerfile-links-partial.tmpl
│ ├── get-help.md
│ ├── issues.md
│ ├── license-common.md
│ ├── template.md
│ ├── variant-alpine.md
│ ├── variant-default-buildpack-deps.md
│ ├── variant-default-debian.md
│ ├── variant-default-ubuntu.md
│ ├── variant-onbuild.md
│ ├── variant-slim.md
│ ├── variant-windowsservercore.md
│ ├── variant.md
│ └── variant.sh
├── adminer
│ ├── compose.yaml
│ ├── content.md
│ ├── github-repo
│ ├── license.md
│ ├── logo.png
│ ├── maintainer.md
│ ├── metadata.json
│ ├── README-short.txt
│ └── README.md
├── aerospike
│ ├── content.md
│ ├── github-repo
│ ├── issues.md
│ ├── license.md
│ ├── logo.png
│ ├── maintainer.md
│ ├── metadata.json
│ ├── README-short.txt
│ └── README.md
├── almalinux
│ ├── content.md
│ ├── github-repo
│ ├── issues.md
│ ├── license.md
│ ├── logo.png
│ ├── maintainer.md
│ ├── metadata.json
│ ├── README-short.txt
│ └── README.md
├── alpine
│ ├── content.md
│ ├── github-repo
│ ├── license.md
│ ├── logo.png
│ ├── maintainer.md
│ ├── metadata.json
│ ├── README-short.txt
│ └── README.md
├── alt
│ ├── content.md
│ ├── github-repo
│ ├── issues.md
│ ├── license.md
│ ├── logo.png
│ ├── maintainer.md
│ ├── metadata.json
│ ├── README-short.txt
│ └── README.md
├── amazoncorretto
│ ├── content.md
│ ├── github-repo
│ ├── license.md
│ ├── logo.png
│ ├── maintainer.md
│ ├── metadata.json
│ ├── README-short.txt
│ └── README.md
├── amazonlinux
│ ├── content.md
│ ├── github-repo
│ ├── issues.md
│ ├── license.md
│ ├── logo.png
│ ├── maintainer.md
│ ├── metadata.json
│ ├── README-short.txt
│ └── README.md
├── api-firewall
│ ├── content.md
│ ├── github-repo
│ ├── license.md
│ ├── logo.svg
│ ├── maintainer.md
│ ├── metadata.json
│ ├── README-short.txt
│ └── README.md
├── arangodb
│ ├── content.md
│ ├── github-repo
│ ├── license.md
│ ├── logo.png
│ ├── maintainer.md
│ ├── metadata.json
│ ├── README-short.txt
│ └── README.md
├── archlinux
│ ├── content.md
│ ├── github-repo
│ ├── issues.md
│ ├── license.md
│ ├── logo.png
│ ├── maintainer.md
│ ├── metadata.json
│ ├── README-short.txt
│ └── README.md
├── backdrop
│ ├── compose.yaml
│ ├── content.md
│ ├── github-repo
│ ├── license.md
│ ├── logo.png
│ ├── maintainer.md
│ ├── metadata.json
│ ├── README-short.txt
│ └── README.md
├── bash
│ ├── content.md
│ ├── github-repo
│ ├── license.md
│ ├── logo.png
│ ├── maintainer.md
│ ├── metadata.json
│ ├── README-short.txt
│ └── README.md
├── bonita
│ ├── compose.yaml
│ ├── content.md
│ ├── get-help.md
│ ├── github-repo
│ ├── issues.md
│ ├── license.md
│ ├── logo.png
│ ├── maintainer.md
│ ├── metadata.json
│ ├── README-short.txt
│ └── README.md
├── buildpack-deps
│ ├── content.md
│ ├── github-repo
│ ├── license.md
│ ├── logo.png
│ ├── maintainer.md
│ ├── metadata.json
│ ├── README-short.txt
│ └── README.md
├── busybox
│ ├── content.md
│ ├── github-repo
│ ├── license.md
│ ├── logo.png
│ ├── maintainer.md
│ ├── metadata.json
│ ├── README-short.txt
│ ├── README.md
│ ├── variant-glibc.md
│ ├── variant-musl.md
│ ├── variant-uclibc.md
│ └── variant.md
├── caddy
│ ├── content.md
│ ├── get-help.md
│ ├── github-repo
│ ├── license.md
│ ├── logo-120.png
│ ├── logo.png
│ ├── maintainer.md
│ ├── metadata.json
│ ├── README-short.txt
│ └── README.md
├── cassandra
│ ├── content.md
│ ├── github-repo
│ ├── license.md
│ ├── logo.png
│ ├── maintainer.md
│ ├── metadata.json
│ ├── README-short.txt
│ └── README.md
├── chronograf
│ ├── content.md
│ ├── github-repo
│ ├── license.md
│ ├── logo.png
│ ├── maintainer.md
│ ├── metadata.json
│ ├── README-short.txt
│ └── README.md
├── cirros
│ ├── content.md
│ ├── github-repo
│ ├── license.md
│ ├── logo.png
│ ├── maintainer.md
│ ├── metadata.json
│ ├── README-short.txt
│ └── README.md
├── clearlinux
│ ├── content.md
│ ├── github-repo
│ ├── license.md
│ ├── logo.png
│ ├── maintainer.md
│ ├── metadata.json
│ ├── README-short.txt
│ └── README.md
├── clefos
│ ├── content.md
│ ├── deprecated.md
│ ├── github-repo
│ ├── issues.md
│ ├── license.md
│ ├── logo.png
│ ├── maintainer.md
│ ├── metadata.json
│ ├── README-short.txt
│ └── README.md
├── clickhouse
│ ├── content.md
│ ├── github-repo
│ ├── license.md
│ ├── logo.svg
│ ├── maintainer.md
│ ├── metadata.json
│ ├── README-short.txt
│ └── README.md
├── clojure
│ ├── content.md
│ ├── github-repo
│ ├── license.md
│ ├── logo.png
│ ├── maintainer.md
│ ├── metadata.json
│ ├── README-short.txt
│ └── README.md
├── composer
│ ├── content.md
│ ├── github-repo
│ ├── license.md
│ ├── logo.png
│ ├── maintainer.md
│ ├── metadata.json
│ ├── README-short.txt
│ └── README.md
├── convertigo
│ ├── content.md
│ ├── github-repo
│ ├── license.md
│ ├── logo.png
│ ├── maintainer.md
│ ├── metadata.json
│ ├── README-short.txt
│ └── README.md
├── couchbase
│ ├── content.md
│ ├── github-repo
│ ├── license.md
│ ├── logo.png
│ ├── maintainer.md
│ ├── metadata.json
│ ├── README-short.txt
│ └── README.md
├── couchdb
│ ├── content.md
│ ├── github-repo
│ ├── license.md
│ ├── logo.png
│ ├── maintainer.md
│ ├── metadata.json
│ ├── README-short.txt
│ └── README.md
├── crate
│ ├── content.md
│ ├── get-help.md
│ ├── github-repo
│ ├── license.md
│ ├── logo.svg
│ ├── maintainer.md
│ ├── metadata.json
│ ├── README-short.txt
│ └── README.md
├── dart
│ ├── content.md
│ ├── github-repo
│ ├── license.md
│ ├── logo.svg
│ ├── maintainer.md
│ ├── metadata.json
│ ├── README-short.txt
│ └── README.md
├── debian
│ ├── content.md
│ ├── github-repo
│ ├── license.md
│ ├── logo.png
│ ├── maintainer.md
│ ├── metadata.json
│ ├── README-short.txt
│ ├── README.md
│ ├── variant-slim.md
│ └── variant.md
├── docker
│ ├── content.md
│ ├── github-repo
│ ├── license.md
│ ├── logo.png
│ ├── maintainer.md
│ ├── metadata.json
│ ├── README-short.txt
│ ├── README.md
│ ├── variant-rootless.md
│ └── variant-windowsservercore.md
├── Dockerfile
├── drupal
│ ├── compose.yaml
│ ├── content.md
│ ├── github-repo
│ ├── license.md
│ ├── logo.svg
│ ├── maintainer.md
│ ├── metadata.json
│ ├── README-short.txt
│ ├── README.md
│ └── variant-fpm.md
├── eclipse-mosquitto
│ ├── content.md
│ ├── github-repo
│ ├── license.md
│ ├── logo.png
│ ├── maintainer.md
│ ├── metadata.json
│ ├── README-short.txt
│ └── README.md
├── eclipse-temurin
│ ├── content.md
│ ├── get-help.md
│ ├── github-repo
│ ├── issues.md
│ ├── license.md
│ ├── logo.png
│ ├── maintainer.md
│ ├── metadata.json
│ ├── README-short.txt
│ └── README.md
├── eggdrop
│ ├── content.md
│ ├── github-repo
│ ├── license.md
│ ├── logo.png
│ ├── maintainer.md
│ ├── metadata.json
│ ├── README-short.txt
│ └── README.md
├── elasticsearch
│ ├── compose.yaml
│ ├── content.md
│ ├── get-help.md
│ ├── github-repo
│ ├── issues.md
│ ├── license.md
│ ├── logo.png
│ ├── maintainer.md
│ ├── metadata.json
│ ├── README-short.txt
│ ├── README.md
│ └── variant-alpine.md
├── elixir
│ ├── content.md
│ ├── github-repo
│ ├── license.md
│ ├── logo.png
│ ├── maintainer.md
│ ├── metadata.json
│ ├── README-short.txt
│ └── README.md
├── emqx
│ ├── content.md
│ ├── get-help.md
│ ├── github-repo
│ ├── license.md
│ ├── logo.svg
│ ├── maintainer.md
│ ├── metadata.json
│ ├── README-short.txt
│ └── README.md
├── erlang
│ ├── content.md
│ ├── github-repo
│ ├── license.md
│ ├── logo.png
│ ├── maintainer.md
│ ├── metadata.json
│ ├── README-short.txt
│ └── README.md
├── fedora
│ ├── content.md
│ ├── github-repo
│ ├── issues.md
│ ├── license.md
│ ├── logo.png
│ ├── maintainer.md
│ ├── metadata.json
│ ├── README-short.txt
│ └── README.md
├── flink
│ ├── content.md
│ ├── get-help.md
│ ├── github-repo
│ ├── issues.md
│ ├── license.md
│ ├── logo.png
│ ├── maintainer.md
│ ├── metadata.json
│ ├── README-short.txt
│ └── README.md
├── fluentd
│ ├── content.md
│ ├── github-repo
│ ├── license.md
│ ├── logo.png
│ ├── maintainer.md
│ ├── metadata.json
│ ├── README-short.txt
│ └── README.md
├── friendica
│ ├── compose.yaml
│ ├── content.md
│ ├── github-repo
│ ├── license.md
│ ├── logo.svg
│ ├── maintainer.md
│ ├── metadata.json
│ ├── README-short.txt
│ └── README.md
├── gazebo
│ ├── content.md
│ ├── github-repo
│ ├── license.md
│ ├── logo.png
│ ├── maintainer.md
│ ├── metadata.json
│ ├── README-short.txt
│ └── README.md
├── gcc
│ ├── content.md
│ ├── github-repo
│ ├── license.md
│ ├── logo.png
│ ├── maintainer.md
│ ├── metadata.json
│ ├── README-short.txt
│ └── README.md
├── generate-repo-stub-readme.sh
├── geonetwork
│ ├── compose.yaml
│ ├── content.md
│ ├── github-repo
│ ├── license.md
│ ├── logo.png
│ ├── maintainer.md
│ ├── metadata.json
│ ├── README-short.txt
│ ├── README.md
│ ├── variant-postgres.md
│ └── variant.md
├── get-categories.sh
├── ghost
│ ├── compose.yaml
│ ├── content.md
│ ├── github-repo
│ ├── license.md
│ ├── logo.png
│ ├── maintainer.md
│ ├── metadata.json
│ ├── README-short.txt
│ └── README.md
├── golang
│ ├── content.md
│ ├── github-repo
│ ├── license.md
│ ├── logo.png
│ ├── maintainer.md
│ ├── metadata.json
│ ├── README-short.txt
│ ├── README.md
│ ├── variant-alpine.md
│ └── variant-tip.md
├── gradle
│ ├── content.md
│ ├── github-repo
│ ├── license.md
│ ├── logo.png
│ ├── maintainer.md
│ ├── metadata.json
│ ├── README-short.txt
│ └── README.md
├── groovy
│ ├── content.md
│ ├── github-repo
│ ├── license.md
│ ├── logo.png
│ ├── maintainer.md
│ ├── metadata.json
│ ├── README-short.txt
│ └── README.md
├── haproxy
│ ├── content.md
│ ├── github-repo
│ ├── license.md
│ ├── logo.png
│ ├── maintainer.md
│ ├── metadata.json
│ ├── README-short.txt
│ └── README.md
├── haskell
│ ├── content.md
│ ├── github-repo
│ ├── license.md
│ ├── logo.png
│ ├── maintainer.md
│ ├── metadata.json
│ ├── README-short.txt
│ ├── README.md
│ └── variant-slim.md
├── haxe
│ ├── content.md
│ ├── github-repo
│ ├── license.md
│ ├── logo.png
│ ├── maintainer.md
│ ├── metadata.json
│ ├── README-short.txt
│ └── README.md
├── hello-world
│ ├── content.md
│ ├── github-repo
│ ├── license.md
│ ├── logo.png
│ ├── maintainer.md
│ ├── metadata.json
│ ├── README-short.txt
│ ├── README.md
│ └── update.sh
├── hitch
│ ├── content.md
│ ├── github-repo
│ ├── license.md
│ ├── maintainer.md
│ ├── metadata.json
│ ├── README-short.txt
│ └── README.md
├── httpd
│ ├── content.md
│ ├── github-repo
│ ├── license.md
│ ├── logo.png
│ ├── maintainer.md
│ ├── metadata.json
│ ├── README-short.txt
│ └── README.md
├── hylang
│ ├── content.md
│ ├── github-repo
│ ├── license.md
│ ├── logo.png
│ ├── maintainer.md
│ ├── metadata.json
│ ├── README-short.txt
│ └── README.md
├── ibm-semeru-runtimes
│ ├── content.md
│ ├── github-repo
│ ├── issues.md
│ ├── license.md
│ ├── logo.svg
│ ├── maintainer.md
│ ├── metadata.json
│ ├── README-short.txt
│ └── README.md
├── ibmjava
│ ├── content.md
│ ├── get-help.md
│ ├── github-repo
│ ├── issues.md
│ ├── license.md
│ ├── maintainer.md
│ ├── metadata.json
│ ├── README-short.txt
│ └── README.md
├── influxdb
│ ├── content.md
│ ├── github-repo
│ ├── license.md
│ ├── logo.png
│ ├── maintainer.md
│ ├── metadata.json
│ ├── README-short.txt
│ ├── README.md
│ ├── variant-data.md
│ └── variant-meta.md
├── irssi
│ ├── content.md
│ ├── github-repo
│ ├── license.md
│ ├── logo.png
│ ├── maintainer.md
│ ├── metadata.json
│ ├── README-short.txt
│ └── README.md
├── jetty
│ ├── content.md
│ ├── github-repo
│ ├── license.md
│ ├── logo.png
│ ├── maintainer.md
│ ├── metadata.json
│ ├── README-short.txt
│ └── README.md
├── joomla
│ ├── compose.yaml
│ ├── content.md
│ ├── github-repo
│ ├── license.md
│ ├── logo.png
│ ├── maintainer.md
│ ├── metadata.json
│ ├── README-short.txt
│ └── README.md
├── jruby
│ ├── content.md
│ ├── github-repo
│ ├── license.md
│ ├── logo.png
│ ├── maintainer.md
│ ├── metadata.json
│ ├── README-short.txt
│ └── README.md
├── julia
│ ├── content.md
│ ├── github-repo
│ ├── license.md
│ ├── logo.png
│ ├── maintainer.md
│ ├── metadata.json
│ ├── README-short.txt
│ └── README.md
├── kapacitor
│ ├── content.md
│ ├── github-repo
│ ├── license.md
│ ├── logo.png
│ ├── maintainer.md
│ ├── metadata.json
│ ├── README-short.txt
│ └── README.md
├── kibana
│ ├── compose.yaml
│ ├── content.md
│ ├── get-help.md
│ ├── github-repo
│ ├── issues.md
│ ├── license.md
│ ├── logo.png
│ ├── maintainer.md
│ ├── metadata.json
│ ├── README-short.txt
│ └── README.md
├── kong
│ ├── content.md
│ ├── github-repo
│ ├── license.md
│ ├── logo.png
│ ├── maintainer.md
│ ├── metadata.json
│ ├── README-short.txt
│ └── README.md
├── krakend
│ ├── content.md
│ ├── get-help.md
│ ├── github-repo
│ ├── license.md
│ ├── logo-120.png
│ ├── logo.png
│ ├── maintainer.md
│ ├── metadata.json
│ ├── README-short.txt
│ └── README.md
├── LICENSE
├── lightstreamer
│ ├── content.md
│ ├── github-repo
│ ├── license.md
│ ├── logo.png
│ ├── maintainer.md
│ ├── metadata.json
│ ├── README-short.txt
│ └── README.md
├── liquibase
│ ├── content.md
│ ├── github-repo
│ ├── license.md
│ ├── logo.png
│ ├── maintainer.md
│ ├── metadata.json
│ ├── README-short.txt
│ └── README.md
├── logstash
│ ├── content.md
│ ├── get-help.md
│ ├── github-repo
│ ├── issues.md
│ ├── license.md
│ ├── logo.png
│ ├── maintainer.md
│ ├── metadata.json
│ ├── README-short.txt
│ ├── README.md
│ └── variant-alpine.md
├── mageia
│ ├── content.md
│ ├── github-repo
│ ├── license.md
│ ├── logo.png
│ ├── maintainer.md
│ ├── metadata.json
│ ├── README-short.txt
│ └── README.md
├── mariadb
│ ├── compose.yaml
│ ├── content.md
│ ├── get-help.md
│ ├── github-repo
│ ├── issues.md
│ ├── license.md
│ ├── logo.png
│ ├── maintainer.md
│ ├── metadata.json
│ ├── README-short.txt
│ └── README.md
├── markdownfmt.sh
├── matomo
│ ├── content.md
│ ├── github-repo
│ ├── license.md
│ ├── logo.png
│ ├── maintainer.md
│ ├── metadata.json
│ ├── README-short.txt
│ └── README.md
├── maven
│ ├── content.md
│ ├── github-repo
│ ├── license.md
│ ├── logo.png
│ ├── maintainer.md
│ ├── metadata.json
│ ├── README-short.txt
│ └── README.md
├── mediawiki
│ ├── compose.yaml
│ ├── content.md
│ ├── github-repo
│ ├── issues.md
│ ├── license.md
│ ├── logo.svg
│ ├── maintainer.md
│ ├── metadata.json
│ ├── README-short.txt
│ └── README.md
├── memcached
│ ├── content.md
│ ├── github-repo
│ ├── license.md
│ ├── maintainer.md
│ ├── metadata.json
│ ├── README-short.txt
│ └── README.md
├── metadata.json
├── metadata.sh
├── mongo
│ ├── compose.yaml
│ ├── content.md
│ ├── github-repo
│ ├── license.md
│ ├── maintainer.md
│ ├── metadata.json
│ ├── README-short.txt
│ └── README.md
├── mongo-express
│ ├── content.md
│ ├── github-repo
│ ├── license.md
│ ├── logo.png
│ ├── maintainer.md
│ ├── metadata.json
│ ├── README-short.txt
│ └── README.md
├── monica
│ ├── content.md
│ ├── github-repo
│ ├── license.md
│ ├── logo.svg
│ ├── maintainer.md
│ ├── metadata.json
│ ├── README-short.txt
│ └── README.md
├── mono
│ ├── content.md
│ ├── deprecated.md
│ ├── github-repo
│ ├── license.md
│ ├── logo.png
│ ├── maintainer.md
│ ├── metadata.json
│ ├── README-short.txt
│ └── README.md
├── mysql
│ ├── compose.yaml
│ ├── content.md
│ ├── github-repo
│ ├── license.md
│ ├── logo.png
│ ├── maintainer.md
│ ├── metadata.json
│ ├── README-short.txt
│ └── README.md
├── nats
│ ├── content.md
│ ├── github-repo
│ ├── license.md
│ ├── logo.png
│ ├── maintainer.md
│ ├── metadata.json
│ ├── README-short.txt
│ └── README.md
├── neo4j
│ ├── content.md
│ ├── get-help.md
│ ├── github-repo
│ ├── license.md
│ ├── logo.png
│ ├── maintainer.md
│ ├── metadata.json
│ ├── README-short.txt
│ └── README.md
├── neurodebian
│ ├── content.md
│ ├── github-repo
│ ├── license.md
│ ├── logo.png
│ ├── maintainer.md
│ ├── metadata.json
│ ├── README-short.txt
│ └── README.md
├── nextcloud
│ ├── content.md
│ ├── deprecated.md
│ ├── github-repo
│ ├── license.md
│ ├── maintainer.md
│ ├── metadata.json
│ ├── README-short.txt
│ └── README.md
├── nginx
│ ├── content.md
│ ├── github-repo
│ ├── license.md
│ ├── logo.png
│ ├── maintainer.md
│ ├── metadata.json
│ ├── README-short.txt
│ ├── README.md
│ └── variant-perl.md
├── node
│ ├── content.md
│ ├── github-repo
│ ├── license.md
│ ├── logo.png
│ ├── maintainer.md
│ ├── metadata.json
│ ├── README-short.txt
│ └── README.md
├── notary
│ ├── content.md
│ ├── github-repo
│ ├── license.md
│ ├── maintainer.md
│ ├── metadata.json
│ ├── README-short.txt
│ └── README.md
├── odoo
│ ├── content.md
│ ├── github-repo
│ ├── license.md
│ ├── logo.png
│ ├── maintainer.md
│ ├── metadata.json
│ ├── README-short.txt
│ └── README.md
├── open-liberty
│ ├── content.md
│ ├── get-help.md
│ ├── github-repo
│ ├── license.md
│ ├── logo.png
│ ├── maintainer.md
│ ├── metadata.json
│ ├── README-short.txt
│ └── README.md
├── openjdk
│ ├── content.md
│ ├── deprecated.md
│ ├── github-repo
│ ├── license.md
│ ├── logo.png
│ ├── maintainer.md
│ ├── metadata.json
│ ├── README-short.txt
│ ├── README.md
│ ├── variant-alpine.md
│ ├── variant-oracle.md
│ └── variant-slim.md
├── oraclelinux
│ ├── content.md
│ ├── get-help.md
│ ├── github-repo
│ ├── license.md
│ ├── logo.png
│ ├── maintainer.md
│ ├── metadata.json
│ ├── README-short.txt
│ ├── README.md
│ └── variant-slim.md
├── orientdb
│ ├── content.md
│ ├── github-repo
│ ├── license.md
│ ├── logo.png
│ ├── maintainer.md
│ ├── metadata.json
│ ├── README-short.txt
│ └── README.md
├── parallel-update.sh
├── percona
│ ├── compose.yaml
│ ├── content.md
│ ├── github-repo
│ ├── issues.md
│ ├── license.md
│ ├── logo.png
│ ├── maintainer.md
│ ├── metadata.json
│ ├── README-short.txt
│ └── README.md
├── perl
│ ├── content.md
│ ├── github-repo
│ ├── license.md
│ ├── logo.png
│ ├── maintainer.md
│ ├── metadata.json
│ ├── README-short.txt
│ └── README.md
├── photon
│ ├── content.md
│ ├── github-repo
│ ├── license.md
│ ├── logo.png
│ ├── maintainer.md
│ ├── metadata.json
│ ├── README-short.txt
│ └── README.md
├── php
│ ├── content.md
│ ├── github-repo
│ ├── license.md
│ ├── logo.png
│ ├── maintainer.md
│ ├── metadata.json
│ ├── README-short.txt
│ ├── README.md
│ ├── variant-apache.md
│ ├── variant-cli.md
│ ├── variant-fpm.md
│ └── variant.md
├── php-zendserver
│ ├── content.md
│ ├── deprecated.md
│ ├── github-repo
│ ├── issues.md
│ ├── license.md
│ ├── logo.png
│ ├── maintainer.md
│ ├── metadata.json
│ ├── README-short.txt
│ └── README.md
├── phpmyadmin
│ ├── compose.yaml
│ ├── content.md
│ ├── github-repo
│ ├── license.md
│ ├── logo.png
│ ├── maintainer.md
│ ├── metadata.json
│ ├── README-short.txt
│ └── README.md
├── plone
│ ├── content.md
│ ├── github-repo
│ ├── license.md
│ ├── logo.svg
│ ├── maintainer.md
│ ├── metadata.json
│ ├── README-short.txt
│ └── README.md
├── postfixadmin
│ ├── compose.yaml
│ ├── content.md
│ ├── github-repo
│ ├── license.md
│ ├── logo.png
│ ├── maintainer.md
│ ├── metadata.json
│ ├── README-short.txt
│ ├── README.md
│ ├── variant-apache.md
│ ├── variant-fpm-alpine.md
│ └── variant-fpm.md
├── postgres
│ ├── compose.yaml
│ ├── content.md
│ ├── github-repo
│ ├── license.md
│ ├── logo.png
│ ├── maintainer.md
│ ├── metadata.json
│ ├── README-short.txt
│ └── README.md
├── push.pl
├── push.sh
├── pypy
│ ├── content.md
│ ├── github-repo
│ ├── license.md
│ ├── logo.png
│ ├── maintainer.md
│ ├── metadata.json
│ ├── README-short.txt
│ └── README.md
├── python
│ ├── content.md
│ ├── github-repo
│ ├── license.md
│ ├── logo.png
│ ├── maintainer.md
│ ├── metadata.json
│ ├── README-short.txt
│ ├── README.md
│ └── variant-slim.md
├── r-base
│ ├── content.md
│ ├── github-repo
│ ├── issues.md
│ ├── license.md
│ ├── logo.png
│ ├── maintainer.md
│ ├── metadata.json
│ ├── README-short.txt
│ └── README.md
├── rabbitmq
│ ├── content.md
│ ├── github-repo
│ ├── license.md
│ ├── logo.png
│ ├── maintainer.md
│ ├── metadata.json
│ ├── README-short.txt
│ └── README.md
├── rakudo-star
│ ├── content.md
│ ├── github-repo
│ ├── license.md
│ ├── logo.png
│ ├── maintainer.md
│ ├── metadata.json
│ ├── README-short.txt
│ └── README.md
├── README.md
├── redis
│ ├── content.md
│ ├── github-repo
│ ├── license.md
│ ├── logo.png
│ ├── maintainer.md
│ ├── metadata.json
│ ├── README-short.txt
│ └── README.md
├── redmine
│ ├── compose.yaml
│ ├── content.md
│ ├── github-repo
│ ├── license.md
│ ├── logo.png
│ ├── maintainer.md
│ ├── metadata.json
│ ├── README-short.txt
│ └── README.md
├── registry
│ ├── content.md
│ ├── get-help.md
│ ├── github-repo
│ ├── license.md
│ ├── logo.png
│ ├── maintainer.md
│ ├── metadata.json
│ ├── README-short.txt
│ └── README.md
├── rethinkdb
│ ├── content.md
│ ├── github-repo
│ ├── license.md
│ ├── logo.png
│ ├── maintainer.md
│ ├── metadata.json
│ ├── README-short.txt
│ └── README.md
├── rocket.chat
│ ├── content.md
│ ├── github-repo
│ ├── license.md
│ ├── logo.svg
│ ├── maintainer.md
│ ├── metadata.json
│ ├── README-short.txt
│ └── README.md
├── rockylinux
│ ├── content.md
│ ├── github-repo
│ ├── issues.md
│ ├── license.md
│ ├── logo.png
│ ├── maintainer.md
│ ├── metadata.json
│ ├── README-short.txt
│ └── README.md
├── ros
│ ├── content.md
│ ├── github-repo
│ ├── license.md
│ ├── logo.png
│ ├── maintainer.md
│ ├── metadata.json
│ ├── README-short.txt
│ └── README.md
├── ruby
│ ├── content.md
│ ├── github-repo
│ ├── license.md
│ ├── logo.png
│ ├── maintainer.md
│ ├── metadata.json
│ ├── README-short.txt
│ └── README.md
├── rust
│ ├── content.md
│ ├── github-repo
│ ├── license.md
│ ├── logo.png
│ ├── maintainer.md
│ ├── metadata.json
│ ├── README-short.txt
│ └── README.md
├── sapmachine
│ ├── content.md
│ ├── get-help.md
│ ├── github-repo
│ ├── issues.md
│ ├── license.md
│ ├── logo.png
│ ├── maintainer.md
│ ├── metadata.json
│ ├── README-short.txt
│ └── README.md
├── satosa
│ ├── content.md
│ ├── get-help.md
│ ├── github-repo
│ ├── license.md
│ ├── logo.svg
│ ├── maintainer.md
│ ├── metadata.json
│ ├── README-short.txt
│ └── README.md
├── scratch
│ ├── metadata.json
│ ├── README-short.txt
│ └── README.md
├── silverpeas
│ ├── content.md
│ ├── get-help.md
│ ├── github-repo
│ ├── license.md
│ ├── logo.png
│ ├── maintainer.md
│ ├── metadata.json
│ ├── README-short.txt
│ └── README.md
├── solr
│ ├── content.md
│ ├── get-help.md
│ ├── github-repo
│ ├── issues.md
│ ├── license.md
│ ├── logo.png
│ ├── maintainer.md
│ ├── metadata.json
│ ├── README-short.txt
│ └── README.md
├── sonarqube
│ ├── content.md
│ ├── get-help.md
│ ├── github-repo
│ ├── license.md
│ ├── logo.png
│ ├── maintainer.md
│ ├── metadata.json
│ ├── README-short.txt
│ └── README.md
├── spark
│ ├── content.md
│ ├── get-help.md
│ ├── github-repo
│ ├── issues.md
│ ├── license.md
│ ├── logo.png
│ ├── maintainer.md
│ ├── metadata.json
│ ├── README-short.txt
│ └── README.md
├── spiped
│ ├── content.md
│ ├── github-repo
│ ├── license.md
│ ├── maintainer.md
│ ├── metadata.json
│ ├── README-short.txt
│ └── README.md
├── storm
│ ├── compose.yaml
│ ├── content.md
│ ├── get-help.md
│ ├── github-repo
│ ├── issues.md
│ ├── license.md
│ ├── logo.png
│ ├── maintainer.md
│ ├── metadata.json
│ ├── README-short.txt
│ └── README.md
├── swift
│ ├── content.md
│ ├── get-help.md
│ ├── github-repo
│ ├── issues.md
│ ├── license.md
│ ├── logo.png
│ ├── maintainer.md
│ ├── metadata.json
│ ├── README-short.txt
│ └── README.md
├── swipl
│ ├── content.md
│ ├── get-help.md
│ ├── github-repo
│ ├── license.md
│ ├── logo.png
│ ├── maintainer.md
│ ├── metadata.json
│ ├── README-short.txt
│ └── README.md
├── teamspeak
│ ├── compose.yaml
│ ├── content.md
│ ├── github-repo
│ ├── license.md
│ ├── logo.png
│ ├── maintainer.md
│ ├── metadata.json
│ ├── README-short.txt
│ └── README.md
├── telegraf
│ ├── content.md
│ ├── github-repo
│ ├── license.md
│ ├── logo.png
│ ├── maintainer.md
│ ├── metadata.json
│ ├── README-short.txt
│ └── README.md
├── tomcat
│ ├── content.md
│ ├── github-repo
│ ├── license.md
│ ├── logo.png
│ ├── maintainer.md
│ ├── metadata.json
│ ├── README-short.txt
│ └── README.md
├── tomee
│ ├── content.md
│ ├── github-repo
│ ├── license.md
│ ├── logo.png
│ ├── maintainer.md
│ ├── metadata.json
│ ├── README-short.txt
│ └── README.md
├── traefik
│ ├── content.md
│ ├── github-repo
│ ├── license.md
│ ├── logo.png
│ ├── maintainer.md
│ ├── metadata.json
│ ├── README-short.txt
│ ├── README.md
│ └── variant-alpine.md
├── ubuntu
│ ├── content.md
│ ├── github-repo
│ ├── issues.md
│ ├── license.md
│ ├── logo.png
│ ├── maintainer.md
│ ├── metadata.json
│ ├── README-short.txt
│ └── README.md
├── unit
│ ├── content.md
│ ├── get-help.md
│ ├── github-repo
│ ├── license.md
│ ├── logo.svg
│ ├── maintainer.md
│ ├── metadata.json
│ ├── README-short.txt
│ └── README.md
├── update.sh
├── varnish
│ ├── content.md
│ ├── github-repo
│ ├── license.md
│ ├── logo.png
│ ├── maintainer.md
│ ├── metadata.json
│ ├── README-short.txt
│ └── README.md
├── websphere-liberty
│ ├── content.md
│ ├── get-help.md
│ ├── github-repo
│ ├── license.md
│ ├── logo.png
│ ├── maintainer.md
│ ├── metadata.json
│ ├── README-short.txt
│ └── README.md
├── wordpress
│ ├── compose.yaml
│ ├── content.md
│ ├── github-repo
│ ├── license.md
│ ├── logo.png
│ ├── maintainer.md
│ ├── metadata.json
│ ├── README-short.txt
│ ├── README.md
│ ├── variant-cli.md
│ └── variant-fpm.md
├── xwiki
│ ├── content.md
│ ├── get-help.md
│ ├── github-repo
│ ├── issues.md
│ ├── license.md
│ ├── logo.png
│ ├── maintainer.md
│ ├── metadata.json
│ ├── README-short.txt
│ └── README.md
├── ymlfmt.sh
├── yourls
│ ├── compose.yaml
│ ├── content.md
│ ├── github-repo
│ ├── license.md
│ ├── logo.svg
│ ├── maintainer.md
│ ├── metadata.json
│ ├── README-short.txt
│ ├── README.md
│ └── variant-fpm.md
├── znc
│ ├── content.md
│ ├── github-repo
│ ├── license.md
│ ├── logo.png
│ ├── maintainer.md
│ ├── metadata.json
│ ├── README-short.txt
│ ├── README.md
│ └── variant-slim.md
└── zookeeper
├── compose.yaml
├── content.md
├── github-repo
├── license.md
├── logo.png
├── maintainer.md
├── metadata.json
├── README-short.txt
└── README.md
```
# Files
--------------------------------------------------------------------------------
/mongo-express/content.md:
--------------------------------------------------------------------------------
```markdown
# What is mongo-express?
mongo-express is a web-based MongoDB admin interface written in Node.js, Express.js, and Bootstrap3.
> [github.com/mongo-express/mongo-express](https://github.com/mongo-express/mongo-express)
%%LOGO%%
# How to use this image
```console
$ docker run --network some-network -e ME_CONFIG_MONGODB_SERVER=some-mongo -p 8081:8081 %%IMAGE%%
```
Then you can hit `http://localhost:8081` or `http://host-ip:8081` in your browser.
## Security Notice
JSON documents are parsed through a javascript virtual machine, so the web interface can be used for executing malicious javascript on a server.
**mongo-express should only be used privately for development purposes.**
# Configuration
Environment vairables are passed to the `run` command for configuring a mongo-express container.
Name | Default | Description
--------------------------------|-----------------|------------
ME_CONFIG_BASICAUTH_USERNAME | '' | mongo-express web username
ME_CONFIG_BASICAUTH_PASSWORD | '' | mongo-express web password
ME_CONFIG_MONGODB_ENABLE_ADMIN | 'true' | Enable admin access to all databases. Send strings: `"true"` or `"false"`
ME_CONFIG_MONGODB_ADMINUSERNAME | '' | MongoDB admin username
ME_CONFIG_MONGODB_ADMINPASSWORD | '' | MongoDB admin password
ME_CONFIG_MONGODB_PORT | 27017 | MongoDB port
ME_CONFIG_MONGODB_SERVER | 'mongo' | MongoDB container name. Use comma delimited list of host names for replica sets.
ME_CONFIG_OPTIONS_EDITORTHEME | 'default' | mongo-express editor color theme, [more here](http://codemirror.net/demo/theme.html)
ME_CONFIG_REQUEST_SIZE | '100kb' | Maximum payload size. CRUD operations above this size will fail in [body-parser](https://www.npmjs.com/package/body-parser).
ME_CONFIG_SITE_BASEURL | '/' | Set the baseUrl to ease mounting at a subdirectory. Remember to include a leading and trailing slash.
ME_CONFIG_SITE_COOKIESECRET | 'cookiesecret' | String used by [cookie-parser middleware](https://www.npmjs.com/package/cookie-parser) to sign cookies.
ME_CONFIG_SITE_SESSIONSECRET | 'sessionsecret' | String used to sign the session ID cookie by [express-session middleware](https://www.npmjs.com/package/express-session).
ME_CONFIG_SITE_SSL_ENABLED | 'false' | Enable SSL.
ME_CONFIG_SITE_SSL_CRT_PATH | '' | SSL certificate file.
ME_CONFIG_SITE_SSL_KEY_PATH | '' | SSL key file.
The following are only needed if `ME_CONFIG_MONGODB_ENABLE_ADMIN` is **"false"**
Name | Default | Description
--------------------------------|-----------------|------------
ME_CONFIG_MONGODB_AUTH_DATABASE | 'db' | Database name
ME_CONFIG_MONGODB_AUTH_USERNAME | 'admin' | Database username
ME_CONFIG_MONGODB_AUTH_PASSWORD | 'pass' | Database password
## Example
```console
$ docker run -it --rm \
--network web_default \
--name mongo-express \
-p 8081:8081 \
-e ME_CONFIG_OPTIONS_EDITORTHEME="ambiance" \
-e ME_CONFIG_MONGODB_SERVER="web_db_1" \
-e ME_CONFIG_BASICAUTH_USERNAME="user" \
-e ME_CONFIG_BASICAUTH_PASSWORD="fairly long password" \
%%IMAGE%%
```
This example links to a container name typical of `docker compose`, changes the editor's color theme, and enables basic authentication.
```
--------------------------------------------------------------------------------
/adminer/content.md:
--------------------------------------------------------------------------------
```markdown
# Adminer
## What is Adminer?
Adminer (formerly phpMinAdmin) is a full-featured database management tool written in PHP. Conversely to phpMyAdmin, it consist of a single file ready to deploy to the target server. Adminer is available for MySQL, PostgreSQL, SQLite, MS SQL, Oracle, Firebird, SimpleDB, Elasticsearch and MongoDB.
> [adminer.org](https://www.adminer.org)
%%LOGO%%
## How to use this image
### Standalone
```console
$ docker run --link some_database:db -p 8080:8080 %%IMAGE%%
```
Then you can hit `http://localhost:8080` or `http://host-ip:8080` in your browser.
### FastCGI
If you are already running a FastCGI capable web server you might prefer running Adminer via FastCGI:
```console
$ docker run --link some_database:db -p 9000:9000 %%IMAGE%%:fastcgi
```
Then point your web server to port 9000 of the container.
Note: This exposes the FastCGI socket to the Internet. Make sure to add proper firewall rules or use a private Docker network instead to prevent a direct access.
### %%COMPOSE%%
Run `docker compose up`, wait for it to initialize completely, and visit `http://localhost:8080` or `http://host-ip:8080` (as appropriate).
### Loading plugins
This image bundles all official Adminer plugins. You can find the list of plugins on GitHub: https://github.com/vrana/adminer/tree/master/plugins.
To load plugins you can pass a list of filenames in `ADMINER_PLUGINS`:
```console
$ docker run --link some_database:db -p 8080:8080 -e ADMINER_PLUGINS='tables-filter tinymce' %%IMAGE%%
```
If a plugin *requires* parameters to work correctly instead of adding the plugin to `ADMINER_PLUGINS`, you need to add a custom file to the container:
```console
$ docker run --link some_database:db -p 8080:8080 -e ADMINER_PLUGINS='login-servers' %%IMAGE%%
Unable to load plugin file "login-servers", because it has required parameters: servers
Create a file "/var/www/html/plugins-enabled/login-servers.php" with the following contents to load the plugin:
<?php
require_once('plugins/login-servers.php');
/** Set supported servers
* @param array array($domain) or array($domain => $description) or array($category => array())
* @param string
*/
return new AdminerLoginServers(
$servers = ???,
$driver = 'server'
);
```
To load a custom plugin you can add PHP scripts that return the instance of the plugin object to `/var/www/html/plugins-enabled/`.
### Choosing a design
The image bundles all the designs that are available in the source package of adminer. You can find the list of designs on GitHub: https://github.com/vrana/adminer/tree/master/designs.
To use a bundled design you can pass its name in `ADMINER_DESIGN`:
```console
$ docker run --link some_database:db -p 8080:8080 -e ADMINER_DESIGN='nette' %%IMAGE%%
```
To use a custom design you can add a file called `/var/www/html/adminer.css`.
### Usage with external server
You can specify the default host with the `ADMINER_DEFAULT_SERVER` environment variable. This is useful if you are connecting to an external server or a docker container named something other than the default `db`.
```console
docker run -p 8080:8080 -e ADMINER_DEFAULT_SERVER=mysql %%IMAGE%%
```
## Supported Drivers
While Adminer supports a wide range of database drivers this image only supports the following out of the box:
- MySQL
- PostgreSQL
- SQLite
- SimpleDB
- Elasticsearch
To add support for the other drivers you will need to install the following PHP extensions on top of this image:
- `pdo_dblib` (MS SQL)
- `oci8` (Oracle)
- `interbase` (Firebird)
- `mongodb` (MongoDB)
```
--------------------------------------------------------------------------------
/geonetwork/compose.yaml:
--------------------------------------------------------------------------------
```yaml
# GeoNetwork
#
# Access via "http://localhost:8080/geonetwork"
#
# Default user: admin
# Default password: admin
volumes:
geonetwork:
esdata:
pgdata:
pglog:
services:
geonetwork:
image: geonetwork:4.4
healthcheck:
test: curl http://localhost:8080/
interval: 5s
timeout: 5s
retries: 30
restart: always
volumes:
- geonetwork:/catalogue-data
depends_on:
database:
condition: service_healthy
ports:
- 8080:8080
environment:
WEBAPP_CONTEXT_PATH: /geonetwork
DATA_DIR: /catalogue-data
TZ: Europe/Amsterdam
JAVA_OPTS: >-
--add-opens=jdk.management/com.sun.management.internal=ALL-UNNAMED
-Djava.security.egd=file:/dev/./urandom -Djava.awt.headless=true
-Xms512M -Xss512M -Xmx2G -XX:+UseConcMarkSweepGC
-Djetty.httpConfig.requestHeaderSize=32768
-Dorg.eclipse.jetty.server.Request.maxFormContentSize=500000
-Dorg.eclipse.jetty.server.Request.maxFormKeys=4000
# For remote debug
# -Xdebug -Xrunjdwp:transport=dt_socket,server=y,suspend=n,address=5005
GN_CONFIG_PROPERTIES: >-
-Dgeonetwork.dir=/catalogue-data
-Dgeonetwork.formatter.dir=/catalogue-data/data/formatter
-Dgeonetwork.schema.dir=/opt/geonetwork/WEB-INF/data/config/schema_plugins
-Dgeonetwork.indexConfig.dir=/opt/geonetwork/WEB-INF/data/config/index
-Dgeonetwork.schemapublication.dir=/opt/geonetwork/WEB-INF/data/resources/schemapublication
-Dgeonetwork.htmlcache.dir=/opt/geonetwork/WEB-INF/data/resources/htmlcache
-Des.host=elasticsearch
-Des.protocol=http
-Des.port=9200
-Des.url=http://elasticsearch:9200
-Des.username=
-Des.password=
-Dgeonetwork.ESFeaturesProxy.targetUri=http://elasticsearch:9200/gn-features/{_}
-Dgeonetwork.HttpDashboardProxy.targetUri=http://kibana:5601
GEONETWORK_DB_TYPE: postgres-postgis
GEONETWORK_DB_HOST: database
GEONETWORK_DB_PORT: 5432
GEONETWORK_DB_NAME: geonetwork
GEONETWORK_DB_USERNAME: geonetwork
GEONETWORK_DB_PASSWORD: geonetwork
database:
image: postgis/postgis:16-3.4
environment:
POSTGRES_USER: geonetwork
POSTGRES_PASSWORD: geonetwork
POSTGRES_DB: geonetwork
command: [postgres, -c, log_statement=all, -c, logging_collector=true, -c, log_file_mode=0644,
-c, log_directory=/var/log/postgresql, -c, log_filename=postgresql.log]
healthcheck:
test: [CMD-SHELL, pg_isready -U postgres]
interval: 5s
timeout: 5s
retries: 5
volumes:
- pgdata:/var/lib/postgresql/data
- pglog:/var/log/postgresql
elasticsearch:
image: elasticsearch:7.17.15
ports:
- 9200:9200
ulimits:
memlock:
soft: -1
hard: -1
nofile:
soft: 65536
hard: 65536
healthcheck:
test: curl -s http://localhost:9200 >/dev/null || exit 1
interval: 10s
timeout: 2s
retries: 10
start_period: 2m
environment:
ES_JAVA_OPTS: -Xms1G -Xmx1G
discovery.type: single-node
volumes:
- esdata:/usr/share/elasticsearch/data
kibana:
image: kibana:7.17.15
environment:
SERVER_NAME: kibana
ELASTICSEARCH_URL: http://elasticsearch:9200/
SERVER_BASEPATH: /geonetwork/dashboards
SERVER_REWRITEBASEPATH: 'false'
KIBANA_INDEX: .dashboards
XPACK_MONITORING_UI_CONTAINER_ELASTICSEARCH_ENABLED: 'true'
depends_on:
elasticsearch:
condition: service_healthy
```
--------------------------------------------------------------------------------
/traefik/content.md:
--------------------------------------------------------------------------------
```markdown
%%LOGO%%
[Traefik](https://traefik.io) is a modern HTTP reverse proxy and ingress controller that makes deploying microservices easy.
Traefik integrates with your existing infrastructure components ([Kubernetes](https://kubernetes.io), [Docker](https://www.docker.com/), [Swarm](https://docs.docker.com/engine/swarm/), [Consul](https://www.consul.io/), [Nomad](https://www.nomadproject.io/), [etcd](https://coreos.com/etcd/), [Amazon ECS](https://aws.amazon.com/ecs), ...) and configures itself automatically and dynamically.
Pointing Traefik at your orchestrator should be the *only* configuration step you need.
## Traefik v3 - Example usage
Enable `docker` provider and dashboard UI:
```yml
## traefik.yml
# Docker configuration backend
providers:
docker:
defaultRule: "Host(`{{ trimPrefix `/` .Name }}.docker.localhost`)"
# API and dashboard configuration
api:
insecure: true
```
Start Traefik v3:
```sh
docker run -d -p 8080:8080 -p 80:80 \
-v $PWD/traefik.yml:/etc/traefik/traefik.yml \
-v /var/run/docker.sock:/var/run/docker.sock \
%%IMAGE%%:v3
```
Start a backend server using the `traefik/whoami` image:
```sh
docker run -d --name test traefik/whoami
```
Access the whoami service through Traefik via the defined rule `test.docker.localhost`:
```console
$ curl test.docker.localhost
Hostname: 0693100b16de
IP: 127.0.0.1
IP: ::1
IP: 192.168.215.4
RemoteAddr: 192.168.215.3:57618
GET / HTTP/1.1
Host: test.docker.localhost
User-Agent: curl/8.7.1
Accept: */*
Accept-Encoding: gzip
X-Forwarded-For: 192.168.215.1
X-Forwarded-Host: test.docker.localhost
X-Forwarded-Port: 80
X-Forwarded-Proto: http
X-Forwarded-Server: 8a37fd4f35fb
X-Real-Ip: 192.168.215.1
```
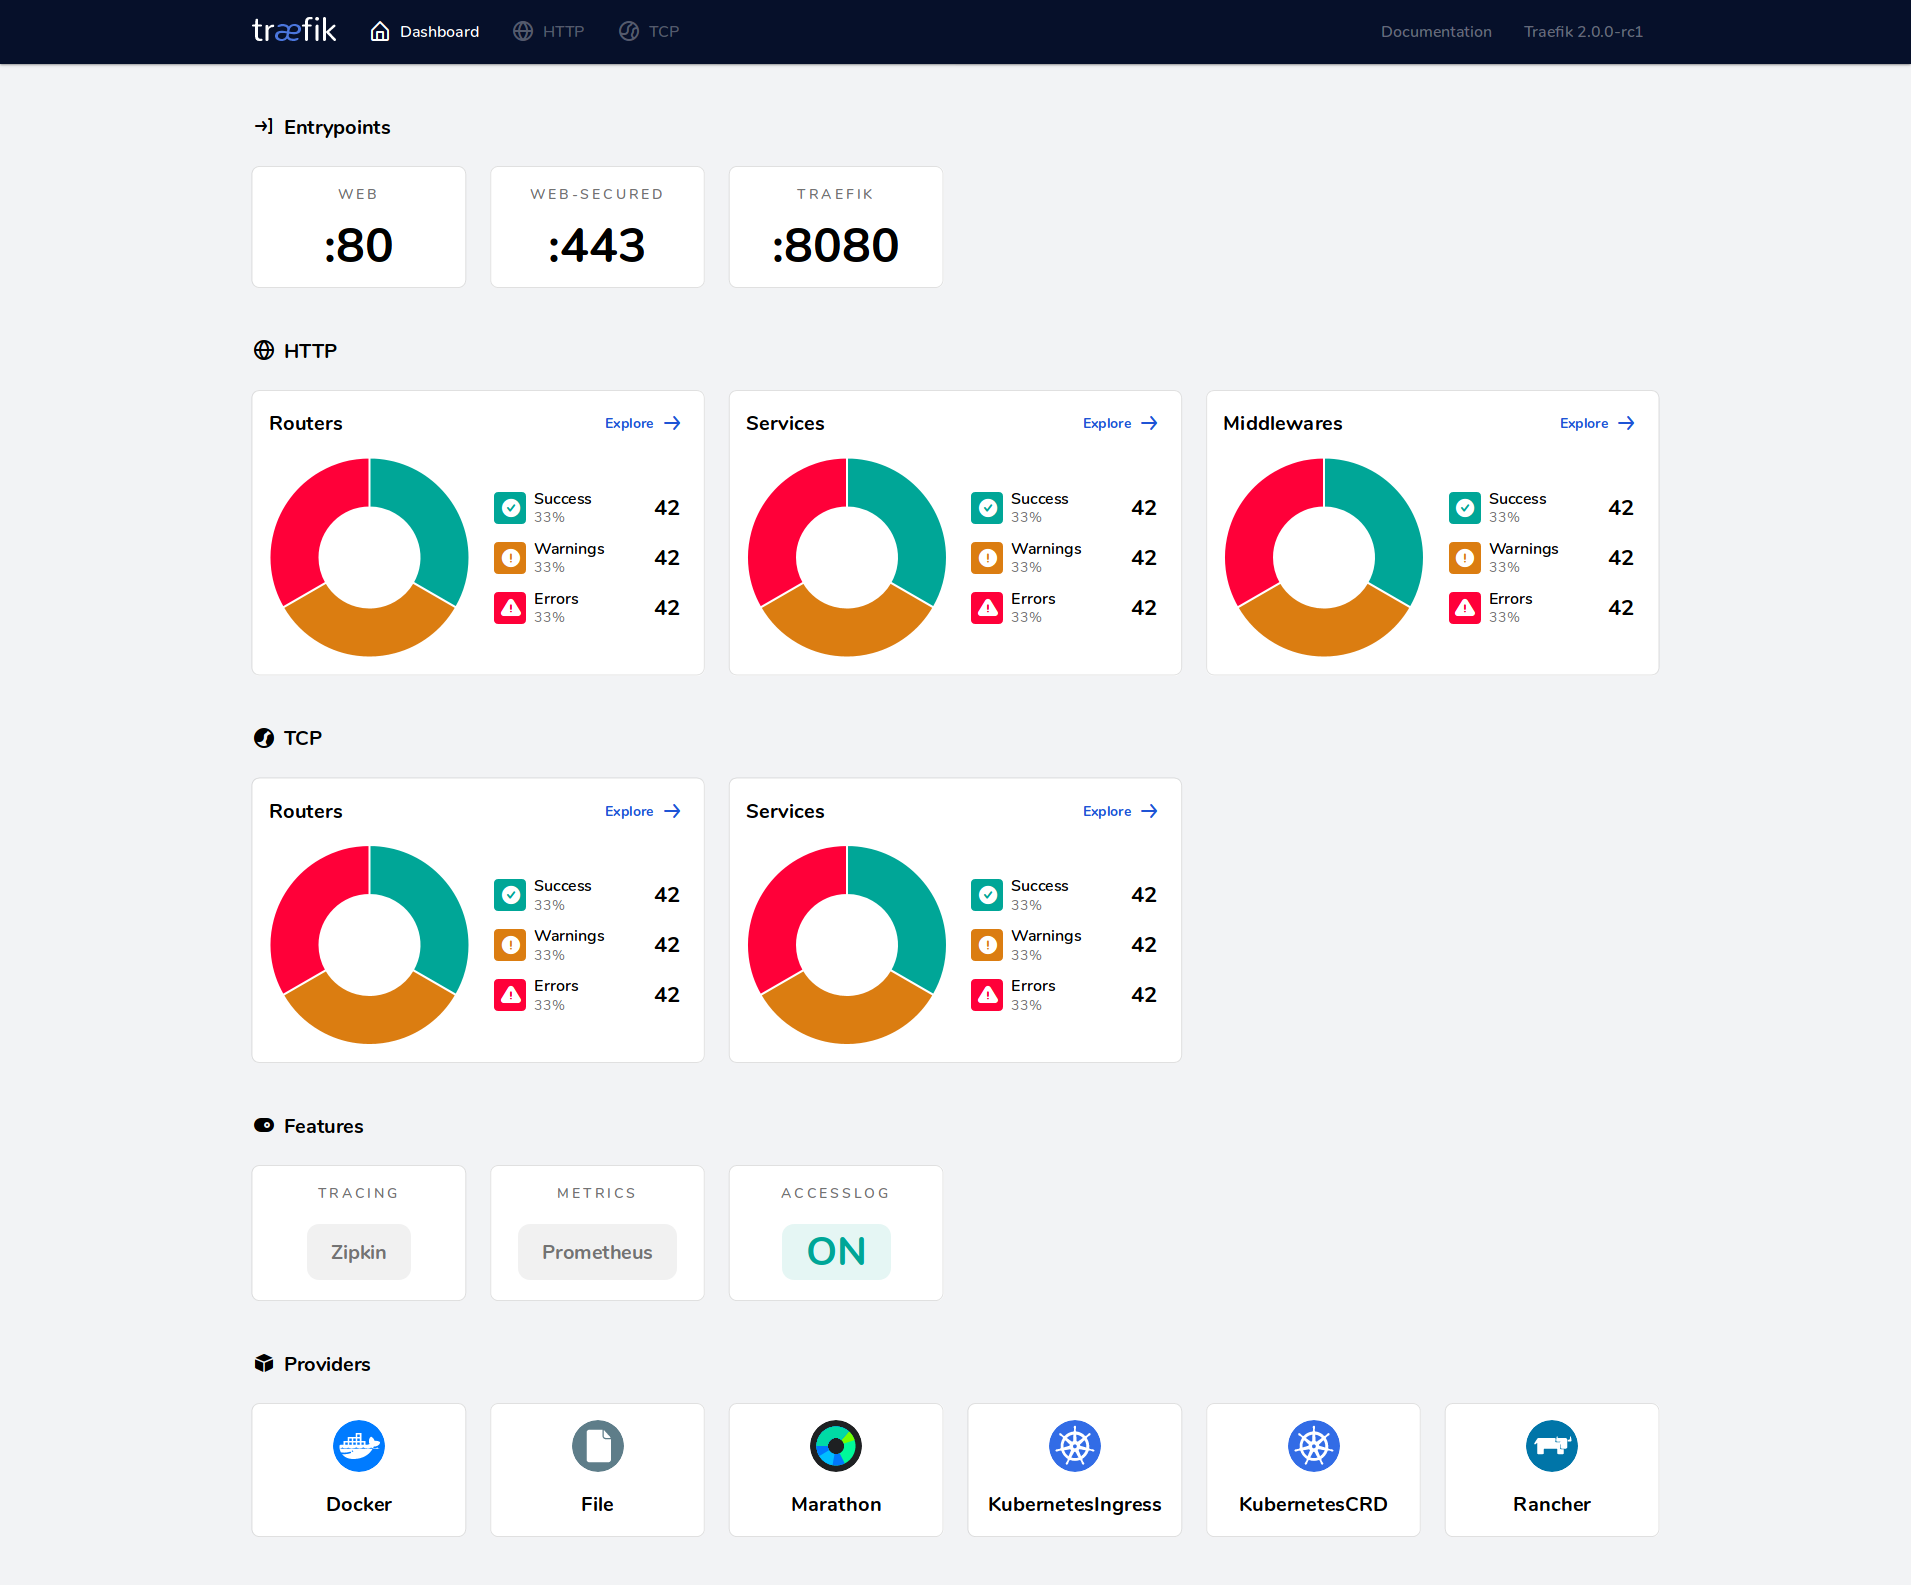
Access the Traefik Dashboard:
Open your web browser and navigate to `http://localhost:8080` to access the Traefik dashboard. This will provide an overview of routers, services, and middlewares.

## Traefik v2 - Example usage
Enable `docker` provider and dashboard UI:
```yml
## traefik.yml
# Docker configuration backend
providers:
docker:
defaultRule: "Host(`{{ trimPrefix `/` .Name }}.docker.localhost`)"
# API and dashboard configuration
api:
insecure: true
```
Start Traefik v2:
```sh
docker run -d -p 8080:8080 -p 80:80 \
-v $PWD/traefik.yml:/etc/traefik/traefik.yml \
-v /var/run/docker.sock:/var/run/docker.sock \
%%IMAGE%%:v2.11
```
Start a backend server using the `traefik/whoami` image:
```sh
docker run -d --name test traefik/whoami
```
Access the whoami service through Traefik via the defined rule `test.docker.localhost`:
```console
$ curl test.docker.localhost
Hostname: 390a880bdfab
IP: 127.0.0.1
IP: 172.17.0.3
GET / HTTP/1.1
Host: test.docker.localhost
User-Agent: curl/7.65.3
Accept: */*
Accept-Encoding: gzip
X-Forwarded-For: 172.17.0.1
X-Forwarded-Host: test.docker.localhost
X-Forwarded-Port: 80
X-Forwarded-Proto: http
X-Forwarded-Server: 7e073cb54211
X-Real-Ip: 172.17.0.1
```
Access the Traefik Dashboard:
Open your web browser and navigate to `http://localhost:8080` to access the Traefik dashboard. This will provide an overview of routers, services, and middlewares.
## Documentation
You can find the complete documentation:
- for [v3.x](https://doc.traefik.io/traefik/)
- for [v2.11](https://doc.traefik.io/traefik/v2.11)
A community support is available at [https://community.traefik.io](https://community.traefik.io)
```
--------------------------------------------------------------------------------
/amazonlinux/content.md:
--------------------------------------------------------------------------------
```markdown
## What is Amazon Linux?
Amazon Linux is provided by Amazon Web Services (AWS). It is designed to provide a stable, secure, and high-performance execution environment for applications running on Amazon EC2. The full distribution includes packages that enable easy integration with AWS, including launch configuration tools and many popular AWS libraries and tools. AWS provides ongoing security and maintenance updates to all instances running Amazon Linux.
The Amazon Linux container image contains a minimal set of packages. To install additional packages, [use `yum`](https://docs.aws.amazon.com/AWSEC2/latest/UserGuide/managing-software.html).
AWS provides three versions of Amazon Linux:
- [Amazon Linux 2023](https://aws.amazon.com/linux/amazon-linux-2023/) (recommended, latest)
- [Amazon Linux 2](https://aws.amazon.com/amazon-linux-2/)
- [Amazon Linux AMI](https://aws.amazon.com/amazon-linux-ami/)
For information on security updates for Amazon Linux, please refer to:
- [Amazon Linux 2023 Security Advisories](https://alas.aws.amazon.com/alas2023.html)
- [Amazon Linux 2 Security Advisories](https://alas.aws.amazon.com/alas2.html)
- [Amazon Linux AMI Security Advisories](https://alas.aws.amazon.com/)
Note that Docker Hub's vulnerability scanning for Amazon Linux is currently based on RPM versions, which does not reflect the state of backported patches for vulnerabilities.
%%LOGO%%
## What is Amazon Linux 2023?
- Amazon Linux 2023: https://aws.amazon.com/linux/amazon-linux-2023/
- 2023 Release Notes: https://docs.aws.amazon.com/linux/al2023/release-notes/relnotes.html
- FAQs: https://aws.amazon.com/linux/amazon-linux-2023/faqs/
- What's New: https://aws.amazon.com/about-aws/whats-new/2023/03/amazon-linux-2023/
- User Guide: https://docs.aws.amazon.com/linux/al2023/ug/what-is-amazon-linux.html
## Where can I run Amazon Linux container images?
You can run Amazon Linux container images in any Docker based environment. Examples include, your laptop, in AWS EC2 instances, and ECS clusters.
## What packages are available in the Amazon Linux containers?
Amazon Linux Docker container images contain a subset of the packages in the images for use on EC2 and as VMs in on-premises scenarios. The container images can be configured to use any of the full set of packages in images for EC2 and on-premises use.
## Will updates be available for Amazon Linux containers?
Similar to the Amazon Linux images for AWS EC2 and on-premises use, Amazon Linux container images will get ongoing updates from Amazon in the form of security updates, bug fix updates, and other enhancements. Security bulletins for Amazon Linux are available at https://alas.aws.amazon.com/
## What support is available for Amazon Linux outside AWS?
- GitHub Issues: https://github.com/amazonlinux/container-images/issues
- Documentation: http://docs.aws.amazon.com/AWSEC2/latest/UserGuide/amazon-linux-ami-basics.html
- Amazon Linux Forums: https://forums.aws.amazon.com/forum.jspa?forumID=228
- Paid Support from AWS: https://aws.amazon.com/premiumsupport/
## Will AWS support the current versions of Amazon Linux going forward?
Yes; in order to avoid any disruption to your existing applications and to facilitate migration to Amazon Linux 2023, AWS will provide regular security updates for Amazon Linux 2 and Amazon Linux 2018.03. Please refer to their FAQs for more information. You can also use all your existing support channels such as AWS Premium Support and Amazon Linux Discussion Forum to continue to submit support requests.
## FAQs
### Amazon Linux 2023
- FAQs: https://aws.amazon.com/linux/amazon-linux-2023/faqs/
### Amazon Linux 2
- FAQs: https://aws.amazon.com/amazon-linux-2/faqs/
### Amazon Linux 1
- FAQs: https://aws.amazon.com/amazon-linux-ami/faqs/
```
--------------------------------------------------------------------------------
/storm/content.md:
--------------------------------------------------------------------------------
```markdown
# What is Apache Storm?
Apache Storm is a free and open source distributed realtime computation system. Apache Storm makes it easy to reliably process unbounded streams of data, doing for realtime processing what Hadoop did for batch processing. Apache Storm is simple, can be used with any programming language, and is a lot of fun to use!
Apache Storm has many use cases: realtime analytics, online machine learning, continuous computation, distributed RPC, ETL, and more. Apache Storm is fast: a benchmark clocked it at over a million tuples processed per second per node. It is scalable, fault-tolerant, guarantees your data will be processed, and is easy to set up and operate.
Apache Storm integrates with the queueing and database technologies you already use. An Apache Storm topology consumes streams of data and processes those streams in arbitrarily complex ways, repartitioning the streams between each stage of the computation however needed.
> [wikipedia.org/wiki/Storm_(event_processor)](https://en.wikipedia.org/wiki/Storm_(event_processor))
%%LOGO%%
# How to use this image
## Running topologies in local mode
Assuming you have `topology.jar` in the current directory.
```console
$ docker run -it -v $(pwd)/topology.jar:/topology.jar %%IMAGE%% storm jar /topology.jar org.apache.storm.starter.ExclamationTopology
```
## Setting up a minimal Storm cluster
1. [Apache Zookeeper](https://zookeeper.apache.org/) is a must for running a Storm cluster. Start it first. Since the Zookeeper "fails fast" it's better to always restart it.
```console
$ docker run -d --restart always --name some-zookeeper zookeeper
```
2. The Nimbus daemon has to be connected with the Zookeeper. It's also a "fail fast" system.
```console
$ docker run -d --restart always --name some-nimbus --link some-zookeeper:zookeeper %%IMAGE%% storm nimbus
```
3. Finally start a single Supervisor node. It will talk to the Nimbus and Zookeeper.
```console
$ docker run -d --restart always --name supervisor --link some-zookeeper:zookeeper --link some-nimbus:nimbus %%IMAGE%% storm supervisor
```
4. Now you can submit a topology to our cluster.
```console
$ docker run --link some-nimbus:nimbus -it --rm -v $(pwd)/topology.jar:/topology.jar %%IMAGE%% storm jar /topology.jar org.apache.storm.starter.WordCountTopology topology
```
5. Optionally, you can start the Storm UI.
```console
$ docker run -d -p 8080:8080 --restart always --name ui --link some-nimbus:nimbus %%IMAGE%% storm ui
```
## %%COMPOSE%%
Run `docker compose up` and wait for it to initialize completely. The Nimbus will be available at `http://localhost:6627` or `http://host-ip:6627` (as appropriate).
## Configuration
This image uses [default configuration](https://github.com/apache/storm/blob/v2.0.0/conf/defaults.yaml) of the Apache Storm. There are two main ways to change it.
1. Using command line arguments.
```console
$ docker run -d --restart always --name nimbus %%IMAGE%% storm nimbus -c storm.zookeeper.servers='["zookeeper"]'
```
2. Assuming you have `storm.yaml` in the current directory you can mount it as a volume.
```console
$ docker run -it -v $(pwd)/storm.yaml:/conf/storm.yaml %%IMAGE%% storm nimbus
```
## Logging
This image uses [default logging configuration](https://github.com/apache/storm/tree/v2.0.0/log4j2). All logs go to the `/logs` directory by default.
## Data persistence
No data are persisted by default. For convenience there are `/data` and `/logs` directories in the image owned by `storm` user. Use them accordingly to persist data and logs using volumes.
```console
$ docker run -it -v /logs -v /data %%IMAGE%% storm nimbus
```
*Please be noticed that using paths other than those predefined is likely to cause permission denied errors. It's because for [security reasons](https://docs.docker.com/engine/userguide/eng-image/dockerfile_best-practices/#user) the Storm is running under the non-root `storm` user.*
```
--------------------------------------------------------------------------------
/amazoncorretto/content.md:
--------------------------------------------------------------------------------
```markdown
### What is Amazon Corretto?
Corretto is a binary distribution of the Open Java Development Kit (OpenJDK) with long-term support from Amazon. Corretto is certified using the Java Technical Compatibility Kit (TCK) to ensure it meets the Java SE standard and is available on Linux, Windows, and macOS. It includes [patches from Amazon](https://docs.aws.amazon.com/corretto/latest/corretto-8-ug/patches.html) that have proven useful in running our own services.
%%LOGO%%
### Why should I use Corretto?
Corretto is a reliable binary distribution of OpenJDK with the assurance of long-term support provided at no cost to you. Amazon runs Corretto internally on thousands of production services. Every modification we make to Corretto fixes or mitigates a problem we found running OpenJDK. Amazon also plans to apply urgent fixes (including security) when they are available and ready to use, outside of the regular quarterly cycle.
### How is Corretto different from OpenJDK?
Corretto is a distribution of Open JDK with patches included by Amazon that are not yet integrated in the corresponding OpenJDK update projects. We focus on patches that improve performance or stability in OpenJDK, chosen based on Amazon's observations running large services.
### What kinds of patches does Amazon intend to include in Corretto?
Patches will include security fixes, performance enhancements (e.g., speeding up frequently used functions), garbage collection scheduling, and preventing out-of-memory situations, as well as improved monitoring, reporting, and thread management.
### Is there any cost associated with using Corretto?
Corretto is distributed by Amazon under an Open Source license at no cost to you. It is licensed under the terms of the GNU Public License version 2 with the Class Path Exception (GPLv2 with CPE). Amazon does not charge for its use or distribution.
### What is included in Corretto's long-term support?
Amazon will provide security updates for Corretto 8 until at least June 2023. Updates are planned to be released quarterly. Corretto 11, corresponding to OpenJDK 11, will be available during the first half of 2019. Amazon will support Corretto 11 with quarterly updates until at least August 2024.
### Can I use Corretto as a drop-in replacement for other JDKs?
Corretto is designed as a drop-in replacement for all Java SE distributions unless you are using features (e.g., Java Flight Recorder) not available in OpenJDK. Once Corretto binaries are installed on a host and correctly invoked to run your Java applications (e.g., using the alternatives command on Linux), existing command-line options, tuning parameters, monitoring, and anything else in place will continue to work as before.
### Why does security scanner show that a docker image has a CVE?
If a security scanner reports that an amazoncorretto image includes a CVE, the first recommended action is to pull an updated version of this image.
If no updated image is available, run the appropriate command to update packages for the platform, ie. run "apk -U upgrade" for Alpine or "yum update -y --security" for AmazonLinux in your Dockerfiles or systems to resolve the issue immediately.
If no updated package is available, please treat this as a potential security issue and follow [these instructions](https://aws.amazon.com/security/vulnerability-reporting/) or email AWS security directly at [[email protected]](mailto:[email protected]).
It is the responsibility of the base docker image supplier to provide timely security updates to images and packages. The amazoncorretto images are automatically rebuilt when a new base image is made available, but we do not make changes to our Dockerfiles to pull in one-off package updates. If a new base image has not yet been made generally available by a base docker image maintainer, please contact that maintainer to request that the issue be addressed.
Note that there are multiple reasons why a CVE may appear to be present in a docker image, as explained in the [docker library FAQs](https://github.com/docker-library/faq/tree/73f10b0daf2fb8e7b38efaccc0e90b3510919d51#why-does-my-security-scanner-show-that-an-image-has-cves).
```
--------------------------------------------------------------------------------
/tomee/content.md:
--------------------------------------------------------------------------------
```markdown
# What is TomEE?
[Apache TomEE](http://tomee.apache.org/), pronounced "Tommy", is an all-Apache Java EE Web Profile certified stack where Apache Tomcat is top dog. Apache TomEE is assembled from a vanilla Apache Tomcat zip file. We start with Apache Tomcat, add our jars and zip up the rest. The result is Tomcat with added EE features - TomEE.
%%LOGO%%
Apache TomEE comes with four different flavors, Web Profile, JAX-RS, Plus and Plume.
- Apache TomEE Web Profile delivers Servlets, JSP, JSF, JTA, JPA, CDI, Bean Validation and EJB Lite.
- Apache TomEE JAX-RS (RESTfull Services) delivers the Web Profile plus JAX-RS (RESTfull Services).
- Apache TomEE Plus delivers all that is in the Web Profile and JAX-RS (RESTfull Services), plus EJB Full, Java EE Connector Architecture, JMS (Java Message Service) and JAX-WS (Web Services).
- Apache TomEE Plume delivers all that is in the Plus Profile, but includes Mojarra and EclipseLink support.
All Dockerfile files of supported versions can be found at https://github.com/tomitribe/docker-tomee
# Apache TomEE and Tomitribe
Tomitribe provides commercial support, professional services and training for Apache TomEE. We offers a new business model that furthers the development and growth of the Open Source project all the while fulfilling business requirement for production support. The Tomitribe Community Partnership Program connects businesses with the community.
All of Tomitribe developers are committers of TomEE and are influencers of the project's direction and development. We want to extend this influence to the people and companies that matter, users of TomEE. How? The Tomitribe Community Partnership Program.
Below are some press releases that might be helpful:
- Tomitribe Announces [Enterprise Service Support for Apache TomEE](http://www.tomitribe.com/company/press/tomitribe_enterprise_service_support_for_apache_tomee_javaone_2013/)
- Tomitribe Introduces [Community Partnership Program Conference](http://www.tomitribe.com/company/press/tomitribe-introduces-community-partnership-program-and-presents-java-ee-sessions-at-javaone-2014-conference/)
# Apache TomEE and ManageCat
Another commercial support company provides enterprise support for Apache TomEE is ManageCat. ManageCat involves with a lot of Apache Java EE projects to contribute open source Java EE ecosystem. ManageCat co-founder is also a founder of open source Apache OpenWebBeans project (http://openwebbans.apache.org) which is heavily used in Apache TomEE application server for CDI integration.
ManageCat is a cloud management and service platform for Apache Tomcat and Apache TomEE servers. Involving with a lot of Apache Java EE projects, we want to transfer not only our knowledge about Apache TomEE and also other Java EE technologies including JPA, EJB, CDI, JSF, JSTL, JTA, JMS. We will help our customers to develop and deploy their production based Java EE applications smoothly.
- ManageCat Announces [Enterprise Service Support for Apache Tomcat and TomEE](http://managecat.com/index.php/enterprise-tomcat-support)
# How to use this image.
Run the default TomEE server (`CMD ["catalina.sh", "run"]`):
```console
$ docker run -it --rm %%IMAGE%%:<java-version>\-<tomeeversion>\-<flavour>
```
For example running Apache TomEE 1.7.2 with JRE 8 and Webprofile flavour will be:
```console
$ docker run -it --rm %%IMAGE%%:8-jre-1.7.2-webprofile
```
You can test it by visiting `http://container-ip:8080` in a browser or, if you need access outside the host, on port 8888:
```console
$ docker run -it --rm -p 8888:8080 %%IMAGE%%:<java-version>\-<tomeeversion>\-<flavour>
```
You can then go to `http://localhost:8888` or `http://host-ip:8888` in a browser.
The configuration files are available in `/usr/local/tomee/conf/`. By default, no user is included in the "manager-gui" role required to operate the "/manager/html" web application. If you wish to use this app, you must define such a user in `tomcat-users.xml`.
You can also use this image as base image for deploying your war application. To do it you need to create a Dockerfile based on Tomee Docker image and add the war file in `webapps` directory:
```dockerfile
COPY <locationofapplication>/<warfile> /usr/local/tomee/webapps/<warfile>
```
```
--------------------------------------------------------------------------------
/.template-helpers/variant.sh:
--------------------------------------------------------------------------------
```bash
#!/bin/bash
set -eo pipefail
repo="$1"
if [ -z "$repo" ]; then
echo >&2 "usage: $0 repo"
echo >&2 " ie: $0 hylang"
exit 1
fi
dir="$(dirname "$(readlink -f "$BASH_SOURCE")")"
repoDir="$dir/../$repo"
# prints "$2$1$3$1...$N"
join() {
local sep="$1"; shift
local out; printf -v out "${sep//%/%%}%s" "$@"
echo "${out#$sep}"
}
commaJoin() {
local items=( $(xargs -n1 <<<"$1" | sort -u) ); shift
local sep=', '
case "${#items[@]}" in
0)
return
;;
1)
echo "$items"
return
;;
2)
sep=' '
;;
esac
items[-1]="or ${items[-1]}"
join "$sep" "${items[@]}"
}
tagFiles() {
local tag="$1"; shift
local tagUltimate="${tag##*-}" # 3.6-stretch -> stretch
local tagPenultimate="${tag%-*}" # 2.7.15-windowsservercore-1803 -> 2.7.15-windowsservercore
tagPenultimate="${tagPenultimate##*-}" # 2.7.15-windowsservercore -> windowsservercore
echo \
"$repoDir/variant-$tag.md" \
"$repoDir/variant-$tagUltimate.md" \
"$repoDir/variant-$tagPenultimate.md" \
"$dir/variant-$tag.md" \
"$dir/variant-$tagUltimate.md" \
"$dir/variant-$tagPenultimate.md"
}
_repo() {
local repo=$1; shift
# if we haven't set BASHBREW_LIBRARY explicitly (like Jenkins does, for example), don't trust the local library
if [ -z "${BASHBREW_LIBRARY:-}" ]; then
repo="https://github.com/docker-library/official-images/raw/master/library/$repo"
fi
echo "$repo"
}
bbRepo="$(_repo "$repo")"
IFS=$'\n'
tags=( $(bashbrew cat -f '
{{- $archSpecific := getenv "ARCH_SPECIFIC_DOCS" -}}
{{- range ($archSpecific | ternary (archFilter arch .Entries) .Entries) -}}
{{- join "\n" .Tags -}}
{{- "\n" -}}
{{- end -}}
' "$bbRepo") )
unset IFS
text=
declare -A includedFiles=()
for tag in "${tags[@]}"; do
for f in $(tagFiles "$tag"); do
if [ -n "${includedFiles[$f]}" ]; then
# make sure we don't duplicate variant sections
break
fi
if [ -f "$f" ]; then
includedFiles[$f]=1
if [ -s "$f" ]; then
# an empty file can be used to disable a specific "variant" section for an image
text+=$'\n' # give a little space
text+="$(< "$f")"
text+=$'\n' # parameter expansion eats the trailing newline
fi
break
fi
done
done
if [ -n "$text" ]; then
default="$([ -f "$repoDir/variant.md" ] && cat "$repoDir/variant.md" || cat "$dir/variant.md")"
default+=$'\n' # parameter expansion eats the trailing newline
if [ "$repo" != 'debian' ] && [ "$repo" != 'ubuntu' ]; then
# what is 'bullseye', 'buster' and 'sid'
# https://github.com/docker-library/python/issues/343
debian=( $(bashbrew list --uniq "$(_repo 'debian')" | grep -vE 'stable|slim|backports|experimental|testing' | cut -d: -f2) )
ubuntu=( $(bashbrew list "$(_repo 'ubuntu')" | grep -vE 'devel|latest|[0-9]' | cut -d: -f2) )
foundDebianTags=
foundUbuntuTags=
for tag in ${tags[@]}; do
for suite in "${debian[@]}"; do
case "$tag" in
*-"$suite" | "$suite"-* | *-"$suite"-* | "$suite" )
foundDebianTags+=" $suite"
;;
esac
done
for suite in "${ubuntu[@]}"; do
case "$tag" in
*-"$suite" | "$suite"-* | *-"$suite"-* | "$suite" )
foundUbuntuTags+=" $suite"
;;
esac
done
done
if [ -n "$foundDebianTags" ]; then
default+=$'\n' # give a little space
default+="$( sed -e 's/%%DEB-SUITES%%/'"$(commaJoin "$foundDebianTags")"'/' "$dir/variant-default-debian.md" )"
default+=$'\n' # parameter expansion eats the trailing newline
fi
if [ -n "$foundUbuntuTags" ]; then
default+=$'\n' # give a little space
default+="$( sed -e 's/%%DEB-SUITES%%/'"$(commaJoin "$foundUbuntuTags")"'/' "$dir/variant-default-ubuntu.md" )"
default+=$'\n' # parameter expansion eats the trailing newline
fi
fi
# buildpack-deps text
potentialTags="$(bashbrew list --uniq "$bbRepo" | cut -d: -f2)"
for tag in $potentialTags; do
baseImage="$(bashbrew cat -f '{{ .ArchLastStageFrom (.TagEntry.Architectures | first) .TagEntry }}' "$bbRepo:$tag" 2>/dev/null)"
case "$baseImage" in
buildpack-deps:*-*) ;; # "scm", "curl" -- not large images
buildpack-deps:*)
default+=$'\n' # give a little space
default+="$(< "$dir/variant-default-buildpack-deps.md")"
default+=$'\n' # parameter expansion eats the trailing newline
break
;;
esac
done
echo
echo
echo -n "$default"
echo "$text"
fi
```
--------------------------------------------------------------------------------
/kapacitor/content.md:
--------------------------------------------------------------------------------
```markdown
# Kapacitor
Kapacitor is an open source data processing engine written in Go. It can process both stream and batch data.
[Kapacitor Official Documentation](https://docs.influxdata.com/kapacitor/latest/introduction/getting_started/)
%%LOGO%%
## Using this image
### Using the default configuration
Start the Kapacitor container with default options:
```console
$ docker run -p 9092:9092 %%IMAGE%%
```
Start the Kapacitor container sharing the data directory with the host:
```console
$ docker run -p 9092:9092 \
-v $PWD:/var/lib/kapacitor \
%%IMAGE%%
```
Modify `$PWD` to the directory where you want to store data associated with the Kapacitor container.
You can also have Docker control the volume mountpoint by using a named volume.
```console
$ docker run -p 9092:9092 \
-v kapacitor:/var/lib/kapacitor \
%%IMAGE%%
```
### Configuration
Kapacitor can be either configured from a config file or using environment variables. To mount a configuration file and use it with the server, you can use this command:
Generate the default configuration file:
```console
$ docker run --rm %%IMAGE%% kapacitord config > kapacitor.conf
```
Modify the default configuration, which will now be available under `$PWD`. Then start the Kapacitor container.
```console
$ docker run -p 9092:9092 \
-v $PWD/kapacitor.conf:/etc/kapacitor/kapacitor.conf:ro \
%%IMAGE%%
```
Modify `$PWD` to the directory where you want to store the configuration file.
For environment variables, the format is `KAPACITOR_$SECTION_$NAME`. All dashes (`-`) are replaced with underscores (`_`). If the variable isn't in a section, then omit that part. If the config section is an array, use a number to set the nth value in the configuration file.
Examples:
```console
KAPACITOR_HOSTNAME=kapacitor
KAPACITOR_LOGGING_LEVEL=INFO
KAPACITOR_REPORTING_ENABLED=false
KAPACITOR_INFLUXDB_0_URLS_0=http://influxdb:8086
```
Find more about configuring Kapacitor [here](https://docs.influxdata.com/kapacitor/latest/introduction/installation/)
#### Running as root
Starting in v1.7.4, Kapacitor no longer run as the root user by default. If a user wants to revert this change they can set `KAPACITOR_AS_ROOT=true` as an environment variable.
### Exposed Ports
- 9092 TCP -- HTTP API endpoint
#### Subscriptions
Subscriptions allow InfluxDB to push data to Kapacitor for faster alerting instead of requiring Kapacitor to pull data from InfluxDB.
These examples assume you are using a custom configuration file that takes advantage of Docker's built-in service discovery capability. In order to do so, we'll first create a new network:
```console
$ docker network create influxdb
```
Next, we'll start our InfluxDB container named `influxdb`:
```console
$ docker run -d --name=influxdb \
--net=influxdb \
influxdb
```
Start the Kapacitor container with the container hostname matching the container name so Kapacitor can automatically create subscriptions correctly and with the `KAPACITOR_INFLUXDB_0_URLS_0` value set to point at InfluxDB.
```console
$ docker run -p 9092:9092 \
--name=kapacitor \
-h kapacitor \
--net=influxdb \
-e KAPACITOR_INFLUXDB_0_URLS_0=http://influxdb:8086 \
%%IMAGE%%
```
You can also start Kapacitor sharing the same network interface of the InfluxDB container. If you do this, Docker will act as if both processes were being run on the same machine.
```console
$ docker run -p 9092:9092 \
--name=kapacitor \
--net=container:influxdb \
%%IMAGE%%
```
When run like this, InfluxDB can be communicated with over `localhost`.
### CLI / SHELL
Start the container:
```console
$ docker run --name=kapacitor -d -p 9092:9092 %%IMAGE%%
```
Run another container linked to the `kapacitor` container for using the client. Set the env `KAPACITOR_URL` so the client knows how to connect to Kapacitor. Mount in your current directory for accessing TICKscript files.
```console
$ docker run --rm --net=container:kapacitor \
-v $PWD:/root -w=/root -it \
%%IMAGE%% bash -l
```
Then, from within the container, you can use the `kapacitor` command to interact with the daemon.
See [this](https://docs.influxdata.com/kapacitor/latest/introduction/getting_started/) for a more detailed getting started guide with Kapacitor.
```
--------------------------------------------------------------------------------
/joomla/content.md:
--------------------------------------------------------------------------------
```markdown
# What is Joomla?
Joomla is a free and open-source content management system (CMS) for publishing web content. It is built on a model–view–controller web application framework that can be used independently of the CMS. Joomla is written in PHP, uses object-oriented programming (OOP) techniques and software design patterns, stores data in a MySQL, MS SQL, or PostgreSQL database, and includes features such as page caching, RSS feeds, printable versions of pages, news flashes, blogs, search, and support for language internationalization.
> [wikipedia.org/wiki/Joomla](https://en.wikipedia.org/wiki/Joomla)
%%LOGO%%
# How to use this image
```console
$ docker run --name some-%%REPO%% --network some-network -d %%IMAGE%%
```
The following environment variables are honored for configuring your Joomla instance:
- `-e JOOMLA_DB_HOST=...` (defaults to the IP and port of the linked `mysql` container)
- `-e JOOMLA_DB_USER=...` (defaults to "root")
- `-e JOOMLA_DB_PASSWORD=...` (defaults to the value of the `MYSQL_ROOT_PASSWORD` environment variable from the linked `mysql` container)
- `-e JOOMLA_DB_PASSWORD_FILE=...` (path to a file containing the database password)
- `-e JOOMLA_DB_NAME=...` (defaults to "joomla")
- `-e JOOMLA_DB_TYPE=...` (defaults to "mysqli" options: mysqli, pgsql)
If the `JOOMLA_DB_NAME` specified does not already exist on the given MySQL server, it will be created automatically upon startup of the `%%REPO%%` container, provided that the `JOOMLA_DB_USER` specified has the necessary permissions to create it.
The following environment variables are also honored for configuring auto deployment (skip the browser setup) for your Joomla instance:
- `-e JOOMLA_SITE_NAME=...` (name of the Joomla site)
- `-e JOOMLA_ADMIN_USER=...` (full name of the Joomla administrator)
- `-e JOOMLA_ADMIN_USERNAME=...` (username of the Joomla administrator)
- `-e JOOMLA_ADMIN_PASSWORD=...` (password of the Joomla administrator)
- `-e JOOMLA_ADMIN_EMAIL=...` (email address of the Joomla administrator)
- `-e JOOMLA_EXTENSIONS_URLS=...` (semicolon-separated list of URLs to install Joomla extensions from)
- `-e JOOMLA_EXTENSIONS_PATHS=...` (semicolon-separated list of file paths to install Joomla extensions from)
- `-e JOOMLA_SMTP_HOST=...` (SMTP host for outgoing email)
- `-e JOOMLA_SMTP_HOST_PORT=...` (SMTP port for outgoing email)
If you'd like to be able to access the instance from the host without the container's IP, standard port mappings can be used:
```console
$ docker run --name some-%%REPO%% --network some-network -p 8080:80 -d %%IMAGE%%
```
Then, access it via `http://localhost:8080` or `http://host-ip:8080` in a browser.
If you'd like to use an external database instead of a MySQL container, specify the hostname and port with `JOOMLA_DB_HOST` along with the password in `JOOMLA_DB_PASSWORD` and the username in `JOOMLA_DB_USER` (if it is something other than `root`):
```console
$ docker run --name some-%%REPO%% --network some-network -e JOOMLA_DB_HOST=10.1.2.3:3306 \
-e JOOMLA_DB_USER=... -e JOOMLA_DB_PASSWORD=... -d %%IMAGE%%
```
## %%COMPOSE%%
Run `docker compose up`, wait for it to initialize completely, and visit `http://localhost:8080` or `http://host-ip:8080` (as appropriate).
## Adding additional libraries / extensions
This image does not provide any additional PHP extensions or other libraries, even if they are required by popular plugins. There are an infinite number of possible plugins, and they potentially require any extension PHP supports. Including every PHP extension that exists would dramatically increase the image size.
If you need additional PHP extensions, you'll need to create your own image `FROM` this one. The [documentation of the `php` image](https://github.com/docker-library/docs/blob/master/php/README.md#how-to-install-more-php-extensions) explains how to compile additional extensions. Additionally, the [`%%REPO%%` Dockerfile](https://github.com/joomla-docker/docker-joomla/blob/360f6bd96c80f72b020d2d9c8aae9daa6bca2887/5.1/php8.3/apache/Dockerfile#L51-L64) has an example of doing this.
The following Docker Hub features can help with the task of keeping your dependent images up-to-date:
- [Automated Builds](https://docs.docker.com/docker-hub/builds/) let Docker Hub automatically build your Dockerfile each time you push changes to it.
```
--------------------------------------------------------------------------------
/ghost/content.md:
--------------------------------------------------------------------------------
```markdown
# Ghost
Ghost is an independent platform for publishing online by web and email newsletter. It has user signups, gated access and subscription payments built-in (with Stripe) to allow you to build a direct relationship with your audience. It's fast, user-friendly, and runs on Node.js & MySQL8.
> [Ghost.org)](https://ghost.org)
%%LOGO%%
# How to use this image
This will start a Ghost development instance listening on the default Ghost port of 2368.
```console
$ docker run -d --name some-ghost -e NODE_ENV=development %%IMAGE%%
```
## Custom port
If you'd like to be able to access the instance from the host without the container's IP, standard port mappings can be used:
```console
$ docker run -d --name some-ghost -e NODE_ENV=development -e url=http://localhost:3001 -p 3001:2368 %%IMAGE%%
```
If all goes well, you'll be able to access your new site on `http://localhost:3001` and `http://localhost:3001/ghost` to access Ghost Admin (or `http://host-ip:3001` and `http://host-ip:3001/ghost`, respectively).
### Upgrading Ghost
You will want to ensure you are running the latest minor version of Ghost before upgrading major versions. Otherwise, you may run into database errors.
For upgrading your Ghost container you will want to mount your data to the appropriate path in the predecessor container (see below): import your content from the admin panel, stop the container, and then re-mount your content to the successor container you are upgrading into; you can then export your content from the admin panel.
## Stateful
Mount your existing content. In this example we also use the Alpine Linux based image.
```console
$ docker run -d \
--name some-ghost \
-e NODE_ENV=development \
-e database__connection__filename='/var/lib/ghost/content/data/ghost.db' \
-p 3001:2368 \
-v /path/to/ghost/blog:/var/lib/ghost/content \
%%IMAGE%%:alpine
```
Note: `database__connection__filename` is only valid in development mode and is the location for the SQLite database file. If using development mode, it should be set to a writeable path within a persistent folder (bind mount or volume). It is not available in production mode because an external MySQL server is required (see the Docker Compose example below).
### Docker Volume
Alternatively you can use a named [docker volume](https://docs.docker.com/storage/volumes/) instead of a direct host path for `/var/lib/ghost/content`:
```console
$ docker run -d \
--name some-ghost \
-e NODE_ENV=development \
-e database__connection__filename='/var/lib/ghost/content/data/ghost.db' \
-p 3001:2368 \
-v some-ghost-data:/var/lib/ghost/content \
%%IMAGE%%
```
## Configuration
All Ghost configuration parameters (such as `url`) can be specified via environment variables. See [the Ghost documentation](https://ghost.org/docs/concepts/config/#running-ghost-with-config-env-variables) for details about what configuration is allowed and how to convert a nested configuration key into the appropriate environment variable name:
```console
$ docker run -d --name some-ghost -e NODE_ENV=development -e url=http://some-ghost.example.com %%IMAGE%%
```
(There are further configuration examples in the `compose.yaml` listed below.)
## What is the Node.js version?
When opening a ticket at https://github.com/TryGhost/Ghost/issues it becomes necessary to know the version of Node.js in use:
```console
$ docker exec <container-id> node --version
[node version output]
```
## Note about Ghost-CLI
While the Docker images do have Ghost-CLI available and do use some of its commands to set up the base Ghost image, many of the other Ghost-CLI commands won't work correctly, and really aren't designed/intended to. For more info see [docker-library/ghost#156 (comment)](https://github.com/docker-library/ghost/issues/156#issuecomment-428159861)
## Production mode
To run Ghost for production you'll also need to be running with MySQL 8, https, and a reverse proxy configured with appropriate `X-Forwarded-For`, `X-Forwarded-Host`, and `X-Forwarded-Proto` (`https`) headers.
The following example demonstrates some of the necessary configuration for running with MySQL. For more detail, see [Ghost's "Configuration options" documentation](https://ghost.org/docs/config/#configuration-options).
## %%COMPOSE%%
Run `docker compose up`, wait for it to initialize completely, and visit `http://localhost:8080` or `http://host-ip:8080` (as appropriate).
```
--------------------------------------------------------------------------------
/composer/content.md:
--------------------------------------------------------------------------------
```markdown
# What is Composer?
Composer is a tool for dependency management in PHP, written in PHP. It allows you to declare the libraries your project depends on and it will manage (install/update) them for you.
You can read more about Composer in our [official documentation](https://getcomposer.org/doc/).
%%LOGO%%
# How to use this image
### Basic usage
```console
$ docker run --rm --interactive --tty \
--volume $PWD:/app \
%%IMAGE%% <command>
```
### Persist cache / global configuration
You can bind mount the Composer home directory from your host to the container to enable a persistent cache or share global configuration:
```console
$ docker run --rm --interactive --tty \
--volume $PWD:/app \
--volume ${COMPOSER_HOME:-$HOME/.composer}:/tmp \
%%IMAGE%% <command>
```
**Note:** this relies on the fact that the `COMPOSER_HOME` value is set to `/tmp` in the image by default.
Or if your environment follows the XDG specification:
```console
$ docker run --rm --interactive --tty \
--env COMPOSER_HOME \
--env COMPOSER_CACHE_DIR \
--volume ${COMPOSER_HOME:-$HOME/.config/composer}:$COMPOSER_HOME \
--volume ${COMPOSER_CACHE_DIR:-$HOME/.cache/composer}:$COMPOSER_CACHE_DIR \
--volume $PWD:/app \
%%IMAGE%% <command>
```
### Filesystem permissions
By default, Composer runs as root inside the container. This can lead to permission issues on your host filesystem. You can work around this by running the container with a different user:
```console
$ docker run --rm --interactive --tty \
--volume $PWD:/app \
--user $(id -u):$(id -g) \
%%IMAGE%% <command>
```
See: https://docs.docker.com/engine/reference/run/#user for details.
> Note: Docker for Mac behaves differently and this tip might not apply to Docker for Mac users.
### Private repositories / SSH agent
When you need to access private repositories, you will either need to share your configured credentials, or mount your `ssh-agent` socket inside the running container:
```console
$ eval $(ssh-agent); \
docker run --rm --interactive --tty \
--volume $PWD:/app \
--volume $SSH_AUTH_SOCK:/ssh-auth.sock \
--env SSH_AUTH_SOCK=/ssh-auth.sock \
%%IMAGE%% <command>
```
**Note:** On OSX this requires Docker For Mac v2.2.0.0 or later, see [docker/for-mac#410](https://github.com/docker/for-mac/issues/410).
When combining the use of private repositories with running Composer as another user, you can run into non-existent user errors (thrown by ssh). To work around this, bind mount the host passwd and group files (read-only) into the container:
```console
$ eval $(ssh-agent); \
docker run --rm --interactive --tty \
--volume $PWD:/app \
--volume $SSH_AUTH_SOCK:/ssh-auth.sock \
--volume /etc/passwd:/etc/passwd:ro \
--volume /etc/group:/etc/group:ro \
--env SSH_AUTH_SOCK=/ssh-auth.sock \
--user $(id -u):$(id -g) \
%%IMAGE%% <command>
```
# Troubleshooting
### PHP version & extensions
Our image is aimed at quickly running Composer without the need for having a PHP runtime installed on your host. You should not rely on the PHP version in our container. We do not provide a Composer image for each supported PHP version because we do not want to encourage using Composer as a base image or a production image.
We try to deliver an image that is as lean as possible, built for running Composer only. Sometimes dependencies or Composer [scripts](https://getcomposer.org/doc/articles/scripts.md) require the availability of certain PHP extensions.
Suggestions:
- (optimal) create your own build image and [install](https://getcomposer.org/doc/faqs/how-to-install-composer-programmatically.md) Composer inside it.
**Note:** Docker 17.05 introduced [multi-stage builds](https://docs.docker.com/develop/develop-images/multistage-build/), simplifying this enormously:
```dockerfile
COPY --from=%%IMAGE%% /usr/bin/composer /usr/bin/composer
```
- (alternatively) specify the target [platform](https://getcomposer.org/doc/06-config.md#platform) / extension(s) in your `composer.json`:
```json
{
"config": {
"platform": {
"php": "MAJOR.MINOR.PATCH",
"ext-something": "MAJOR.MINOR.PATCH"
}
}
}
```
- (discouraged) pass the [`--ignore-platform-reqs`](https://getcomposer.org/doc/03-cli.md#install-i) and / or `--no-scripts` flags to `install` or `update`:
```console
$ docker run --rm --interactive --tty \
--volume $PWD:/app \
%%IMAGE%% install --ignore-platform-reqs --no-scripts
```
```
--------------------------------------------------------------------------------
/notary/content.md:
--------------------------------------------------------------------------------
```markdown
# How to use this repository
The Notary respository contains two distinct applications, Notary Server, and Notary Signer. The images for these applications are tagged "server-\*" and "signer-\*" respectively. While the server can be configured to run entirely in memory, this configuration is not be appropriate for a production deployment so you should expect to run both a server *and* and signer.
Ensure that the images you are running have similar version tags. That is, if you are running the server-0.2.0 tag, you should also be running the similar signer-0.2.0 tag. Running different versions of the server and signer will never be a supported configuration.
# Notary Server
The Notary server manages JSON formatted TUF (The Update Framework) metadata for Notary clients and the docker command line tool's Docker Content Trust features. It requires a companion Notary signer instance and a MySQL (or MariaDB) database.
## How to use this image
The following sample configuration is included in the image:
{
"server": {
"http_addr": ":4443",
"tls_key_file": "/certs/notary-server.key",
"tls_cert_file": "/certs/notary-server.crt"
},
"trust_service": {
"type": "remote",
"hostname": "notarysigner",
"port": "7899",
"tls_ca_file": "/certs/root-ca.crt",
"key_algorithm": "ecdsa",
"tls_client_cert": "/certs/notary-server.crt",
"tls_client_key": "/certs/notary-server.key"
},
"logging": {
"level": "info"
},
"storage": {
"backend": "mysql",
"db_url": "server@tcp(mysql:3306)/notaryserver?parseTime=True"
}
}
The components you *must* provide are the certificates and keys, and the links for the `notarysigner` and `mysql` hostnames. The `root-ca.crt` file enables the Notary server to identify valid signers, which it communicates with over mutual TLS using a GRPC interface. The `notary-server.crt` and`notary-server.key` are used to identify this service to both external clients, and signer instances. All the certificate and key files must be readable by the notary user which is created inside the container and owns the notary-server process.
If you require a different configuration, you should wrap this image with your own Dockerfile.
For more details on how to configure your Notary server, please read the [docs](https://github.com/theupdateframework/notary/blob/master/docs/reference/server-config.md).
# Notary Signer
The Notary signer is a support service for the Notary server. It manages private keys and performs all signing operations. It requires a MySQL (or MariaDB) database.
## How to use this image
The following sample configuration is included in the image:
{
"server": {
"http_addr": ":4444",
"grpc_addr": ":7899",
"tls_cert_file": "/certs/notary-signer.crt",
"tls_key_file": "/certs/notary-signer.key",
"client_ca_file": "/certs/notary-server.crt"
},
"logging": {
"level": "info"
},
"storage": {
"backend": "mysql",
"db_url": "signer@tcp(mysql:3306)/notarysigner?parseTime=True"
}
}
The components you *must* provide are the certificates and keys, and the link for the `mysql` hostname. The `notary-server.crt` file enables the Notary signer to identify valid servers, which it communicates with over mutual TLS using a GRPC interface. The `notary-server.crt` and`notary-server.key` are used to identify this service to both external clients, and signer instances. All the certificate and key files must be readable by the notary user which is created inside the container and owns the notary-signer process.
If you require a different configuration, you should wrap this image with your own Dockerfile.
For more details on how to configure your Notary signer, please read the [docs](https://github.com/theupdateframework/notary/blob/master/docs/reference/signer-config.md).
## Database Migrations
Notary server and signer both use the [migrate tool](https://github.com/golang-migrate/migrate) to manage database updates. The migration files can be found [here](https://github.com/theupdateframework/notary/tree/master/migrations/) and are an ordered list of plain SQL files. The migrate tool manages schema versions to ensure that migrations start and end at the correct point.
We strongly recommend you create separate databases and users with restricted permissions such that the server cannot access the signer's database and vice versa.
```
--------------------------------------------------------------------------------
/debian/content.md:
--------------------------------------------------------------------------------
```markdown
# What is Debian?
Debian is an operating system which is composed primarily of free and open-source software, most of which is under the GNU General Public License, and developed by a group of individuals known as the Debian project. Debian is one of the most popular Linux distributions for personal computers and network servers, and has been used as a base for several other Linux distributions.
> [wikipedia.org/wiki/Debian](https://en.wikipedia.org/wiki/Debian)
%%LOGO%%
# About this image
The images in this repository are intended to be as minimal as possible (because of the immutable/layered nature of containers, it's much easier to add than it is to remove). More specifically, they're built from [the "minbase" variant](https://manpages.debian.org/stable/debootstrap/debootstrap.8.en.html#variant=minbase_buildd_fakechroot), which only installs "required" packages, and thus creates the smallest possible footprint that is still "Debian" (as defined/managed by [the Release and FTP teams](https://www.debian.org/intro/organization#distribution) within the project).
The `%%IMAGE%%:latest` tag will always point the latest stable release. Stable releases are also tagged with their version (ie, `%%IMAGE%%:11` is an alias for `%%IMAGE%%:bullseye`, `%%IMAGE%%:10` is an alias for `%%IMAGE%%:buster`, etc).
The rolling tags (`%%IMAGE%%:stable`, `%%IMAGE%%:testing`, etc) use the rolling suite names in their `/etc/apt/sources.list` file (ie, `deb http://deb.debian.org/debian testing main`).
The mirror of choice for these images is [the deb.debian.org CDN pointer/redirector](https://deb.debian.org) so that it's as reliable as possible for the largest subset of users (and is also the default mirror for `debootstrap` as of [2016-10-20](https://anonscm.debian.org/cgit/d-i/debootstrap.git/commit/?id=9e8bc60ad1ccf3a25ce7890526b70059f3e770de)). See the [deb.debian.org homepage](https://deb.debian.org) for more information.
If you find yourself needing a Debian release which is EOL (and thus only available from [archive.debian.org](http://archive.debian.org)), you should check out [the `debian/eol` image](https://hub.docker.com/r/debian/eol/), which includes tags for Debian releases as far back as Potato (Debian 2.2), the first release to fully utilize APT.
## Locales
Given that it is a faithful "minbase" install of Debian, this image only includes the `C`, `C.UTF-8`, and `POSIX` locales by default. For most uses requiring a UTF-8 locale, `C.UTF-8` is likely sufficient (`-e LANG=C.UTF-8` or `ENV LANG C.UTF-8`).
For uses where that is not sufficient, other locales can be installed/generated via the `locales` package. [PostgreSQL has a good example of doing so](https://github.com/docker-library/postgres/blob/69bc540ecfffecce72d49fa7e4a46680350037f9/9.6/Dockerfile#L21-L24), copied below:
```dockerfile
RUN apt-get update && apt-get install -y locales && rm -rf /var/lib/apt/lists/* \
&& localedef -i en_US -c -f UTF-8 -A /usr/share/locale/locale.alias en_US.UTF-8
ENV LANG en_US.utf8
```
## How It's Made
The rootfs tarballs for this image are built using [the reproducible-Debian-rootfs tool, `debuerreotype`](https://github.com/debuerreotype/debuerreotype), with an explicit goal being that they are transparent and reproducible. Using the same toolchain, it should be possible to regenerate (clean-room!) the same tarballs used for building the official Debian images. [The `examples/debian.sh` script in that debuerreotype repository](https://github.com/debuerreotype/debuerreotype/blob/master/examples/debian.sh) (and the `debian-all.sh` companion/wrapper) is the canonical entrypoint used for creating the artifacts published in this image (via a process similar to the `docker-run.sh` included in the root of that repository).
Additionally, the scripts in [%%GITHUB-REPO%%](%%GITHUB-REPO%%) are used to create each tag's `Dockerfile` and collect architecture-specific tarballs into [`dist-ARCH` branches on the same repository](%%GITHUB-REPO%%/branches), which also contain extra metadata about the artifacts included in each build, such as explicit package versions included in the base image (`rootfs.manifest`), the exact snapshot.debian.org timestamp used for `debuerreotype` invocation (`rootfs.debuerreotype-epoch`), the `sources.list` found in the image (`rootfs.sources-list`) and the one used during image creation (`rootfs.sources-list-snapshot`), etc.
For convenience, the SHA256 checksum (and full build command) for each of the primary `rootfs.tar.xz` artifacts are also published at [docker.debian.net](https://docker.debian.net/).
```
--------------------------------------------------------------------------------
/yourls/content.md:
--------------------------------------------------------------------------------
```markdown
# What is YOURLS?
YOURLS is a set of PHP scripts that will allow you to run Your Own URL Shortener. You'll have full control over your data, detailed stats, analytics, plugins, and more. It's free.
> [github.com/YOURLS/YOURLS](https://github.com/YOURLS/YOURLS)
%%LOGO%%
# How to use this image
## Start a `%%IMAGE%%` server instance
```console
$ docker run --name some-%%REPO%% --link some-mysql:mysql \
-e YOURLS_SITE="https://example.com" \
-e YOURLS_USER="example_username" \
-e YOURLS_PASS="example_password" \
-d %%IMAGE%%
```
The YOURLS instance accepts a number of environment variables for configuration, see *Environment Variables* section below.
If you'd like to use an external database instead of a linked `mysql` container, specify the hostname and port with `YOURLS_DB_HOST` along with the password in `YOURLS_DB_PASS` and the username in `YOURLS_DB_USER` (if it is something other than `root`):
```console
$ docker run --name some-%%REPO%%s -e YOURLS_DB_HOST=10.1.2.3:3306 \
-e YOURLS_DB_USER=... -e YOURLS_DB_PASS=... -d %%IMAGE%%
```
## Connect to the YOURLS administration interface
If you'd like to be able to access the instance from the host without the container's IP, standard port mappings can be used:
```console
$ docker run --name some-%%REPO%% --link some-mysql:mysql -p 8080:80 -d %%IMAGE%%
```
Then, access it via `http://localhost:8080/admin/` or `http://<host-ip>:8080/admin/` in a browser.
**Note:** On first instantiation, reaching the root folder will generate an error. Access the YOURLS administration interface via the path `/admin/`.
## Environment Variables
When you start the `yourls` image, you can adjust the configuration of the YOURLS instance by passing one or more environment variables on the `docker run` command line.
The YOURLS instance accepts [a number of environment variables for configuration](https://yourls.org/docs/guide/essentials/configuration).
A few notable/important examples for using this Docker image include the following.
### `YOURLS_SITE`
**Required.**
YOURLS instance URL, no trailing slash, lowercase.
Example: `YOURLS_SITE="https://example.com"`
### `YOURLS_USER`
**Required.**
YOURLS instance username.
Example: `YOURLS_USER="example_username"`
### `YOURLS_PASS`
**Required.**
YOURLS instance password.
Example: `YOURLS_PASS="example_password"`
### `YOURLS_DB_HOST`, `YOURLS_DB_USER`, `YOURLS_DB_PASS`
**Optional if linked `mysql` container.**
Host, user (defaults to `root`) and password for the database.
### `YOURLS_DB_NAME`
**Optional.**
Database name, defaults to `yourls`. The database must have been created before installing YOURLS.
### `YOURLS_DB_PREFIX`
**Optional.**
Database tables prefix, defaults to `yourls_`. Only set this when you need to override the default table prefix.
## Docker Secrets
As an alternative to passing sensitive information via environment variables, `_FILE` may be appended to the previously listed environment variables, causing the initialization script to load the values for those variables from files present in the container. In particular, this can be used to load passwords from Docker secrets stored in `/run/secrets/<secret_name>` files. For example:
```console
$ docker run --name some-%%REPO%% -e YOURLS_DB_PASS_FILE=/run/secrets/mysql-root ... -d %%IMAGE%%:tag
```
Currently, this is supported for `YOURLS_DB_HOST`, `YOURLS_DB_USER`, `YOURLS_DB_PASS`, `YOURLS_DB_NAME`, `YOURLS_DB_PREFIX`, `YOURLS_SITE`, `YOURLS_USER`, and `YOURLS_PASS`.
## %%COMPOSE%%
Run `docker compose up`, wait for it to initialize completely, and visit `http://localhost:8080/admin/` or `http://<host-ip>:8080/admin/` (as appropriate).
## Adding additional libraries / extensions
This image does not provide any additional PHP extensions or other libraries, even if they are required by popular plugins. There are an infinite number of possible plugins, and they potentially require any extension PHP supports. Including every PHP extension that exists would dramatically increase the image size.
If you need additional PHP extensions, you'll need to create your own image `FROM` this one. The [documentation of the `php` image](https://github.com/docker-library/docs/blob/master/php/README.md#how-to-install-more-php-extensions) explains how to compile additional extensions.
The following Docker Hub features can help with the task of keeping your dependent images up-to-date:
- [Automated Builds](https://docs.docker.com/docker-hub/builds/) let Docker Hub automatically build your Dockerfile each time you push changes to it.
```
--------------------------------------------------------------------------------
/satosa/content.md:
--------------------------------------------------------------------------------
```markdown
# What is SATOSA?
SATOSA is a configurable proxy for translating between different authentication protocols such as SAML2, OpenID Connect, and OAuth2.
%%LOGO%%
# How to use this image
## To start a SATOSA instance
The basic pattern for starting a `%%REPO%%` instance is:
```sh
docker run --name some-%%REPO%% -d %%IMAGE%%
```
To access the instance from the host without the container's IP, use port mappings:
```sh
docker run --name some-%%REPO%% -p 80:8080 -d %%IMAGE%%
```
The entrypoint script outputs SAML2 metadata to the container log at start time. This metadata refers to the instance's base URL, e.g., `https://example.com`. Browsers must be able to access the instance over HTTPS.
# How to extend this image
## Configuration files
The `%%REPO%%` image stores its configuration in /etc/satosa. This configuration must persist among instances, particularly the SAML2 entity ID (derived from the proxy's base URL by default) and related keying material. [Use volumes, bind mounts, or custom images](https://docs.docker.com/storage/) to maintain this configuration.
## Entrypoint script
The `%%REPO%%` image's entrypoint script runs [Gunicorn](https://gunicorn.org/) by default if the first argument looks like a command-line flag. For example, the following will use a bind mount to provide an X.509 certificate and corresponding private key to the instance, and it will run Gunicorn with HTTPS enabled:
```sh
docker run --name some-%%REPO%% -p 443:8443 \
-v /etc/letsencrypt/live/some-%%REPO%%/fullchain.pem:/etc/https.crt \
-v /etc/letsencrypt/live/some-%%REPO%%/privkey.pem:/etc/https.key \
-d %%IMAGE%% \
-b0.0.0.0:8443 --certfile /etc/https.crt --keyfile /etc/https.key satosa.wsgi:app
```
If the first argument looks like a command instead of a flag, the entrypoint script will run that instead of Gunicorn. For example, the following will start an interactive, unprivileged shell inside the container:
```sh
docker run -it --name some-%%REPO%% %%IMAGE%% bash
```
## Environment variables
The entrypoint script uses environment variables to generate the initial configuration, which sets SATOSA up as a SAML2 proxy between the free [SAMLtest.ID](https://samltest.id/) test service provider and test identity provider. All of the environment variables are optional.
The environment variables' values can be read from [Docker secrets](https://docs.docker.com/engine/swarm/secrets/). Append `_FILE` to the variable name (e.g., `STATE_ENCRYPTION_KEY_FILE`), and set it to the pathname of the corresponding secret (e.g., `/run/secrets/state_encryption_key`).
### `BASE_URL`
SATOSA must be hosted at the root of the website. This environment variable optionally specifies the website's base URL, which defaults to `http://example.com`. If set, the base URL *must* be a method plus a hostname without any trailing slash or path components, e.g., `https://idproxy.example.com`, not `https://idproxy.example.com/` nor `https://idproxy.example.com/satosa`.
### `STATE_ENCRYPTION_KEY`
SATOSA uses encrypted cookies to track the progress of an authentication flow. This environment variable optionally sets the state cookies' encryption key. If set, the state encryption key *must* be an alphanumeric value, e.g., `12345SameAsMyLuggage`. If not specified, a new random 32-character key will be generated.
### `SAML2_BACKEND_DISCO_SRV`
When part of a SAML2 multilateral federation, SATOSA will ask the user to choose an identity provider using a SAML discovery service. This environment variable optionally sets the discovery service URL, which defaults to [SeamlessAccess](https://seamlessaccess.org/).
### `SAML2_BACKEND_CERT` and `SAML2_BACKEND_KEY`
SATOSA's SAML2 backend acts like a service provider (relying party), requesting authentication by and attributes from the user's identity provider. It uses public key cryptography to sign authentication requests and decrypt responses. These optional environment variables hold the backend's paired public and private keys in [the PEM format](https://en.wikipedia.org/wiki/Privacy-Enhanced_Mail). If not specified, a new 2048-bit RSA key-pair will be generated using the hostname part of `BASE_URL`.
### `SAML2_FRONTEND_CERT` and `SAML2_FRONTEND_KEY`
SATOSA's SAML2 frontend acts like an identity provider (credential service provider), processing authentication requests from and returning user attributes to trusted websites. It uses public key cryptography to sign authentication responses. These optional environment variables hold the frontend's paired public and private keys, also in the PEM format. If not specified, a new 2048-bit RSA key-pair will be generated using the hostname part of `BASE_URL`.
```
--------------------------------------------------------------------------------
/influxdb/variant-meta.md:
--------------------------------------------------------------------------------
```markdown
## `%%IMAGE%%:meta`
*This image requires a valid license key from InfluxData.* Please visit our [products page](https://www.influxdata.com/products/) to learn more.
This image contains the enterprise meta node package for clustering. It is meant to be used in conjunction with the `influxdb:data` package of the same version.
### Using this Image
#### Specifying the license key
The license key can be specified using either an environment variable or by overriding the configuration file. If you specify the license key directly, the container needs to be able to access the InfluxData portal.
```console
docker run -p 8089:8089 -p 8091:8091 \
-e INFLUXDB_ENTERPRISE_LICENSE_KEY=<license-key>
%%IMAGE%%:meta
```
#### Running the container
The examples below will use docker's built-in networking capability. If you use the port exposing feature, the host port and the container port need to be the same.
First, create a docker network:
```console
docker network create influxdb
```
Start three meta nodes. This is the suggested number of meta nodes. We do not recommend running more or less. If you choose to run more or less, be sure that the number of meta nodes is odd. The hostname must be set on each container to the address that will be used to access the meta node. When using docker networks, the hostname should be made the same as the name of the container.
```console
docker run -d --name=influxdb-meta-0 --network=influxdb \
-h influxdb-meta-0 \
-e INFLUXDB_ENTERPRISE_LICENSE_KEY=<license-key> \
%%IMAGE%%:meta
docker run -d --name=influxdb-meta-1 --network=influxdb \
-h influxdb-meta-1 \
-e INFLUXDB_ENTERPRISE_LICENSE_KEY=<license-key> \
%%IMAGE%%:meta
docker run -d --name=influxdb-meta-2 --network=influxdb \
-h influxdb-meta-2 \
-e INFLUXDB_ENTERPRISE_LICENSE_KEY=<license-key> \
%%IMAGE%%:meta
```
When setting the hostname, you can use `-h <hostname>` or you can directly set the environment variable using `-e INFLUXDB_HOSTNAME=<hostname>`.
After starting the meta nodes, you need to tell them about each other. Choose one of the meta nodes and run `influxd-ctl` in the container.
```console
docker exec influxdb-meta-0 \
influxd-ctl add-meta influxdb-meta-1:8091
docker exec influxdb-meta-0 \
influxd-ctl add-meta influxdb-meta-2:8091
```
Or you can just start a single meta node. If you setup a single meta node, you do not need to use `influxd-ctl add-meta`.
```console
docker run -d --name=influxdb-meta --network=influxdb \
-h influxdb-meta \
-e INFLUXDB_ENTERPRISE_LICENSE_KEY=<license-key> \
%%IMAGE%%:meta -single-server
```
#### Connecting the data nodes
Start the data nodes using `%%IMAGE%%:data` with similar command line arguments to the meta nodes. You can start as many data nodes as are allowed by your license.
```console
docker run -d --name=influxdb-data-0 --network=influxdb \
-h influxdb-data-0 \
-e INFLUXDB_LICENSE_KEY=<license-key> \
%%IMAGE%%:data
```
You can add `-p 8086:8086` to expose the http port to the host machine. After starting the container, choose one of the meta nodes and add the data node to it.
```console
docker exec influxdb-meta-0 \
influxd-ctl add-data influxdb-data-0:8088
```
Perform these same steps for any other data nodes that you want to add.
You can now connect to any of the running data nodes to use your cluster.
See the [influxdb](https://hub.docker.com/_/influxdb/) image documentation for more details on how to use the data node images.
#### Configuration
InfluxDB Meta can be either configured from a config file or using environment variables. To mount a configuration file and use it with the server, you can use this command:
Generate the default configuration file:
```console
docker run --rm %%IMAGE%%:meta influxd-meta config > influxdb-meta.conf
```
Modify the default configuration, which will now be available under `$PWD`. Then start the InfluxDB Meta container.
```console
docker run \
-v $PWD/influxdb-meta.conf:/etc/influxdb/influxdb-meta.conf:ro \
%%IMAGE%% -config /etc/influxdb/influxdb-meta.conf
```
Modify `$PWD` to the directory where you want to store the configuration file.
For environment variables, the format is `INFLUXDB_$SECTION_$NAME`. All dashes (`-`) are replaced with underscores (`_`). If the variable isn't in a section, then omit that part.
Examples:
```console
INFLUXDB_REPORTING_DISABLED=true
INFLUXDB_META_DIR=/path/to/metadir
INFLUXDB_ENTERPRISE_REGISTRATION_ENABLED=true
```
For more information, see how to [Install InfluxDB Enterprise meta nodes](https://docs.influxdata.com/enterprise_influxdb/v1/introduction/installation/meta_node_installation/).
```
--------------------------------------------------------------------------------
/clefos/content.md:
--------------------------------------------------------------------------------
```markdown
# ClefOS
ClefOS Linux is a community-supported distribution for IBM Z (aka "mainframe") derived from sources freely provided to the public by [CentOS](http://vault.clefos.org/) which in turn is derived from the [Red Hat](ftp://ftp.redhat.com/pub/redhat/linux/enterprise/) sources for Red Hat Enterprise Linux (RHEL). As such, ClefOS Linux aims to be functionally compatible with CentOS and RHEL. The ClefOS Project mainly changes packages to remove upstream vendor branding and artwork. ClefOS Linux is no-cost and free to redistribute. Each ClefOS Linux version is maintained and released according to the CentOS schedule.
%%LOGO%%
## ClefOS image documentation
The `%%IMAGE%%:latest` tag is always the most recent version currently available.
### Building the Base Image
The image is built via the `make` command which will create the tarball and build the image.
The `createBase.sh` script is used to create the tarball for the docker build command. The script uses the yum command with the `tsflags=nodocs` option set to reduce the size of the image. In addition a lot of the locale files are eliminated from the image.
The `VERSION` file contains the id of the current ClefOS version and will be added as a label within the image.
### Rolling builds
The ClefOS Project offers regularly updated images for all active releases. These images will be updated monthly or as needed for emergency fixes. These rolling updates are tagged with the major version number and minor tags as well. For example, if 7.4.1708 is the most current then the build will result in `%%IMAGE%%:7` and `%%IMAGE%%:7.4.1708`. When the next minor level is available then `%%IMAGE%%:7` and `%%IMAGE%%:7.x.yymm` will be identical.
### Overlayfs and yum
Recent Docker versions support the [overlayfs](https://docs.docker.com/engine/userguide/storagedriver/overlayfs-driver/) backend, which is enabled by default on most distros supporting it from Docker 1.13 onwards. On ClefOS 7, **that backend requires yum-plugin-ovl to be installed and enabled**; while it is installed by default in recent clefos images, make it sure you retain the `plugins=1` option in `/etc/yum.conf` if you update that file; otherwise, you may encounter errors related to rpmdb checksum failure - see [Docker ticket 10180](https://github.com/docker/docker/issues/10180) for more details.
## Package documentation
By default, the ClefOS containers are built using yum's `nodocs` option, which helps reduce the size of the image. If you install a package and discover files missing, please comment out the line `tsflags=nodocs` in `/etc/yum.conf` and reinstall your package.
## Systemd integration
Systemd is not included in both the `%%IMAGE%%:7` and `%%IMAGE%%:latest` base containers, but can be created from these bases:
### Dockerfile for systemd base image
```dockerfile
FROM %%IMAGE%%:7
ENV container docker
RUN yum install -y --setopt=tsflags=nodocs systemd && \
yum clean all && \
rm -rf /var/cache/yum/* /tmp/* /var/log/yum.log
RUN (cd /lib/systemd/system/sysinit.target.wants/; for i in *; do [ $i == systemd-tmpfiles-setup.service ] || rm -f $i; done); \
rm -f /lib/systemd/system/multi-user.target.wants/*;\
rm -f /etc/systemd/system/*.wants/*;\
rm -f /lib/systemd/system/local-fs.target.wants/*; \
rm -f /lib/systemd/system/sockets.target.wants/*udev*; \
rm -f /lib/systemd/system/sockets.target.wants/*initctl*; \
rm -f /lib/systemd/system/basic.target.wants/*;\
rm -f /lib/systemd/system/anaconda.target.wants/*;
VOLUME ["/sys/fs/cgroup"]
CMD ["/usr/sbin/init"]
```
This `Dockerfile` deletes a number of unit files which might cause issues. From here, you are ready to build your base image.
```console
$ docker build --rm -t local/c7-systemd .
```
### Example systemd enabled app container
In order to use the systemd enabled base container created above, you will need to create your `Dockerfile` similar to the one below.
```dockerfile
FROM local/c7-systemd
RUN yum -y install httpd; yum clean all; systemctl enable httpd.service
EXPOSE 80
CMD ["/usr/sbin/init"]
```
Build this image:
```console
$ docker build --rm -t local/c7-systemd-httpd .
```
### Running a systemd enabled app container
In order to run a container with systemd, you will need to mount the cgroups volumes from the host. Below is an example command that will run the systemd enabled httpd container created earlier.
```console
$ docker run -ti -v /sys/fs/cgroup:/sys/fs/cgroup:ro -p 80:80 local/c7-systemd-httpd
```
This container is running with systemd in a limited context, with the cgroups filesystem mounted. There have been reports that if you're using an Ubuntu host, you will need to add `-v /tmp/$(mktemp -d):/run` in addition to the cgroups mount.
```
--------------------------------------------------------------------------------
/jetty/content.md:
--------------------------------------------------------------------------------
```markdown
# What is Jetty?
Jetty is a pure Java-based HTTP (Web) server and Java Servlet container. While Web Servers are usually associated with serving documents to people, Jetty is now often used for machine to machine communications, usually within larger software frameworks. Jetty is developed as a free and open source project as part of the Eclipse Foundation. The web server is used in products such as Apache ActiveMQ, Alfresco, Apache Geronimo, Apache Maven, Apache Spark, Google App Engine, Eclipse, FUSE, Twitter's Streaming API and Zimbra. Jetty is also the server in open source projects such as Lift, Eucalyptus, Red5, Hadoop and I2P. Jetty supports the latest Java Servlet API (with JSP support) as well as protocols SPDY and WebSocket.
> [wikipedia.org/wiki/Jetty_(web_server)](https://en.wikipedia.org/wiki/Jetty_%28web_server%29)
%%LOGO%% Logo © Eclipse Foundation
# How to use this image.
To run the default Jetty server in the background, use the following command:
```console
$ docker run -d %%IMAGE%%
```
You can test it by visiting `http://container-ip:8080` or `https://container-ip:8443/` in a browser. To expose your Jetty server to outside requests, use a port mapping as follows:
```console
$ docker run -d -p 80:8080 -p 443:8443 %%IMAGE%%
```
This will map port 8080 inside the container as port 80 on the host and container port 8443 as host port 443. You can then go to `http://host-ip` or `https://host-ip` in a browser.
## Environment
The default Jetty environment in the image is:
JETTY_HOME = /usr/local/jetty
JETTY_BASE = /var/lib/jetty
TMPDIR = /tmp/jetty
## Deployment
Webapps can be [deployed](https://www.eclipse.org/jetty/documentation/current/quickstart-deploying-webapps.html) under `/var/lib/jetty/webapps` in the usual ways (WAR file, exploded WAR directory, or context XML file). To deploy your application to the `/` context, use the name `ROOT.war`, the directory name `ROOT`, or the context file `ROOT.xml` (case insensitive).
For older EOL'd images based on Jetty 7 or Jetty 8, please follow the [legacy instructions](https://wiki.eclipse.org/Jetty/Howto/Deploy_Web_Applications) on the Eclipse Wiki and deploy under `/usr/local/jetty/webapps` instead of `/var/lib/jetty/webapps`.
## Configuration
The configuration of the Jetty server can be reported by running with the `--list-config` option:
```console
$ docker run -d %%IMAGE%% --list-config
```
Configuration such as parameters and additional modules may also be passed in via the command line. For example:
```console
$ docker run -d %%IMAGE%% --module=jmx jetty.threadPool.maxThreads=500
```
To update the server configuration in a derived Docker image, the `Dockerfile` may enable additional modules with `RUN` commands like:
```Dockerfile
FROM %%IMAGE%%
RUN java -jar "$JETTY_HOME/start.jar" --add-to-startd=jmx,stats
```
Modules may be configured in a `Dockerfile` by editing the properties in the corresponding `/var/lib/jetty/start.d/*.ini` file or the module can be deactivated by removing that file.
### JVM Configuration
JVM options can be set by passing the `JAVA_OPTIONS` environment variable to the container. For example, to set the maximum heap size to 1 gigabyte, you can run the container as follows:
```console
$ docker run -e JAVA_OPTIONS="-Xmx1g" -d %%IMAGE%%
```
## Read-only container
To run `%%IMAGE%%` as a read-only container, have Docker create the `/tmp/jetty` and `/run/jetty` directories as volumes:
```console
$ docker run -d --read-only -v /tmp/jetty -v /run/jetty %%IMAGE%%
```
Since the container is read-only, you'll need to either mount in your webapps directory with `-v /path/to/my/webapps:/var/lib/jetty/webapps` or by populating `/var/lib/jetty/webapps` in a derived image.
## HTTP/2 Support
Starting with version 9.3, Jetty comes with built-in support for HTTP/2. However, due to potential license compatiblity issues with the ALPN library used to implement HTTP/2, the module is not enabled by default. In order to enable HTTP/2 support in a derived `Dockerfile` for private use, you can add a `RUN` command that enables the `http2` module and approve its license as follows:
```Dockerfile
FROM %%IMAGE%%
RUN java -jar $JETTY_HOME/start.jar --add-to-startd=http2 --approve-all-licenses
```
This will add an `http2.ini` file to the `$JETTY_BASE/start.d` directory and download the required ALPN libraries into `$JETTY_BASE/lib/alpn`, allowing the use of HTTP/2. HTTP/2 connections should be made via the same port as normal HTTPS connections (container port 8443). If you would like to enable the `http2` module via `$JETTY_BASE/start.ini` instead, substitute `--add-to-start` in place of `--add-to-startd` in the `RUN` command above.
# Security
By default, this image starts as user `root` and uses Jetty's `setuid` module to drop privileges to user `jetty` after initialization. The `JETTY_BASE` directory at `/var/lib/jetty` is owned by `jetty:jetty` (uid 999, gid 999).
If you would like the image to start immediately as user `jetty` instead of starting as `root`, you can start the container with `-u jetty`:
```console
$ docker run -d -u jetty %%IMAGE%%
```
```
--------------------------------------------------------------------------------
/telegraf/content.md:
--------------------------------------------------------------------------------
```markdown
# What is telegraf?
Telegraf is an open source agent for collecting, processing, aggregating, and writing metrics. Based on a plugin system to enable developers in the community to easily add support for additional metric collection. There are five distinct types of plugins:
- Input plugins collect metrics from the system, services, or 3rd party APIs
- Output plugins write metrics to various destinations
- Processor plugins transform, decorate, and/or filter metrics
- Aggregator plugins create aggregate metrics (e.g. mean, min, max, quantiles, etc.)
- Secret Store plugins are used to hide secrets from the configuration file
[Telegraf Official Docs](https://docs.influxdata.com/telegraf/latest/get_started/)
%%LOGO%%
# How to use this image
## Exposed Ports
- 8125 UDP
- 8092 UDP
- 8094 TCP
## Configuration file
The user is required to provide a valid configuration to use the image. A valid configuration has at least one input and one output plugin specified. The following will walk through the general steps to get going.
### Basic Example
Configuration files are TOML-based files that declare which plugins to use. A very simple configuration file, `telegraf.conf`, that collects metrics from the system CPU and outputs the metrics to stdout looks like the following:
```toml
[[inputs.cpu]]
[[outputs.file]]
```
Once a user has a customized configuration file, they can launch a Telegraf container with it mounted in the expected location:
```console
$ docker run -v $PWD/telegraf.conf:/etc/telegraf/telegraf.conf:ro %%IMAGE%%
```
Modify `$PWD` to the directory where you want to store the configuration file.
Read more about the Telegraf configuration [here](https://docs.influxdata.com/telegraf/latest/administration/configuration/).
### Sample Configuration
Users can generate a sample configuration using the `config` subcommand. This will provide the user with a basic config that has a handful of input plugins enabled that collect data from the system. However, the user will still need to configure at least one output before the file is ready for use:
```console
$ docker run --rm %%IMAGE%% telegraf config > telegraf.conf
```
## Supported Plugins Reference
The following are links to the various plugins that are available in Telegraf:
- [Input Plugins](https://docs.influxdata.com/telegraf/latest/plugins/#input-plugins)
- [Output Plugins](https://docs.influxdata.com/telegraf/latest/plugins/#output-plugins)
- [Processor Plugins](https://docs.influxdata.com/telegraf/latest/plugins/#processor-plugins)
- [Aggregator Plugins](https://docs.influxdata.com/telegraf/latest/plugins/#aggregator-plugins)
# Examples
## Monitoring the Docker Engine Host
One common use case for Telegraf is to monitor the Docker Engine Host from within a container. The recommended technique is to mount the host filesystems into the container and use environment variables to instruct Telegraf where to locate the filesystems.
The precise files that need to be made available varies from plugin to plugin. Here is an example showing the full set of supported locations:
```console
$ docker run -d --name=telegraf \
-v $PWD/telegraf.conf:/etc/telegraf/telegraf.conf:ro \
-v /:/hostfs:ro \
-e HOST_ETC=/hostfs/etc \
-e HOST_PROC=/hostfs/proc \
-e HOST_SYS=/hostfs/sys \
-e HOST_VAR=/hostfs/var \
-e HOST_RUN=/hostfs/run \
-e HOST_MOUNT_PREFIX=/hostfs \
%%IMAGE%%
```
## Monitoring docker containers
To monitor other docker containers, you can use the docker plugin and mount the docker socket into the container. An example configuration is below:
```toml
[[inputs.docker]]
endpoint = "unix:///var/run/docker.sock"
```
Then you can start the telegraf container.
```console
$ docker run -d --name=telegraf \
--net=influxdb \
-v /var/run/docker.sock:/var/run/docker.sock \
-v $PWD/telegraf.conf:/etc/telegraf/telegraf.conf:ro \
%%IMAGE%%
```
Refer to the docker [plugin documentation](https://github.com/influxdata/telegraf/blob/master/plugins/inputs/docker/README.md) for more information.
## Install Additional Packages
Some plugins require additional packages to be installed. For example, the `ntpq` plugin requires `ntpq` command. It is recommended to create a custom derivative image to install any needed commands.
As an example this Dockerfile add the `mtr-tiny` image to the stock image and save it as `telegraf-mtr.docker`:
```dockerfile
FROM telegraf:1.12.3
RUN apt-get update && apt-get install -y --no-install-recommends mtr-tiny && \
rm -rf /var/lib/apt/lists/*
```
Build the derivative image:
```console
$ docker build -t telegraf-mtr:1.12.3 - < telegraf-mtr.docker
```
Create a `telegraf.conf` configuration file:
```toml
[[inputs.exec]]
interval = "60s"
commands=["mtr -C -n example.org"]
timeout = "40s"
data_format = "csv"
csv_skip_rows = 1
csv_column_names=["", "", "status", "dest", "hop", "ip", "loss", "snt", "", "", "avg", "best", "worst", "stdev"]
name_override = "mtr"
csv_tag_columns = ["dest", "hop", "ip"]
[[outputs.file]]
files = ["stdout"]
```
Run your derivative image:
```console
$ docker run --name telegraf --rm -v $PWD/telegraf.conf:/etc/telegraf/telegraf.conf telegraf-mtr:1.12.3
```
```
--------------------------------------------------------------------------------
/api-firewall/content.md:
--------------------------------------------------------------------------------
```markdown
%%LOGO%%
# What is API Firewall?
Wallarm API Firewall is an open-source light-weighted proxy designed to protect REST API endpoints in cloud-native environments by hardening based on a strict OpenAPI/Swagger schema validation. Wallarm API Firewall relies on a positive security model allowing calls that match a predefined API specification for requests and responses, while rejecting everything else.
The **key features** of API Firewall are:
- Protect REST API endpoints by blocking requests and responses that do not match the OAS/Swagger schema
- Discover Shadow API endpoints
- If using OAuth 2.0 protocol-based authentication, validate access tokens
- Quick and easy deployment and configuration
- Customization of request and response processing modes, response codes and log format
# Use cases
- Block abnormal requests and responses that do not match the OpenAPI 3.0 specification (if running API Firewall in the blocking mode)
- Discover Shadow APIs and undocumented endpoints (if running API Firewall in the logging mode)
- Log abnormal requests and responses that do not match the OpenAPI 3.0 specification (if running API Firewall in the logging mode)
# API schema validation and positive security model
When starting API Firewall, you should provide the [OpenAPI 3.0 specification](https://swagger.io/specification/) of the application to be protected with API Firewall. The started API Firewall will operate as a reverse proxy and validate whether requests and responses match the schema defined in the specification.
The traffic that does not match the schema will be logged using the [`STDOUT` and `STDERR` Docker services](https://docs.docker.com/config/containers/logging/) or blocked (depending on the configured API Firewall operation mode). If operating in the logging mode and detecting the traffic on endpoints that are not included in the specification, API Firewall also logs these endpoints as the shadow ones (except for endpoints returning the code `404`).

Provided API schema should be described using the [OpenAPI 3.0 specification](https://swagger.io/specification/) in the YAML or JSON file (`.yaml`, `.yml`, `.json` file extensions).
By allowing you to set the traffic requirements with the OpenAPI 3.0 specification, Wallarm API Firewall relies on a positive security model.
# Technical characteristics
API Firewall works as a reverse proxy with a built-in OpenAPI 3.0 request and response validator. The validator is written in Go and optimized for extreme performance and near-zero added latency.
# Starting API Firewall
To download, install, and start Wallarm API Firewall on Docker, see the [instructions](https://docs.wallarm.com/api-firewall/installation-guides/docker-container/).
# Demos
You can try API Firewall by running the demo environment that deploys an example application protected with Wallarm API Firewall. There are two available demo environments:
- [Wallarm API Firewall demo with Docker Compose](https://github.com/wallarm/api-firewall/tree/main/demo/docker-compose)
- [Wallarm API Firewall demo with Kubernetes](https://github.com/wallarm/api-firewall/tree/main/demo/kubernetes)
# Wallarm's blog articles related to API Firewall
- [Discovering Shadow APIs with API Firewall](https://lab.wallarm.com/discovering-shadow-apis-with-a-api-firewall/)
- [Wallarm API Firewall outperforms NGINX in a production environment](https://lab.wallarm.com/wallarm-api-firewall-outperforms-nginx-in-a-production-environment/)
# Performance
When creating API Firewall, we prioritized speed and efficiency to ensure that our customers would have the fastest APIs possible. Our latest tests demonstrate that the average time required for API Firewall to process one request is 1.339 ms:
```console
$ ab -c 200 -n 10000 -p ./large.json -T application/json http://127.0.0.1:8282/test/signup
Document Path: /test/signup
Document Length: 20 bytes
Concurrency Level: 200
Time taken for tests: 0.769 seconds
Complete requests: 10000
Failed requests: 0
Total transferred: 2150000 bytes
Total body sent: 283770000
HTML transferred: 200000 bytes
Requests per second: 13005.81 [#/sec] (mean)
Time per request: 15.378 [ms] (mean)
Time per request: 0.077 [ms] (mean, across all concurrent requests)
Transfer rate: 2730.71 [Kbytes/sec] received
360415.95 kb/s sent
363146.67 kb/s total
Connection Times (ms)
min mean[+/-sd] median max
Connect: 0 5 1.6 5 12
Processing: 2 10 5.4 9 59
Waiting: 2 8 5.2 7 56
Total: 3 15 5.7 14 68
Percentage of the requests served within a certain time (ms)
50% 14
66% 15
75% 16
80% 17
90% 18
95% 23
98% 36
99% 44
100% 68 (longest request)
```
These performance results are not the only ones we have got during API Firewall testing. Other results along with the methods used to improve API Firewall performance are described in this [Wallarm's blog article](https://lab.wallarm.com/wallarm-api-firewall-outperforms-nginx-in-a-production-environment/).
```
--------------------------------------------------------------------------------
/lightstreamer/content.md:
--------------------------------------------------------------------------------
```markdown
# What is Lightstreamer Server?
Lightstreamer is a real-time messaging server optimized for the Internet. Blending WebSockets, HTTP, and push notifications, it streams data to/from mobile, tablet, browser-based, desktop, and IoT applications.
For more information and related downloads for Lightstreamer Server and other Lightstreamer products, please visit [www.lightstreamer.com](https://www.lightstreamer.com).
%%LOGO%%
# How to use this image
## Up and Running
Launch the container with the default configuration:
```console
$ docker run --name ls-server -d -p 80:8080 %%IMAGE%%
```
This will map port 8080 inside the container to port 80 on local host. Then point your browser to `http://localhost` and watch the Welcome page showing real-time data flowing in from the locally deployed demo application, which is a first overview of the unique features offered by the Lightstreamer technology. More examples are available online at the [demo site](https://demos.lightstreamer.com).
## Custom settings
It is possible to customize each aspect of the Lightstreamer instance running into the container. For example, a specific configuration file may be supplied as follows:
```console
$ docker run --name ls-server -v /path/to/my-lightstreamer_conf.xml:/lightstreamer/conf/lightstreamer_conf.xml -d -p 80:8080 %%IMAGE%%
```
In the same way, you could provide a custom logging configuration, maybe in this case also specifying a dedicated volume to ensure both the persistence of log files and better performance of the container:
```console
$ docker run --name ls-server -v /path/to/my-lightstreamer_log_conf.xml:/lightstreamer/conf/lightstreamer_log_conf.xml -v /path/to/logs:/lightstreamer/logs -d -p 80:8080 %%IMAGE%%
```
If you also change in your `my-lightstreamer_log_conf.xml` file the default logging path from `../logs` to `/path/to/dest/logs`:
```console
$ docker run --name ls-server -v /path/to/my-lightstreamer_log_conf.xml:/lightstreamer/conf/lightstreamer_log_conf.xml -v /path/to/hosted/logs:/path/to/dest/logs -d -p 80:8080 %%IMAGE%%
```
Alternatively, the above tasks can be executed by deriving a new image through a `Dockerfile` as the following:
```dockerfile
FROM %%IMAGE%%
# Please specify a COPY command only for the required custom configuration file
COPY my-lightstreamer_conf.xml /lightstreamer/conf/lightstreamer_conf.xml
COPY my-lightstreamer_log_conf.xml /lightstreamer/conf/lightstreamer_log_conf.xml
```
where `my-lightstreamer_conf.xml` and `my-lightstreamer_log_conf.xml` are your custom configuration files, placed in the same directory as the Dockerfile. By simply running the command:
```console
$ docker build -t my-lightstreamer .
```
the new image will be built along with the provided files. After that, launch the container:
```console
$ docker run --name ls-server -d -p 80:8080 my-lightstreamer
```
To get more detailed information on how to configure the Lightstreamer server, please see the inline documentation in the `lightstreamer_conf.xml` and `lightstreamer_log_conf.xml` files you can find under the `conf` folder of the installation directory.
## Deployment of Adapter Sets
You might want to use this image even with any Adapter Set, either developed by yourself or provided by third parties.
To accomplish such goal, you may use similar strategies to those illustrated above:
### Deployment of a single Adapter Set
To deploy a single custom Adapter Set, the simplest way is to attach its files into the factory adapters folder, as follows:
```console
$ docker run --name ls-server -v /path/to/my-adapter-set:/lightstreamer/adapters/my-adapter-set -d -p 80:8080 %%IMAGE%%
```
### Full replacement of the "adapters" folder
In the case you have many custom Adapter Sets to deploy, a more appropriate strategy is to replace the factory adapters folder with the one located in your host machine:
```console
$ docker run --name ls-server -v /path/to/my-adapters:/lightstreamer/adapters -d -p 80:8080 %%IMAGE%%
```
In this case, the `/path/to/my-adapters` folder has to be structured with the required layout for an adapters folder:
```console
/path/to/my-adapters+
+my_adapter_set_1
+my_adapter_set_2
...
+my_adapter_set_N
```
### Building a new image
Once again, a linear and clean approach is to make a new image including all needed files.
In this case, you could write a simple Docker file in which the list of all your Adapter Sets configuration files is provided:
```dockerfile
FROM %%IMAGE%%
# Will copy the contents of N Adapter Sets into the factory adapters folder
COPY my-adapter-set-1 /lightstreamer/adapters/my-adapter-set-1
COPY my-adapter-set-2 /lightstreamer/adapters/my-adapter-set-2
COPY my-adapter-set-3 /lightstreamer/adapters/my-adapter-set-3
```
Then, just build and start the container as already explained.
## Deployment of web server pages
There might be some circumstances where you would like to provide custom pages for the internal web server of the Lightstreamer Server. Even in this case, it is possible to customize the container by employing the same techniques as above.
For example, with the following command you will be able to fully replace the factory `pages` folder:
```console
$ docker run --name ls-server -v /path/to/custom/pages:/lightstreamer/pages -d -p 80:8080 %%IMAGE%%
```
where `/path/to/custom/pages` is the path in your host machine containing the replacing web content files.
```
--------------------------------------------------------------------------------
/krakend/content.md:
--------------------------------------------------------------------------------
```markdown
%%LOGO%%
# What is KrakenD?
[KrakenD](https://www.krakend.io/) is a stateless, high-performance, enterprise-ready, open-source API gateway written in Go. Its engine (formerly known as *KrakenD Framework*) is now a **Linux Foundation Project** codenamed [Lura Project](https://luraproject.org/). Lura is the only enterprise-grade API Gateway hosted in a neutral, open forum.
KrakenD is lightweight and straightforward, as it only requires writing the configuration file. No Go knowledge is required. It offers connectivity to internal and external services, data transformation and filtering, and aggregation of multiple data sources (APIs, gRPC, queues and pub/sub, lambda, etc.) simultaneously or in cascade. It protects access to your API, throughputs its usage, and integrates with many third-parties.
All features are designed to offer extraordinary performance and infinite scalability.
## How to use this image
KrakenD only needs a single configuration file to create an API Gateway, although you can have a complex setup reflecting your organization structure. The configuration file(s) can live anywhere in the container, but the default location (the workdir) is `/etc/krakend`.
To use the image, `COPY` your `krakend.json` file inside the container or mount it using a volume. The configuration is checked only once during the startup and never used again. Don't have a config file yet? Generate it with the [KrakenD Designer UI](https://designer.krakend.io).
⚠️ **NOTICE**: KrakenD does not use live reload when your configuration changes. Restart the container.
### Quick start
You can start an empty gateway with a health check with the following commands:
```bash
docker run -d -p 8080:8080 -v "$PWD:/etc/krakend/" %%IMAGE%%
curl http://localhost:8080/__health
{"agents":{},"now":"2024-05-23 14:35:55.552591448 +0000 UTC m=+26.856583003","status":"ok"}
```
### More Examples
The following are several examples of running KrakenD. By default, the command `run` is executed, but you can pass other commands and flags at the end of the run command.
The configuration files are taken from the current directory (`$PWD`). Therefore, all examples expect to find at least the file `krakend.json`.
#### Run with the debug enabled (flag `-d`):
This flag is **SAFE to use in production**. It's meant to enable KrakenD as a fake backend itself by enabling a [`/__debug` endpoint](https://www.krakend.io/docs/endpoints/debug-endpoint/)
```bash
docker run -p 8080:8080 -v "${PWD}:/etc/krakend/" %%IMAGE%% run -d -c /etc/krakend/krakend.json
```
#### Checking the syntax of your configuration file
See the [check command](https://www.krakend.io/docs/commands/check/)
```bash
docker run -it -v $PWD:/etc/krakend/ %%IMAGE%% check --config krakend.json
```
#### Show the help:
```bash
docker run --rm -it %%IMAGE%% help
```
### Building your custom KrakenD image
Most production deployments will not want to rely on mounting a volume for the container but to use their image based on `%%IMAGE%%`:
Your `Dockerfile` could look like this:
```Dockerfile
FROM %%IMAGE%%:<version>
# NOTE: Avoid using :latest image on production. Stick to a major version instead.
COPY krakend.json ./
# Check and test that the file is valid
RUN krakend check -t --lint-no-network -c krakend.json
```
If you want to manage your KrakenD configuration using multiple files and folders, reusing templates, and distributing the configuration amongst your teams, you can use the [flexible configuration (FC)](https://www.krakend.io/docs/configuration/flexible-config/). The following `Dockerfile` combines FC, the `krakend check` command, and a 2-step build.
```Dockerfile
FROM %%IMAGE%%:<version> as builder
COPY krakend.tmpl .
COPY config .
# Save temporary output file to /tmp to avoid permission errors
RUN FC_ENABLE=1 \
FC_OUT=/tmp/krakend.json \
FC_PARTIALS="/etc/krakend/partials" \
FC_SETTINGS="/etc/krakend/settings" \
FC_TEMPLATES="/etc/krakend/templates" \
krakend check -d -t -c krakend.tmpl
# Copy the output file only and discard any other files
FROM %%IMAGE%%:<version>
COPY --from=builder /tmp/krakend.json .
```
Then build with `docker build -t my_krakend .`
The configuration above assumes you have a folder structure like the following:
.
├── config
│ ├── partials
│ ├── settings
│ │ └── env.json
│ └── templates
│ └── some.tmpl
├── Dockerfile
└── krakend.tmpl
### Docker Compose example
Finally, a simple `docker compose` file to start KrakenD with your API would be:
```yaml
services:
krakend:
image: %%IMAGE%%:<version>
ports:
- "8080:8080"
volumes:
- ./:/etc/krakend
```
And another one that uses the flexible configuration and a custom template filename (`my_krakend.tmpl`) on each start:
```yaml
services:
krakend:
image: %%IMAGE%%:<version>
ports:
- "8080:8080"
volumes:
- ./:/etc/krakend
environment:
- FC_ENABLE=1
- FC_OUT=/tmp/krakend.json
- FC_PARTIALS="/etc/krakend/config/partials"
- FC_SETTINGS="/etc/krakend/config/settings/prod"
- FC_TEMPLATES="/etc/krakend/config/templates"
command:
command: ["krakend", "run", "-c", "krakend.tmpl", "-d"]
```
### Container permissions and commands
All `krakend` commands are executed as `krakend` user (uid=1000), and the rest of the commands (e.g., `sh`) are executed as root.
You can directly use sub-commands of `krakend` like `run`, `help`, `version`, `check`, `check-plugin`, or `test-plugin` as the entrypoint will add the `krakend` command automatically. For example, the following lines are equivalent:
```bash
docker run --rm -it %%IMAGE%% help
docker run --rm -it %%IMAGE%% krakend help
```
```
--------------------------------------------------------------------------------
/emqx/content.md:
--------------------------------------------------------------------------------
```markdown
# What is EMQX
[EMQX](https://emqx.io/) is the world's most scalable open-source MQTT broker with a high performance that connects 100M+ IoT devices in 1 cluster, while maintaining 1M message per second throughput and sub-millisecond latency.
EMQX supports multiple open standard protocols like MQTT, HTTP, QUIC, and WebSocket. It's 100% compliant with MQTT 5.0 and 3.x standard, and secures bi-directional communication with MQTT over TLS/SSL and various authentication mechanisms.
With the built-in powerful SQL-based rules engine, EMQX can extract, filter, enrich and transform IoT data in real-time. In addition, it ensures high availability and horizontal scalability with a masterless distributed architecture, and provides ops-friendly user experience and great observability.
EMQX boasts more than 20K+ enterprise users across 50+ countries and regions, connecting 100M+ IoT devices worldwide, and is trusted by over 400 customers in mission-critical scenarios of IoT, IIoT, connected vehicles, and more, including over 70 Fortune 500 companies like HPE, VMware, Verifone, SAIC Volkswagen, and Ericsson.
%%LOGO%%
# How to use this image
### Run EMQX
Execute some command under this docker image
```console
$ docker run -d --name emqx %%IMAGE%%:${tag}
```
For example
```console
$ docker run -d --name emqx -p 18083:18083 -p 1883:1883 %%IMAGE%%:latest
```
The EMQX broker runs as Linux user `emqx` in the docker container.
### Configuration
All EMQX Configuration in [`etc/emqx.conf`](https://github.com/emqx/emqx/blob/master/apps/emqx/etc/emqx.conf) can be configured via environment variables.
Example:
EMQX_DASHBOARD__DEFAULT_PASSWORD <--> dashboard.default_password
EMQX_NODE__COOKIE <--> node.cookie
EMQX_LISTENERS__SSL__default__ENABLE <--> listeners.ssl.default.enable
Note: The lowercase use of 'default' is not a typo. It is used to demonstrate that lowercase environment variables are equivalent.
- Prefix `EMQX_` is removed
- All upper case letters are replaced with lower case letters
- `__` is replaced with `.`
For example, set MQTT TCP port to 1883
```console
$ docker run -d --name emqx -e EMQX_DASHBOARD__DEFAULT_PASSWORD=mysecret -p 18083:18083 -p 1883:1883 %%IMAGE%%:latest
```
Please read more about EMQX configuration in the [official documentation](https://docs.emqx.com/en/emqx/latest/configuration/configuration.html)
#### EMQX node name configuration
Environment variable `EMQX_NODE__NAME` allows you to specify an EMQX node name, which defaults to `<container_name>@<container_ip>`.
If not specified, EMQX determines its node name based on the running environment or other environment variables used for node discovery.
### Cluster
EMQX supports a variety of clustering methods, see our [documentation](https://docs.emqx.com/en/emqx/latest/deploy/cluster/create-cluster.html) for details.
Let's create a static node list cluster from Docker Compose.
- Create `compose.yaml`:
```yaml
services:
emqx1:
image: %%IMAGE%%:latest
environment:
- "[email protected]"
- "EMQX_CLUSTER__DISCOVERY_STRATEGY=static"
- "EMQX_CLUSTER__STATIC__SEEDS=[[email protected], [email protected]]"
networks:
emqx-bridge:
aliases:
- node1.emqx.io
emqx2:
image: %%IMAGE%%:latest
environment:
- "[email protected]"
- "EMQX_CLUSTER__DISCOVERY_STRATEGY=static"
- "EMQX_CLUSTER__STATIC__SEEDS=[[email protected], [email protected]]"
networks:
emqx-bridge:
aliases:
- node2.emqx.io
networks:
emqx-bridge:
driver: bridge
```
- Start the Docker Compose services
```bash
docker compose -p my_emqx up -d
```
- View cluster
```bash
$ docker exec -it my_emqx_emqx1_1 sh -c "emqx ctl cluster status"
Cluster status: #{running_nodes => ['[email protected]','[email protected]'],
stopped_nodes => []}
```
### Persistence
If you want to persist the EMQX docker container, you need to keep the following directories:
- `/opt/emqx/data`
- `/opt/emqx/log`
Since data in these folders are partially stored under the `/opt/emqx/data/mnesia/${node_name}`, the user also needs to reuse the same node name to see the previous state. To make this work, one needs to set the host part of `EMQX_NODE__NAME` to something static that does not change when you restart or recreate the container. It could be container name, hostname or loopback IP address `127.0.0.1` if you only have one node.
In if you use Docker Compose, the configuration would look something like this:
```YAML
volumes:
vol-emqx-data:
name: foo-emqx-data
vol-emqx-log:
name: foo-emqx-log
services:
emqx:
image: %%IMAGE%%:latest
restart: always
environment:
EMQX_NODE__NAME: [email protected]
volumes:
- vol-emqx-data:/opt/emqx/data
- vol-emqx-log:/opt/emqx/log
```
### Kernel Tuning
Under Linux host machine, the easiest way is [Tuning guide](https://docs.emqx.com/en/emqx/latest/performance/tune.html).
If you want tune Linux kernel by docker, you must ensure your docker is latest version (>=1.12).
```bash
docker run -d --name emqx -p 18083:18083 -p 1883:1883 \
--sysctl fs.file-max=2097152 \
--sysctl fs.nr_open=2097152 \
--sysctl net.core.somaxconn=32768 \
--sysctl net.ipv4.tcp_max_syn_backlog=16384 \
--sysctl net.core.netdev_max_backlog=16384 \
--sysctl net.ipv4.ip_local_port_range=1000 65535 \
--sysctl net.core.rmem_default=262144 \
--sysctl net.core.wmem_default=262144 \
--sysctl net.core.rmem_max=16777216 \
--sysctl net.core.wmem_max=16777216 \
--sysctl net.core.optmem_max=16777216 \
--sysctl net.ipv4.tcp_rmem=1024 4096 16777216 \
--sysctl net.ipv4.tcp_wmem=1024 4096 16777216 \
--sysctl net.ipv4.tcp_max_tw_buckets=1048576 \
--sysctl net.ipv4.tcp_fin_timeout=15 \
%%IMAGE%%:latest
```
> REMEMBER: DO NOT RUN EMQX DOCKER PRIVILEGED OR MOUNT SYSTEM PROC IN CONTAINER TO TUNE LINUX KERNEL, IT IS UNSAFE.
```
--------------------------------------------------------------------------------
/sonarqube/content.md:
--------------------------------------------------------------------------------
```markdown
# What is `sonarqube`?
`sonarqube` Docker repository stores the official Sonar images for SonarQube Server and SonarQube Community Build.
[SonarQube Server](https://www.sonarsource.com/products/sonarqube/) (formerly SonarQube) is an on-premise analysis tool designed to detect quality and security issues in 30+ languages, frameworks, and IaC platforms. The solution also provides fix recommendations leveraging AI with Sonar's AI CodeFix capability. By integrating directly with your CI pipeline or on one of the supported DevOps platforms, your code is checked against an extensive set of rules that cover many attributes of code, such as maintainability, reliability, and security issues on each merge/pull request.
[SonarQube Community Build](https://www.sonarsource.com/open-source-editions/sonarqube-community-edition/) (formerly SonarQube Community) is Sonar's self-managed free offering, released on a monthly schedule. It includes the latest core capabilities available in open source, providing essential features such as bug detection, identification of code smells, and basic security issue analysis across 21 programming languages and frameworks. For advanced security analysis, enterprise-grade integrations, and scalability features, the commercial version, SonarQube Server, is available.
## How to use this image
Here, you'll find the Docker images for the SonarQube Server (Developer Edition, Enterprise Edition, and Data Center Edition), as well as for SonarQube Community Build.
## Docker Host Requirements
Because SonarQube uses an embedded Elasticsearch, make sure that your Docker host configuration complies with the [Elasticsearch production mode requirements](https://www.elastic.co/guide/en/elasticsearch/reference/current/docker.html#docker-cli-run-prod-mode) and [File Descriptors configuration](https://www.elastic.co/guide/en/elasticsearch/reference/current/file-descriptors.html).
For example, on Linux, you can set the recommended values for the current session by running the following commands as root on the host:
```console
sysctl -w vm.max_map_count=524288
sysctl -w fs.file-max=131072
ulimit -n 131072
ulimit -u 8192
```
## Demo
To quickly run a demo instance, see Using Docker on the [Try Out SonarQube](https://docs.sonarqube.org/latest/setup/get-started-2-minutes/) page. When you are ready to move to a more sustainable setup, take some time to read the **Installation** and **Configuration** sections below.
## Installation
> **Multi-platform support**: Starting from SonarQube `9.9` LTS, the docker images support running both on `amd64` architecture and `arm64`-based Apple Silicon (M1).
For installation instructions, see Installing the Server from the Docker Image on the [Install the Server](https://docs.sonarqube.org/latest/setup/install-server/) page.
To run a cluster with the SonarQube Server Data Center Edition, please refer to Installing SonarQube Server from the Docker Image on the [Install the Server as a Cluster](https://docs.sonarqube.org/latest/setup/install-cluster/) page.
> The `lts` tag on Docker images is replaced with every new LTS release. If you want to avoid any automatic major upgrades, we recommend using the corresponding `9.9-<edition>` tag instead of `lts-<edition>`.
## Configuration
### Port binding
By default, the server running within the container will listen on port 9000. You can expose the container port 9000 to the host port 9000 with the `-p 9000:9000` argument to `docker run`, like the command below:
```console
docker run --name sonarqube-custom -p 9000:9000 %%IMAGE%%:community
```
You can then browse to `http://localhost:9000` or `http://host-ip:9000` in your web browser to access the web interface.
### Database
By default, the image will use an embedded H2 database that is not suited for production.
> **Warning:** Only a single instance of SonarQube Server or SonarQube Community Build can connect to a database schema. If you're using a Docker Swarm or Kubernetes, make sure that multiple instances are never running on the same database schema simultaneously. This will cause the SonarQube to behave unpredictably, and data will be corrupted. There is no safeguard, as described on [SONAR-10362](https://jira.sonarsource.com/browse/SONAR-10362). The SonarQube Server Data Center Edition has the same limitation in that only one cluster can connect to one database schema at the same time.
Set up a database by following the ["Installing the Database"](https://docs.sonarsource.com/sonarqube/latest/setup-and-upgrade/install-the-server/installing-the-database/) section.
### Use volumes
We recommend creating volumes for the following directories:
- `/opt/sonarqube/data`: data files, such as the embedded H2 database and Elasticsearch indexes
- `/opt/sonarqube/logs`: contains SonarQube logs about access, web process, CE process, Elasticsearch logs
- `/opt/sonarqube/extensions`: for 3rd party plugins
> **Warning:** You cannot use the same volumes on multiple instances of SonarQube.
## Upgrading
For upgrade instructions, see Upgrading from the Docker Image on the [Upgrade the Server](https://docs.sonarqube.org/latest/setup/upgrading/) page.
## Advanced configuration
### Customized image
In some environments, it may make more sense to prepare a custom image containing your configuration. A `Dockerfile` to achieve this may be as simple as:
```dockerfile
FROM %%IMAGE%%:community
COPY sonar-custom-plugin-1.0.jar /opt/sonarqube/extensions/
```
You could then build and try the image with something like:
```console
$ docker build --tag=sonarqube-custom .
$ docker run -ti sonarqube-custom
```
### Avoid hard termination
The instance will stop gracefully, waiting for any tasks in progress to finish. Waiting for in-progress tasks to finish can take a large amount of time, which the docker does not expect by default when stopping. To avoid having the instance killed by the Docker daemon after 10 seconds, it is best to configure a timeout to stop the container with `--stop-timeout`. For example:
```console
docker run --stop-timeout 3600 %%IMAGE%%
```
## Administration
The administration guide can be found [here](https://redirect.sonarsource.com/doc/administration-guide.html).
```
--------------------------------------------------------------------------------
/update.sh:
--------------------------------------------------------------------------------
```bash
#!/usr/bin/env bash
set -Eeuo pipefail
cd "$(dirname "$(readlink -f "$BASH_SOURCE")")"
helperDir='.template-helpers'
# usage: ./update.sh [--namespace NAMESPACE] [[NAMESPACE/]IMAGE ...]
# ie: ./update.sh
# ./update.sh debian golang
# ./update.sh --namespace tianontesting debian golang
# ./update.sh tianontesting/debian tianontestingmore/golang
# BASHBREW_ARCH=windows-amd64 BASHBREW_ARCH_NAMESPACES='...' ./update.sh --namespace winamd64
forceNamespace=
if [ "${1:-}" = '--namespace' ]; then
shift
forceNamespace="$1"
shift
fi
images=( "$@" )
if [ ${#images[@]} -eq 0 ]; then
images=( */ )
fi
images=( "${images[@]%/}" )
if [ -n "$forceNamespace" ]; then
images=( "${images[@]/#/"$forceNamespace/"}" )
fi
replace_field() {
targetFile="$1"
field="$2"
content="$3"
extraSed="${4:-}"
sed_escaped_value="$(echo "$content" | sed 's/[\/&]/\\&/g')"
sed_escaped_value="${sed_escaped_value//$'\n'/\\n}"
sed -ri -e "s/${extraSed}%%${field}%%${extraSed}/$sed_escaped_value/g" "$targetFile"
}
for image in "${images[@]}"; do
repo="${image##*/}"
namespace="${image%$repo}"
namespace="${namespace%/}"
# this is used by subscripts to determine whether we're pushing /_/xxx or /r/ARCH/xxx
# (especialy for "supported tags")
export ARCH_SPECIFIC_DOCS=
if [ -n "$namespace" ] && [ -n "${BASHBREW_ARCH:-}" ]; then
export ARCH_SPECIFIC_DOCS=1
fi
if [ -x "$repo/update.sh" ]; then
( set -x; "$repo/update.sh" "$image" )
fi
if [ -e "$repo/content.md" ]; then
githubRepo="$(cat "$repo/github-repo")"
maintainer="$(cat "$repo/maintainer.md")"
issues="$(cat "$repo/issues.md" 2>/dev/null || cat "$helperDir/issues.md")"
getHelp="$(cat "$repo/get-help.md" 2>/dev/null || cat "$helperDir/get-help.md")"
license="$(cat "$repo/license.md" 2>/dev/null || true)"
licenseCommon="$(cat "$repo/license-common.md" 2>/dev/null || cat "$helperDir/license-common.md")"
if [ "$license" ]; then
license=$'\n\n''# License'$'\n\n'"$license"$'\n\n'"$licenseCommon"
fi
logo=
logoFile=
for f in png svg; do
if [ -e "$repo/logo.$f" ]; then
logoFile="$repo/logo.$f"
break
fi
done
if [ "$logoFile" ]; then
logoCommit="$(git log -1 --format='format:%H' -- "$logoFile" 2>/dev/null || true)"
[ "$logoCommit" ] || logoCommit='master'
logoUrl="https://raw.githubusercontent.com/docker-library/docs/$logoCommit/$logoFile"
if [ "${logoFile##*.}" = 'svg' ]; then
# https://stackoverflow.com/a/16462143/433558
logoUrl+='?sanitize=true'
fi
logo=""
fi
compose=
composeYaml=
if [ -f "$repo/compose.yaml" ]; then
compose="$(cat "$repo/compose.md" 2>/dev/null || cat "$helperDir/compose.md")"
composeYaml=$'```yaml\n'"$(cat "$repo/compose.yaml")"$'\n```'
fi
deprecated=
if [ -f "$repo/deprecated.md" ]; then
deprecated="$(< "$repo/deprecated.md")"
if [ "${deprecated:0:2}" != '# ' ]; then
deprecated=$'# **DEPRECATION NOTICE**\n\n'"$deprecated"
fi
deprecated+=$'\n\n'
fi
if ! partial="$("$helperDir/generate-dockerfile-links-partial.sh" "$repo")"; then
{
echo
echo "WARNING: failed to fetch tags for '$repo'; skipping!"
echo
} >&2
continue
fi
targetFile="$repo/README.md"
{
cat "$helperDir/autogenerated-warning.md"
echo
if [ -n "$ARCH_SPECIFIC_DOCS" ]; then
echo '**Note:** this is the "per-architecture" repository for the `'"$BASHBREW_ARCH"'` builds of [the `'"$repo"'` official image](https://hub.docker.com/_/'"$repo"') -- for more information, see ["Architectures other than amd64?" in the official images documentation](https://github.com/docker-library/official-images#architectures-other-than-amd64) and ["An image'\''s source changed in Git, now what?" in the official images FAQ](https://github.com/docker-library/faq#an-images-source-changed-in-git-now-what).'
echo
fi
echo -n "$deprecated"
cat "$helperDir/template.md"
} > "$targetFile"
echo ' TAGS => generate-dockerfile-links-partial.sh "'"$repo"'"'
if [ -z "$partial" ]; then
if [ -n "$ARCH_SPECIFIC_DOCS" ]; then
partial='**No supported tags found!**'$'\n\n''It is very likely that `%%REPO%%` does not support the currently selected architecture (`'"$BASHBREW_ARCH"'`).'
else
# opensuse, etc
partial='**No supported tags**'
fi
elif [ -n "$ARCH_SPECIFIC_DOCS" ]; then
jenkinsJobUrl="https://doi-janky.infosiftr.net/job/multiarch/job/$BASHBREW_ARCH/job/$repo/"
jenkinsImageUrl="https://img.shields.io/jenkins/s/https/doi-janky.infosiftr.net/job/multiarch/job/$BASHBREW_ARCH/job/$repo.svg?label=%%IMAGE%%%20%20build%20job"
partial+=$'\n\n''[]('"$jenkinsJobUrl"')'
fi
replace_field "$targetFile" 'TAGS' "$partial"
echo ' ARCHES => arches.sh "'"$repo"'"'
arches="$("$helperDir/arches.sh" "$repo")"
[ -n "$arches" ] || arches='**No supported architectures**'
replace_field "$targetFile" 'ARCHES' "$arches"
echo ' CONTENT => '"$repo"'/content.md'
replace_field "$targetFile" 'CONTENT' "$(cat "$repo/content.md")"
echo ' VARIANT => variant.sh'
replace_field "$targetFile" 'VARIANT' "$("$helperDir/variant.sh" "$repo")"
# has to be after CONTENT because it's contained in content.md
echo " LOGO => $logo"
replace_field "$targetFile" 'LOGO' "$logo" '\s*'
echo ' COMPOSE => '"$repo"'/compose.md'
replace_field "$targetFile" 'COMPOSE' "$compose"
echo ' COMPOSE-YAML => '"$repo"'/compose.yaml'
replace_field "$targetFile" 'COMPOSE-YAML' "$composeYaml"
echo ' LICENSE => '"$repo"'/license.md'
replace_field "$targetFile" 'LICENSE' "$license"
echo ' ISSUES => "'"$issues"'"'
replace_field "$targetFile" 'ISSUES' "$issues"
echo ' GET-HELP => "'"$getHelp"'"'
replace_field "$targetFile" 'GET-HELP' "$getHelp"
echo ' MAINTAINER => "'"$maintainer"'"'
replace_field "$targetFile" 'MAINTAINER' "$maintainer"
echo ' IMAGE => "'"$image"'"'
replace_field "$targetFile" 'IMAGE' "$image"
echo ' REPO => "'"$repo"'"'
replace_field "$targetFile" 'REPO' "$repo"
echo ' GITHUB-REPO => "'"$githubRepo"'"'
replace_field "$targetFile" 'GITHUB-REPO' "$githubRepo"
echo
else
echo >&2 "skipping $repo: missing repo/content.md"
fi
done
```
--------------------------------------------------------------------------------
/perl/content.md:
--------------------------------------------------------------------------------
```markdown
# What is Perl?
Perl is a high-level, general-purpose, interpreted, dynamic programming language. The Perl language borrows features from other programming languages, including C, shell scripting (sh), AWK, and sed.
> [wikipedia.org/wiki/Perl](https://en.wikipedia.org/wiki/Perl)
%%LOGO%%
# How to use this image
## Create a `Dockerfile` in your Perl app project
```dockerfile
FROM %%IMAGE%%:5.34
COPY . /usr/src/myapp
WORKDIR /usr/src/myapp
CMD [ "perl", "./your-daemon-or-script.pl" ]
```
Then, build and run the Docker image:
```console
$ docker build -t my-perl-app .
$ docker run -it --rm --name my-running-app my-perl-app
```
## Run a single Perl script
For many simple, single file projects, you may find it inconvenient to write a complete `Dockerfile`. In such cases, you can run a Perl script by using the Perl Docker image directly:
```console
$ docker run -it --rm --name my-running-script -v "$PWD":/usr/src/myapp -w /usr/src/myapp %%IMAGE%%:5.34 perl your-daemon-or-script.pl
```
## Coexisting with Debian's `/usr/bin/perl`
The *perl* binary built for this image is installed in `/usr/local/bin/perl`, along with other standard tools in the Perl distribution such as `prove` and `perldoc`, as well as [`cpanm`](https://metacpan.org/pod/App::cpanminus) for installing [CPAN](https://www.cpan.org) modules. Containers running this image will also have their `PATH` enviroment set like `/usr/local/sbin:/usr/local/bin:/usr/sbin:/usr/bin:/sbin:/bin` to ensure that this *perl* binary will be found *first* in normal usage.
As this official image of Docker is built using the [buildpack-deps](https://hub.docker.com/_/buildpack-deps) image (or [debian:slim](https://hub.docker.com/_/debian) for `:slim` variants,) this image also contains a `/usr/bin/perl` as supplied by the [Debian](https://www.debian.org) project. This is needed for the underlying [dpkg](https://en.wikipedia.org/wiki/Dpkg)/[apt](https://en.wikipedia.org/wiki/APT_(software)) package management tools to work correctly, as docker-perl cannot be used here due to different configuration (such as `@INC` and installation paths, as well as other differences like whether `-Dusethreads` is included or not.)
See also [Perl/docker-perl#26](https://github.com/Perl/docker-perl/issues/26) for an extended discussion.
## Signal handling behavior notice
As Perl will run as PID 1 by default in containers (unless an [ENTRYPOINT](https://docs.docker.com/reference/dockerfile/#entrypoint) is set,) special care needs to be considered when expecting to send signals (particularly SIGINT or SIGTERM) to it. For example, running
```console
$ docker run -it --name sleeping_beauty --rm %%IMAGE%%:5.34 perl -E 'sleep 300'
```
and doing on another terminal,
```console
$ docker exec sleeping_beauty kill 1
```
will *not* stop the perl running on the `sleeping_beauty` container (it will keep running until the `sleep 300` finishes.) To do so, one must set a signal handler like this:
```console
$ docker run -it --name quick_nap --rm %%IMAGE%%:5.34 perl -E '$SIG{TERM} = sub { $sig++; say "recv TERM" }; sleep 300; say "waking up" if $sig'
```
so doing `docker exec quick_nap kill 1` (or the simpler `docker stop quick_nap`) will immediately stop the container, and print `recv TERM` in the other terminal. Note that the signal handler does not stop the perl process itself unless it calls a `die` or `exit`; in this case, perl will continue and print `waking up` *after* it receives the signal.
If your Perl program is expected to handle signals and fork child processes, it is encouraged to use an init-like program for ENTRYPOINT, such as [dumb-init](https://github.com/Yelp/dumb-init) or [tini](https://github.com/krallin/tini) (the latter is available since Docker 1.13 via the `docker run --init` flag.)
See also [Signals in perlipc](https://perldoc.pl/perlipc#Signals) as well as [Perl/docker-perl#44](https://github.com/Perl/docker-perl/issues/44).
### `COPY` and `WORKDIR` behavior in Debian Bookworm based images (Perl >= 5.38)
As our Perl images are based on the standard `buildpack-deps` and `debian` images, these inherit the new [merged-usr root filesystem layout](https://wiki.debian.org/UsrMerge) introduced in Debian 12 (Bookworm) which may affect certain build contexts that `COPY` their own `bin`, `sbin`, or `lib` directories into a `WORKDIR /`. Users are encouraged to set `WORKDIR` explicitly to a path other than `/` as much as possible, such as the `/usr/src/app` shown here in the examples, though as of current release our images now default to `WORKDIR /usr/src/app`.
See also [Perl/docker-perl#140](https://github.com/Perl/docker-perl/issues/140) for further information.
## Example: Creating a reusable Carton image for Perl projects
Suppose you have a project that uses [Carton](https://metacpan.org/pod/Carton) to manage Perl dependencies. You can create a `%%IMAGE%%:carton` image that makes use of the [ONBUILD](https://docs.docker.com/reference/dockerfile/#onbuild) instruction in its `Dockerfile`, like this:
```dockerfile
FROM %%IMAGE%%:5.34
RUN cpanm Carton \
&& mkdir -p /usr/src/app
WORKDIR /usr/src/app
ONBUILD COPY cpanfile* /usr/src/app
ONBUILD RUN carton install
ONBUILD COPY . /usr/src/app
```
Then, in your Carton project, you can now reduce your project's `Dockerfile` into a single line of `FROM %%IMAGE%%:carton`, which may be enough to build a stand-alone image.
Having a single `%%IMAGE%%:carton` base image is useful especially if you have multiple Carton-based projects in development, to avoid "boilerplate" coding of installing Carton and/or copying the project source files into the derived image. Keep in mind, though, about certain things to consider when using the Perl image in this way:
- This kind of base image will hide the useful bits (such as the`COPY`/`RUN` above) in the image, separating it from more specific Dockerfiles using the base image. This might lead to confusion when creating further derived images, so be aware of how [ONBUILD triggers](https://docs.docker.com/reference/dockerfile/#onbuild) work and plan appropriately.
- There is the cost of maintaining an extra base image build, so if you're working on a single Carton project and/or plan to publish it, then it may be more preferable to derive directly from a versioned `perl` image instead.
```
--------------------------------------------------------------------------------
/varnish/content.md:
--------------------------------------------------------------------------------
```markdown
# What is Varnish?
Varnish is an HTTP accelerator designed for content-heavy dynamic web sites as well as APIs. In contrast to other web accelerators, such as Squid, which began life as a client-side cache, or Apache and nginx, which are primarily origin servers, Varnish was designed as an HTTP accelerator. Varnish is focused exclusively on HTTP, unlike other proxy servers that often support FTP, SMTP and other network protocols.
> [wikipedia.org/wiki/Varnish_(software)](https://en.wikipedia.org/wiki/Varnish_(software))
%%LOGO%%
# How to use this image.
## Basic usage
### Using `VARNISH_BACKEND_HOST` and `VARNISH_BACKEND_PORT`
You just need to know where your backend (the server that Varnish will accelerate) is:
```console
# we define VARNISH_BACKEND_HOST/VARNISH_BACKEND_PORT
# our workdir has to be mounted as tmpfs to avoid disk I/O,
# and we'll use port 8080 to talk to our container (internally listening on 80)
$ docker run \
-e VARNISH_BACKEND_HOST=example.com -e VARNISH_BACKEND_PORT=80 \
--tmpfs /var/lib/varnish/varnishd:exec \
-p 8080:80 \
%%IMAGE%%
```
From there, you can visit `localhost:8080` in your browser and see the example.com homepage.
### Using a VCL file
If you already have a VCL file, you can directly mount it as `/etc/varnish/default.vcl`:
```console
# we need the configuration file at /etc/varnish/default.vcl,
# our workdir has to be mounted as tmpfs to avoid disk I/O,
# and we'll use port 8080 to talk to our container (internally listening on 80)
$ docker run \
-v /path/to/default.vcl:/etc/varnish/default.vcl:ro \
--tmpfs /var/lib/varnish/varnishd:exec \
-p 8080:80 \
%%IMAGE%%
```
Alternatively, a simple `Dockerfile` can be used to generate a new image that includes the necessary `default.vcl`:
```dockerfile
FROM %%IMAGE%%
COPY default.vcl /etc/varnish/
```
Place this file in the same directory as your `default.vcl`, run `docker build -t my-varnish .`, then start your container:
```console
$ docker --tmpfs /var/lib/varnish/varnishd:exec -p 8080:80 my-varnish
```
## Reloading the configuration
The images all ship with [varnishreload](https://github.com/varnishcache/pkg-varnish-cache/blob/master/systemd/varnishreload#L42) which allows you to easily update the running configuration without restarting the container (and therefore losing your cache). At its most basic, you just need this:
```console
# update the default.vcl in your container
docker cp new_default.vcl running_container:/etc/varnish/default.vcl
# run varnishreload
docker exec running_container varnishreload
```
Note that `varnishreload` also supports reloading other files (it doesn't have to be `default.vcl`), labels (`l`), and garbage collection of old labeles (`-m`) among others. To know more, run
```console
docker run varnish varnishreload -h
```
## Additional configuration
### Cache size (VARNISH_SIZE)
By default, the containers will use a cache size of 100MB, which is usually a bit too small, but you can quickly set it through the `VARNISH_SIZE` environment variable:
```console
$ docker run --tmpfs /var/lib/varnish/varnishd:exec -p 8080:80 -e VARNISH_SIZE=2G %%IMAGE%%
```
### Listening ports (VARNISH_HTTP_PORT/VARNISH_PROXY_PORT)
Varnish will listen to HTTP traffic on port `80`, and this can be overridden by setting the environment variable `VARNISH_HTTP_PORT`. Similarly, the variable `VARNISH_PROXY_PORT` (defaulting to `8443`) dictate the listening port for the [PROXY protocol](https://www.haproxy.org/download/1.8/doc/proxy-protocol.txt) used notably to interact with [hitch](https://hub.docker.com/_/hitch) (which, coincidentally, uses `8443` as a default too!).
```console
# instruct varnish to listening to port 7777 instead of 80
$ docker run --tmpfs /var/lib/varnish/varnishd:exec -p 8080:7777 -e VARNISH_HTTP_PORT=7777 %%IMAGE%%
```
### Extra arguments
Additionally, you can add arguments to `docker run` after `%%IMAGE%%`, if the first argument starts with a `-`, the whole list will be appendend to the [default command](https://github.com/varnish/docker-varnish/blob/master/fresh/debian/scripts/docker-varnish-entrypoint):
```console
# extend the default keep period
$ docker run --tmpfs /var/lib/varnish/varnishd:exec -p 8080:80 -e VARNISH_SIZE=2G %%IMAGE%% -p default_keep=300
```
If your first argument after `%%IMAGE%%` doesn't start with `-`, it will be interpreted as a command to override the default one:
```console
# show the command-line options
$ docker run %%IMAGE%% varnishd -?
# list parameters usable with -p
$ docker run %%IMAGE%% varnishd -x parameter
# run the server with your own parameters (don't forget -F to not daemonize)
$ docker run %%IMAGE%% varnishd -F -a :8080 -b 127.0.0.1:8181 -t 600 -p feature=+http2
```
## vmods (since 7.1)
As mentioned above, you can use [vmod_dynamic](https://github.com/nigoroll/libvmod-dynamic) for backend resolution. The [varnish-modules](https://github.com/varnish/varnish-modules) collection is also included in the image. All the documentation regarding usage and syntax can be found in the [src/](https://github.com/varnish/varnish-modules/tree/master/src) directory of the repository.
On top of this, images include [install-vmod](https://github.com/varnish/toolbox/tree/master/install-vmod), a helper script to quickly download, compile and install vmods while creating your own images. Note that images set the `ENV` variable `VMOD_DEPS` to ease the task further.
### Debian
```dockerfile
FROM %%IMAGE%%:7.1
# set the user to root, and install build dependencies
USER root
RUN set -e; \
apt-get update; \
apt-get -y install $VMOD_DEPS /pkgs/*.deb; \
\
# install one, possibly multiple vmods
install-vmod https://github.com/varnish/varnish-modules/releases/download/0.20.0/varnish-modules-0.20.0.tar.gz; \
\
# clean up and set the user back to varnish
apt-get -y purge --auto-remove $VMOD_DEPS varnish-dev; \
rm -rf /var/lib/apt/lists/*
USER varnish
```
### Alpine
```dockerfile
FROM %%IMAGE%%:7.1-alpine
# install build dependencies
USER root
RUN set -e; \
apk add --no-cache $VMOD_DEPS; \
\
# install one, possibly multiple vmods
install-vmod https://github.com/varnish/varnish-modules/releases/download/0.20.0/varnish-modules-0.20.0.tar.gz; \
\
# clean up
apk del --no-network $VMOD_DEPS
USER varnish
```
```
--------------------------------------------------------------------------------
/php-zendserver/content.md:
--------------------------------------------------------------------------------
```markdown
# What is Zend Server?
Zend Server is the integrated application platform for PHP mobile and web apps. Zend Server provides you with a highly available PHP production environment which includes, amongst other features, a highly reliable PHP stack, application monitoring, troubleshooting, and the all-new Z-Ray.
### Boost your Development with Z-Ray
Using Zend Server Z-Ray is akin to wearing X-Ray goggles, effortlessly giving developers deep insight into how their code is running as they are developing it – all without having to change any of their habits or workflow. With Z-Ray, developers can immediately understand the impact of their code changes, enabling them to both improve quality and solve issues long before their code reaches production. In addition to the obvious benefits of this 'Left Shifting' – better performance, fewer production issues and faster recovery times – using Z-Ray is also downright fun!
### Powering Continuous Delivery
Zend Server is the platform that enables Continuous Delivery, which provides consistency, automation and collaboration capabilities throughout the application delivery cycle. Patterns are available to integrate Zend Server with: Chef, Jenkins, Nagios, Vmware, Puppet.
### Additional Resources
- [http://www.zend.com/](http://www.zend.com/)
- [http://support.roguewave.com/](http://support.roguewave.com/)
- [http://files.zend.com/help/Zend-Server/zend-server.htm#faqs.htm](http://files.zend.com/help/Zend-Server/zend-server.htm#faqs.htm)
- [http://files.zend.com/help/Zend-Server/zend-server.htm#getting\_started.htm](http://files.zend.com/help/Zend-Server/zend-server.htm#getting_started.htm)
# PHP-ZendServer
This is a cluster-enabled version of a Dockerized Zend Server container. With Zend Server on Docker, you'll get your PHP applications up and running on a highly available PHP production environment which includes, amongst other features, a highly reliable PHP stack, application monitoring, troubleshooting, and the new and innovative new technology - Z-Ray. Z-Ray gives developers unprecedented visibility into their code by tracking and displaying in a toolbar live and detailed info on how the various elements constructing their page are performing.
For development purposes we provide you with a time limited trial license. For production use you must provide a valid Zend Server license using the instructions below in the Usage section.
## Usage
#### Launching the Container from Docker-Hub
Zend Server is shared on [Docker-Hub] as **php-zendserver**.
##### Single instance
To start a single Zend Server instance, execute:
$ docker run %%IMAGE%%
- You can specify the PHP and Zend Server version by adding ':<php-version>' or ':<ZS-version>-php<version>' to the 'docker run' command.
for example:
$docker run %%IMAGE%%:8.5-php5.6
#### Availible versions:
- Zend Server 8
- Zend Server 9 (With PHP 7 GA)(Default version)
- Zend Server 2019 with multi PHP Version Support (7.1, 7.2 & 7.3)
##### Cluster
To start a Zend Server cluster, execute the following command for each cluster node:
$ docker run -e MYSQL_HOSTNAME=<db-ip> -e MYSQL_PORT=3306 -e MYSQL_USERNAME=<username> -e MYSQL_PASSWORD=<password> -e MYSQL_DBNAME=zend %%IMAGE%%
#### Bring your own license
To use your own Zend Server license: $ docker run %%IMAGE%% -e ZEND_LICENSE_KEY=<license-key> -e ZEND_LICENSE_ORDER=<order-number>
#### Launching the Container from Dockerfile
From a local folder containing this repo's clone, execute the following command to generate the image. The **image-id** will be outputted:
$ docker build .
##### Single instance from custom image
To start a single Zend Server instance, execute:
$ docker run <image-id>
#### Cluster from custom image
To start a Zend Server cluster, execute the following command on each cluster node:
$ docker run -e MYSQL_HOSTNAME=<db-ip> -e MYSQL_PORT=3306 -e MYSQL_USERNAME=<username> -e MYSQL_PASSWORD=<password> -e MYSQL_DBNAME=zend <image-id>
#### Accessing Zend server
Once started, the container will output the information required to access the PHP application and the Zend Server UI, including an automatically generated admin password.
#### Port forwarding (For remote access)
To access the container **remotely**, port forwarding must be configured, either manually or using docker. For example, this command redirects port 80 to port 88, and port 10081 (Zend Server UI port) to port 10088:
$ docker run -p 88:80 -p 10088:10081 %%IMAGE%%
##### For clustered instances:
To start a Zend Server cluster you must provide a Mysql compatible database:
$ docker run -p 88:80 -p 10088:10081 -e MYSQL_HOSTNAME=<db-ip> -e MYSQL_PORT=3306 -e MYSQL_USERNAME=<username> -e MYSQL_PASSWORD=<password> -e MYSQL_DBNAME=zend <image-id>
Please note, when running multiple instances only one instance can be bound to a port. If you are running a cluster, either assign a port redirect to one node only, or assign a different port to each container.
#### Adding application files
Application files can be automatically pulled from a Git repo by setting the **GIT_URL** env var to the repo's URL. Alternatively, if building an image from Dockerfile, place the app files in the "app/" folder.
The files will be copied to the containers /var/www/html folder and defined in Zend Server as the default app. An example index.html file is included. this feature is available in Zend Server 8 and above.
#### Env variables
Env variables are passed in the run command with the "-e" switch.
##### Optional env-variables:
To specify a pre-defined admin password for Zend Server use:
- ZS\_ADMIN\_PASSWORD
Automatically Deploy an app from Git URL:
- GIT\_URL
MySQL vars for clustered ops. *ALL* are required for the node to properly join a cluster:
- MYSQL\_HOSTNAME - ip or hostname of MySQL database
- MYSQL\_PORT - MySQL listening port
- MYSQL\_USERNAME
- MYSQL\_PASSWORD
- MYSQL\_DBNAME - Name of the database Zend Server will use for cluster ops (created automatically if it does not exist).
To specify a pre-purchased license use the following env vars:
- ZEND\_LICENSE\_KEY
- ZEND\_LICENSE\_ORDER
Set Zend Server to production mode by setting the following env var to "true". By default Zend Server is set to "development mode" with Z-Ray enabled:
- ZS\_PRODUCTION
### Minimal Requirements
Each Zend Server Docker container requires 1GB of availible memory.
```
--------------------------------------------------------------------------------
/monica/content.md:
--------------------------------------------------------------------------------
```markdown
# What is Monica?
Monica is a great open source personal relationship management system to organize the interactions with your loved ones.
%%LOGO%%
## How to use this image
There are two versions of the image you may choose from.
The `apache` tag contains a full Monica installation with an apache webserver. This points to the default `latest` tag too.
The `fpm` tag contains a fastCGI-Process that serves the web pages. This image should be combined with a webserver used as a proxy, like apache or nginx.
### Using the apache image
This image contains a webserver that exposes port 80. Run the container with:
```console
docker run --name some-%%REPO%% -d -p 8080:80 %%IMAGE%%
```
### Using the fpm image
This image serves a fastCGI server that exposes port 9000. You may need an additional web server that can proxy requests to the fpm port 9000 of the container. Run this container with:
```console
docker run --name some-%%REPO%% -d -p 9000:9000 %%IMAGE%%:fpm
```
### Using an external database
You'll need to setup an external database. Monica currently support MySQL/MariaDB database. You can also link a database container, e. g. `--link my-mysql:db`, and then use `db` as the database host on setup. More info is in the Docker Compose section.
### Persistent data storage
To have a persistent storage for your datas, you may want to create volumes for your db, and for monica you will have to save the `/var/www/html/storage` directory.
Run a container with this named volume:
```console
docker run -d \
-v monica_data:/var/www/html/storage \
%%IMAGE%%
```
### Run commands inside the container
Like every Laravel application, the `php artisan` command is very usefull for Monica. To run a command inside the container, run
```console
docker exec CONTAINER_ID php artisan COMMAND
```
Or for Docker Compose:
```console
docker compose exec %%REPO%% php artisan COMMAND
```
where `%%REPO%%` is the name of the service in your `compose.yaml` file.
## Configuration using environment variables
The Monica image will use environment variables to setup the application. See [Monica documentation](https://github.com/monicahq/monica/blob/4.x/.env.example) for common used variables you should setup.
## Running the image with Docker Compose
See some examples of Docker Compose possibilities in the [example section](%%GITHUB-REPO%%/blob/main/.examples).
---
### Apache version
This version will use the apache image and add a mysql container. The volumes are set to keep your data persistent. This setup provides **no ssl encryption** and is intended to run behind a proxy.
Make sure to pass in values for `APP_KEY` variable before you run this setup.
1. Create a `compose.yaml` file
```yaml
services:
app:
image: monica
depends_on:
- db
ports:
- 8080:80
environment:
- APP_KEY= # Generate with `echo -n 'base64:'; openssl rand -base64 32`
- DB_HOST=db
- DB_USERNAME=monica
- DB_PASSWORD=secret
volumes:
- data:/var/www/html/storage
restart: always
db:
image: mariadb:11
environment:
- MYSQL_RANDOM_ROOT_PASSWORD=true
- MYSQL_DATABASE=monica
- MYSQL_USER=monica
- MYSQL_PASSWORD=secret
volumes:
- mysql:/var/lib/mysql
restart: always
volumes:
data:
name: data
mysql:
name: mysql
```
2. Set a value for `APP_KEY` variable before you run this setup. It should be a random 32-character string. You can for instance copy and paste the output of `echo -n 'base64:'; openssl rand -base64 32`:
3. Run
```console
docker compose up -d
```
Wait until all migrations are done and then access Monica at http://localhost:8080/ from your host system. If this looks ok, add your first user account.
4. Run this command once:
```console
docker compose exec app php artisan setup:production
```
### FPM version
When using FPM image, you will need another container with a webserver to proxy http requests. In this example we use nginx with a basic container to do this.
1. Download `nginx.conf` and `Dockerfile` file for nginx image. An example can be found on the [`example section`](%%GITHUB-REPO%%/blob/main/.examples/full/fpm/web/)
```sh
mkdir web
curl -sSL https://raw.githubusercontent.com/monicahq/docker/main/.examples/full/web/nginx.conf -o web/nginx.conf
curl -sSL https://raw.githubusercontent.com/monicahq/docker/main/.examples/full/web/Dockerfile -o web/Dockerfile
```
The `web` container image should be pre-build before each deploy with: `docker compose build`.
2. Create a `compose.yaml` file
```yaml
services:
app:
image: monica:fpm
depends_on:
- db
environment:
- APP_KEY= # Generate with `echo -n 'base64:'; openssl rand -base64 32`
- DB_HOST=db
- DB_USERNAME=monica
- DB_PASSWORD=secret
volumes:
- data:/var/www/html/storage
restart: always
web:
build: ./web
ports:
- 8080:80
depends_on:
- app
volumes:
- data:/var/www/html/storage:ro
restart: always
db:
image: mariadb:11
environment:
- MYSQL_RANDOM_ROOT_PASSWORD=true
- MYSQL_DATABASE=monica
- MYSQL_USER=monica
- MYSQL_PASSWORD=secret
volumes:
- mysql:/var/lib/mysql
restart: always
volumes:
data:
name: data
mysql:
name: mysql
```
3. Set a value for `APP_KEY` variable before you run this setup. It should be a random 32-character string. You can for instance copy and paste the output of `echo -n 'base64:'; openssl rand -base64 32`:
4. Run
```console
docker compose up -d
```
Wait until all migrations are done and then access Monica at http://localhost:8080/ from your host system. If this looks ok, add your first user account.
5. Run this command once:
```console
docker compose exec app php artisan setup:production
```
## Make Monica available from the internet
To expose your Monica instance for the internet, it's important to set environment variable `APP_ENV=production`. In this case `https` mode will be mandatory.
### Using a proxy webserver on the host
One way to expose your Monica instance is to use a proxy webserver from your host with SSL capabilities. This is possible with a reverse proxy.
### Using a proxy webserver container
See some examples of Docker Compose possibilities in the [example section](%%GITHUB-REPO%%/blob/main/.examples) to show how to a proxy webserver with ssl capabilities.
```