This is page 19 of 22. Use http://codebase.md/id/docs/get_started/create/basic_markup.html?lines=false&page={x} to view the full context.
# Directory Structure
```
├── .ci
│ ├── check-markdownfmt.sh
│ ├── check-metadata.sh
│ ├── check-pr-no-readme.sh
│ ├── check-required-files.sh
│ ├── check-short.sh
│ ├── check-ymlfmt.sh
│ └── get-markdownfmt.sh
├── .common-templates
│ ├── maintainer-community.md
│ ├── maintainer-docker.md
│ ├── maintainer-hashicorp.md
│ └── maintainer-influxdata.md
├── .dockerignore
├── .github
│ └── workflows
│ └── ci.yml
├── .template-helpers
│ ├── arches.sh
│ ├── autogenerated-warning.md
│ ├── compose.md
│ ├── generate-dockerfile-links-partial.sh
│ ├── generate-dockerfile-links-partial.tmpl
│ ├── get-help.md
│ ├── issues.md
│ ├── license-common.md
│ ├── template.md
│ ├── variant-alpine.md
│ ├── variant-default-buildpack-deps.md
│ ├── variant-default-debian.md
│ ├── variant-default-ubuntu.md
│ ├── variant-onbuild.md
│ ├── variant-slim.md
│ ├── variant-windowsservercore.md
│ ├── variant.md
│ └── variant.sh
├── adminer
│ ├── compose.yaml
│ ├── content.md
│ ├── github-repo
│ ├── license.md
│ ├── logo.png
│ ├── maintainer.md
│ ├── metadata.json
│ ├── README-short.txt
│ └── README.md
├── aerospike
│ ├── content.md
│ ├── github-repo
│ ├── issues.md
│ ├── license.md
│ ├── logo.png
│ ├── maintainer.md
│ ├── metadata.json
│ ├── README-short.txt
│ └── README.md
├── almalinux
│ ├── content.md
│ ├── github-repo
│ ├── issues.md
│ ├── license.md
│ ├── logo.png
│ ├── maintainer.md
│ ├── metadata.json
│ ├── README-short.txt
│ └── README.md
├── alpine
│ ├── content.md
│ ├── github-repo
│ ├── license.md
│ ├── logo.png
│ ├── maintainer.md
│ ├── metadata.json
│ ├── README-short.txt
│ └── README.md
├── alt
│ ├── content.md
│ ├── github-repo
│ ├── issues.md
│ ├── license.md
│ ├── logo.png
│ ├── maintainer.md
│ ├── metadata.json
│ ├── README-short.txt
│ └── README.md
├── amazoncorretto
│ ├── content.md
│ ├── github-repo
│ ├── license.md
│ ├── logo.png
│ ├── maintainer.md
│ ├── metadata.json
│ ├── README-short.txt
│ └── README.md
├── amazonlinux
│ ├── content.md
│ ├── github-repo
│ ├── issues.md
│ ├── license.md
│ ├── logo.png
│ ├── maintainer.md
│ ├── metadata.json
│ ├── README-short.txt
│ └── README.md
├── api-firewall
│ ├── content.md
│ ├── github-repo
│ ├── license.md
│ ├── logo.svg
│ ├── maintainer.md
│ ├── metadata.json
│ ├── README-short.txt
│ └── README.md
├── arangodb
│ ├── content.md
│ ├── github-repo
│ ├── license.md
│ ├── logo.png
│ ├── maintainer.md
│ ├── metadata.json
│ ├── README-short.txt
│ └── README.md
├── archlinux
│ ├── content.md
│ ├── github-repo
│ ├── issues.md
│ ├── license.md
│ ├── logo.png
│ ├── maintainer.md
│ ├── metadata.json
│ ├── README-short.txt
│ └── README.md
├── backdrop
│ ├── compose.yaml
│ ├── content.md
│ ├── github-repo
│ ├── license.md
│ ├── logo.png
│ ├── maintainer.md
│ ├── metadata.json
│ ├── README-short.txt
│ └── README.md
├── bash
│ ├── content.md
│ ├── github-repo
│ ├── license.md
│ ├── logo.png
│ ├── maintainer.md
│ ├── metadata.json
│ ├── README-short.txt
│ └── README.md
├── bonita
│ ├── compose.yaml
│ ├── content.md
│ ├── get-help.md
│ ├── github-repo
│ ├── issues.md
│ ├── license.md
│ ├── logo.png
│ ├── maintainer.md
│ ├── metadata.json
│ ├── README-short.txt
│ └── README.md
├── buildpack-deps
│ ├── content.md
│ ├── github-repo
│ ├── license.md
│ ├── logo.png
│ ├── maintainer.md
│ ├── metadata.json
│ ├── README-short.txt
│ └── README.md
├── busybox
│ ├── content.md
│ ├── github-repo
│ ├── license.md
│ ├── logo.png
│ ├── maintainer.md
│ ├── metadata.json
│ ├── README-short.txt
│ ├── README.md
│ ├── variant-glibc.md
│ ├── variant-musl.md
│ ├── variant-uclibc.md
│ └── variant.md
├── caddy
│ ├── content.md
│ ├── get-help.md
│ ├── github-repo
│ ├── license.md
│ ├── logo-120.png
│ ├── logo.png
│ ├── maintainer.md
│ ├── metadata.json
│ ├── README-short.txt
│ └── README.md
├── cassandra
│ ├── content.md
│ ├── github-repo
│ ├── license.md
│ ├── logo.png
│ ├── maintainer.md
│ ├── metadata.json
│ ├── README-short.txt
│ └── README.md
├── chronograf
│ ├── content.md
│ ├── github-repo
│ ├── license.md
│ ├── logo.png
│ ├── maintainer.md
│ ├── metadata.json
│ ├── README-short.txt
│ └── README.md
├── cirros
│ ├── content.md
│ ├── github-repo
│ ├── license.md
│ ├── logo.png
│ ├── maintainer.md
│ ├── metadata.json
│ ├── README-short.txt
│ └── README.md
├── clearlinux
│ ├── content.md
│ ├── github-repo
│ ├── license.md
│ ├── logo.png
│ ├── maintainer.md
│ ├── metadata.json
│ ├── README-short.txt
│ └── README.md
├── clefos
│ ├── content.md
│ ├── deprecated.md
│ ├── github-repo
│ ├── issues.md
│ ├── license.md
│ ├── logo.png
│ ├── maintainer.md
│ ├── metadata.json
│ ├── README-short.txt
│ └── README.md
├── clickhouse
│ ├── content.md
│ ├── github-repo
│ ├── license.md
│ ├── logo.svg
│ ├── maintainer.md
│ ├── metadata.json
│ ├── README-short.txt
│ └── README.md
├── clojure
│ ├── content.md
│ ├── github-repo
│ ├── license.md
│ ├── logo.png
│ ├── maintainer.md
│ ├── metadata.json
│ ├── README-short.txt
│ └── README.md
├── composer
│ ├── content.md
│ ├── github-repo
│ ├── license.md
│ ├── logo.png
│ ├── maintainer.md
│ ├── metadata.json
│ ├── README-short.txt
│ └── README.md
├── convertigo
│ ├── content.md
│ ├── github-repo
│ ├── license.md
│ ├── logo.png
│ ├── maintainer.md
│ ├── metadata.json
│ ├── README-short.txt
│ └── README.md
├── couchbase
│ ├── content.md
│ ├── github-repo
│ ├── license.md
│ ├── logo.png
│ ├── maintainer.md
│ ├── metadata.json
│ ├── README-short.txt
│ └── README.md
├── couchdb
│ ├── content.md
│ ├── github-repo
│ ├── license.md
│ ├── logo.png
│ ├── maintainer.md
│ ├── metadata.json
│ ├── README-short.txt
│ └── README.md
├── crate
│ ├── content.md
│ ├── get-help.md
│ ├── github-repo
│ ├── license.md
│ ├── logo.svg
│ ├── maintainer.md
│ ├── metadata.json
│ ├── README-short.txt
│ └── README.md
├── dart
│ ├── content.md
│ ├── github-repo
│ ├── license.md
│ ├── logo.svg
│ ├── maintainer.md
│ ├── metadata.json
│ ├── README-short.txt
│ └── README.md
├── debian
│ ├── content.md
│ ├── github-repo
│ ├── license.md
│ ├── logo.png
│ ├── maintainer.md
│ ├── metadata.json
│ ├── README-short.txt
│ ├── README.md
│ ├── variant-slim.md
│ └── variant.md
├── docker
│ ├── content.md
│ ├── github-repo
│ ├── license.md
│ ├── logo.png
│ ├── maintainer.md
│ ├── metadata.json
│ ├── README-short.txt
│ ├── README.md
│ ├── variant-rootless.md
│ └── variant-windowsservercore.md
├── Dockerfile
├── drupal
│ ├── compose.yaml
│ ├── content.md
│ ├── github-repo
│ ├── license.md
│ ├── logo.svg
│ ├── maintainer.md
│ ├── metadata.json
│ ├── README-short.txt
│ ├── README.md
│ └── variant-fpm.md
├── eclipse-mosquitto
│ ├── content.md
│ ├── github-repo
│ ├── license.md
│ ├── logo.png
│ ├── maintainer.md
│ ├── metadata.json
│ ├── README-short.txt
│ └── README.md
├── eclipse-temurin
│ ├── content.md
│ ├── get-help.md
│ ├── github-repo
│ ├── issues.md
│ ├── license.md
│ ├── logo.png
│ ├── maintainer.md
│ ├── metadata.json
│ ├── README-short.txt
│ └── README.md
├── eggdrop
│ ├── content.md
│ ├── github-repo
│ ├── license.md
│ ├── logo.png
│ ├── maintainer.md
│ ├── metadata.json
│ ├── README-short.txt
│ └── README.md
├── elasticsearch
│ ├── compose.yaml
│ ├── content.md
│ ├── get-help.md
│ ├── github-repo
│ ├── issues.md
│ ├── license.md
│ ├── logo.png
│ ├── maintainer.md
│ ├── metadata.json
│ ├── README-short.txt
│ ├── README.md
│ └── variant-alpine.md
├── elixir
│ ├── content.md
│ ├── github-repo
│ ├── license.md
│ ├── logo.png
│ ├── maintainer.md
│ ├── metadata.json
│ ├── README-short.txt
│ └── README.md
├── emqx
│ ├── content.md
│ ├── get-help.md
│ ├── github-repo
│ ├── license.md
│ ├── logo.svg
│ ├── maintainer.md
│ ├── metadata.json
│ ├── README-short.txt
│ └── README.md
├── erlang
│ ├── content.md
│ ├── github-repo
│ ├── license.md
│ ├── logo.png
│ ├── maintainer.md
│ ├── metadata.json
│ ├── README-short.txt
│ └── README.md
├── fedora
│ ├── content.md
│ ├── github-repo
│ ├── issues.md
│ ├── license.md
│ ├── logo.png
│ ├── maintainer.md
│ ├── metadata.json
│ ├── README-short.txt
│ └── README.md
├── flink
│ ├── content.md
│ ├── get-help.md
│ ├── github-repo
│ ├── issues.md
│ ├── license.md
│ ├── logo.png
│ ├── maintainer.md
│ ├── metadata.json
│ ├── README-short.txt
│ └── README.md
├── fluentd
│ ├── content.md
│ ├── github-repo
│ ├── license.md
│ ├── logo.png
│ ├── maintainer.md
│ ├── metadata.json
│ ├── README-short.txt
│ └── README.md
├── friendica
│ ├── compose.yaml
│ ├── content.md
│ ├── github-repo
│ ├── license.md
│ ├── logo.svg
│ ├── maintainer.md
│ ├── metadata.json
│ ├── README-short.txt
│ └── README.md
├── gazebo
│ ├── content.md
│ ├── github-repo
│ ├── license.md
│ ├── logo.png
│ ├── maintainer.md
│ ├── metadata.json
│ ├── README-short.txt
│ └── README.md
├── gcc
│ ├── content.md
│ ├── github-repo
│ ├── license.md
│ ├── logo.png
│ ├── maintainer.md
│ ├── metadata.json
│ ├── README-short.txt
│ └── README.md
├── generate-repo-stub-readme.sh
├── geonetwork
│ ├── compose.yaml
│ ├── content.md
│ ├── github-repo
│ ├── license.md
│ ├── logo.png
│ ├── maintainer.md
│ ├── metadata.json
│ ├── README-short.txt
│ ├── README.md
│ ├── variant-postgres.md
│ └── variant.md
├── get-categories.sh
├── ghost
│ ├── compose.yaml
│ ├── content.md
│ ├── github-repo
│ ├── license.md
│ ├── logo.png
│ ├── maintainer.md
│ ├── metadata.json
│ ├── README-short.txt
│ └── README.md
├── golang
│ ├── content.md
│ ├── github-repo
│ ├── license.md
│ ├── logo.png
│ ├── maintainer.md
│ ├── metadata.json
│ ├── README-short.txt
│ ├── README.md
│ ├── variant-alpine.md
│ └── variant-tip.md
├── gradle
│ ├── content.md
│ ├── github-repo
│ ├── license.md
│ ├── logo.png
│ ├── maintainer.md
│ ├── metadata.json
│ ├── README-short.txt
│ └── README.md
├── groovy
│ ├── content.md
│ ├── github-repo
│ ├── license.md
│ ├── logo.png
│ ├── maintainer.md
│ ├── metadata.json
│ ├── README-short.txt
│ └── README.md
├── haproxy
│ ├── content.md
│ ├── github-repo
│ ├── license.md
│ ├── logo.png
│ ├── maintainer.md
│ ├── metadata.json
│ ├── README-short.txt
│ └── README.md
├── haskell
│ ├── content.md
│ ├── github-repo
│ ├── license.md
│ ├── logo.png
│ ├── maintainer.md
│ ├── metadata.json
│ ├── README-short.txt
│ ├── README.md
│ └── variant-slim.md
├── haxe
│ ├── content.md
│ ├── github-repo
│ ├── license.md
│ ├── logo.png
│ ├── maintainer.md
│ ├── metadata.json
│ ├── README-short.txt
│ └── README.md
├── hello-world
│ ├── content.md
│ ├── github-repo
│ ├── license.md
│ ├── logo.png
│ ├── maintainer.md
│ ├── metadata.json
│ ├── README-short.txt
│ ├── README.md
│ └── update.sh
├── hitch
│ ├── content.md
│ ├── github-repo
│ ├── license.md
│ ├── maintainer.md
│ ├── metadata.json
│ ├── README-short.txt
│ └── README.md
├── httpd
│ ├── content.md
│ ├── github-repo
│ ├── license.md
│ ├── logo.png
│ ├── maintainer.md
│ ├── metadata.json
│ ├── README-short.txt
│ └── README.md
├── hylang
│ ├── content.md
│ ├── github-repo
│ ├── license.md
│ ├── logo.png
│ ├── maintainer.md
│ ├── metadata.json
│ ├── README-short.txt
│ └── README.md
├── ibm-semeru-runtimes
│ ├── content.md
│ ├── github-repo
│ ├── issues.md
│ ├── license.md
│ ├── logo.svg
│ ├── maintainer.md
│ ├── metadata.json
│ ├── README-short.txt
│ └── README.md
├── ibmjava
│ ├── content.md
│ ├── get-help.md
│ ├── github-repo
│ ├── issues.md
│ ├── license.md
│ ├── maintainer.md
│ ├── metadata.json
│ ├── README-short.txt
│ └── README.md
├── influxdb
│ ├── content.md
│ ├── github-repo
│ ├── license.md
│ ├── logo.png
│ ├── maintainer.md
│ ├── metadata.json
│ ├── README-short.txt
│ ├── README.md
│ ├── variant-data.md
│ └── variant-meta.md
├── irssi
│ ├── content.md
│ ├── github-repo
│ ├── license.md
│ ├── logo.png
│ ├── maintainer.md
│ ├── metadata.json
│ ├── README-short.txt
│ └── README.md
├── jetty
│ ├── content.md
│ ├── github-repo
│ ├── license.md
│ ├── logo.png
│ ├── maintainer.md
│ ├── metadata.json
│ ├── README-short.txt
│ └── README.md
├── joomla
│ ├── compose.yaml
│ ├── content.md
│ ├── github-repo
│ ├── license.md
│ ├── logo.png
│ ├── maintainer.md
│ ├── metadata.json
│ ├── README-short.txt
│ └── README.md
├── jruby
│ ├── content.md
│ ├── github-repo
│ ├── license.md
│ ├── logo.png
│ ├── maintainer.md
│ ├── metadata.json
│ ├── README-short.txt
│ └── README.md
├── julia
│ ├── content.md
│ ├── github-repo
│ ├── license.md
│ ├── logo.png
│ ├── maintainer.md
│ ├── metadata.json
│ ├── README-short.txt
│ └── README.md
├── kapacitor
│ ├── content.md
│ ├── github-repo
│ ├── license.md
│ ├── logo.png
│ ├── maintainer.md
│ ├── metadata.json
│ ├── README-short.txt
│ └── README.md
├── kibana
│ ├── compose.yaml
│ ├── content.md
│ ├── get-help.md
│ ├── github-repo
│ ├── issues.md
│ ├── license.md
│ ├── logo.png
│ ├── maintainer.md
│ ├── metadata.json
│ ├── README-short.txt
│ └── README.md
├── kong
│ ├── content.md
│ ├── github-repo
│ ├── license.md
│ ├── logo.png
│ ├── maintainer.md
│ ├── metadata.json
│ ├── README-short.txt
│ └── README.md
├── krakend
│ ├── content.md
│ ├── get-help.md
│ ├── github-repo
│ ├── license.md
│ ├── logo-120.png
│ ├── logo.png
│ ├── maintainer.md
│ ├── metadata.json
│ ├── README-short.txt
│ └── README.md
├── LICENSE
├── lightstreamer
│ ├── content.md
│ ├── github-repo
│ ├── license.md
│ ├── logo.png
│ ├── maintainer.md
│ ├── metadata.json
│ ├── README-short.txt
│ └── README.md
├── liquibase
│ ├── content.md
│ ├── github-repo
│ ├── license.md
│ ├── logo.png
│ ├── maintainer.md
│ ├── metadata.json
│ ├── README-short.txt
│ └── README.md
├── logstash
│ ├── content.md
│ ├── get-help.md
│ ├── github-repo
│ ├── issues.md
│ ├── license.md
│ ├── logo.png
│ ├── maintainer.md
│ ├── metadata.json
│ ├── README-short.txt
│ ├── README.md
│ └── variant-alpine.md
├── mageia
│ ├── content.md
│ ├── github-repo
│ ├── license.md
│ ├── logo.png
│ ├── maintainer.md
│ ├── metadata.json
│ ├── README-short.txt
│ └── README.md
├── mariadb
│ ├── compose.yaml
│ ├── content.md
│ ├── get-help.md
│ ├── github-repo
│ ├── issues.md
│ ├── license.md
│ ├── logo.png
│ ├── maintainer.md
│ ├── metadata.json
│ ├── README-short.txt
│ └── README.md
├── markdownfmt.sh
├── matomo
│ ├── content.md
│ ├── github-repo
│ ├── license.md
│ ├── logo.png
│ ├── maintainer.md
│ ├── metadata.json
│ ├── README-short.txt
│ └── README.md
├── maven
│ ├── content.md
│ ├── github-repo
│ ├── license.md
│ ├── logo.png
│ ├── maintainer.md
│ ├── metadata.json
│ ├── README-short.txt
│ └── README.md
├── mediawiki
│ ├── compose.yaml
│ ├── content.md
│ ├── github-repo
│ ├── issues.md
│ ├── license.md
│ ├── logo.svg
│ ├── maintainer.md
│ ├── metadata.json
│ ├── README-short.txt
│ └── README.md
├── memcached
│ ├── content.md
│ ├── github-repo
│ ├── license.md
│ ├── maintainer.md
│ ├── metadata.json
│ ├── README-short.txt
│ └── README.md
├── metadata.json
├── metadata.sh
├── mongo
│ ├── compose.yaml
│ ├── content.md
│ ├── github-repo
│ ├── license.md
│ ├── maintainer.md
│ ├── metadata.json
│ ├── README-short.txt
│ └── README.md
├── mongo-express
│ ├── content.md
│ ├── github-repo
│ ├── license.md
│ ├── logo.png
│ ├── maintainer.md
│ ├── metadata.json
│ ├── README-short.txt
│ └── README.md
├── monica
│ ├── content.md
│ ├── github-repo
│ ├── license.md
│ ├── logo.svg
│ ├── maintainer.md
│ ├── metadata.json
│ ├── README-short.txt
│ └── README.md
├── mono
│ ├── content.md
│ ├── deprecated.md
│ ├── github-repo
│ ├── license.md
│ ├── logo.png
│ ├── maintainer.md
│ ├── metadata.json
│ ├── README-short.txt
│ └── README.md
├── mysql
│ ├── compose.yaml
│ ├── content.md
│ ├── github-repo
│ ├── license.md
│ ├── logo.png
│ ├── maintainer.md
│ ├── metadata.json
│ ├── README-short.txt
│ └── README.md
├── nats
│ ├── content.md
│ ├── github-repo
│ ├── license.md
│ ├── logo.png
│ ├── maintainer.md
│ ├── metadata.json
│ ├── README-short.txt
│ └── README.md
├── neo4j
│ ├── content.md
│ ├── get-help.md
│ ├── github-repo
│ ├── license.md
│ ├── logo.png
│ ├── maintainer.md
│ ├── metadata.json
│ ├── README-short.txt
│ └── README.md
├── neurodebian
│ ├── content.md
│ ├── github-repo
│ ├── license.md
│ ├── logo.png
│ ├── maintainer.md
│ ├── metadata.json
│ ├── README-short.txt
│ └── README.md
├── nextcloud
│ ├── content.md
│ ├── deprecated.md
│ ├── github-repo
│ ├── license.md
│ ├── maintainer.md
│ ├── metadata.json
│ ├── README-short.txt
│ └── README.md
├── nginx
│ ├── content.md
│ ├── github-repo
│ ├── license.md
│ ├── logo.png
│ ├── maintainer.md
│ ├── metadata.json
│ ├── README-short.txt
│ ├── README.md
│ └── variant-perl.md
├── node
│ ├── content.md
│ ├── github-repo
│ ├── license.md
│ ├── logo.png
│ ├── maintainer.md
│ ├── metadata.json
│ ├── README-short.txt
│ └── README.md
├── notary
│ ├── content.md
│ ├── github-repo
│ ├── license.md
│ ├── maintainer.md
│ ├── metadata.json
│ ├── README-short.txt
│ └── README.md
├── odoo
│ ├── content.md
│ ├── github-repo
│ ├── license.md
│ ├── logo.png
│ ├── maintainer.md
│ ├── metadata.json
│ ├── README-short.txt
│ └── README.md
├── open-liberty
│ ├── content.md
│ ├── get-help.md
│ ├── github-repo
│ ├── license.md
│ ├── logo.png
│ ├── maintainer.md
│ ├── metadata.json
│ ├── README-short.txt
│ └── README.md
├── openjdk
│ ├── content.md
│ ├── deprecated.md
│ ├── github-repo
│ ├── license.md
│ ├── logo.png
│ ├── maintainer.md
│ ├── metadata.json
│ ├── README-short.txt
│ ├── README.md
│ ├── variant-alpine.md
│ ├── variant-oracle.md
│ └── variant-slim.md
├── oraclelinux
│ ├── content.md
│ ├── get-help.md
│ ├── github-repo
│ ├── license.md
│ ├── logo.png
│ ├── maintainer.md
│ ├── metadata.json
│ ├── README-short.txt
│ ├── README.md
│ └── variant-slim.md
├── orientdb
│ ├── content.md
│ ├── github-repo
│ ├── license.md
│ ├── logo.png
│ ├── maintainer.md
│ ├── metadata.json
│ ├── README-short.txt
│ └── README.md
├── parallel-update.sh
├── percona
│ ├── compose.yaml
│ ├── content.md
│ ├── github-repo
│ ├── issues.md
│ ├── license.md
│ ├── logo.png
│ ├── maintainer.md
│ ├── metadata.json
│ ├── README-short.txt
│ └── README.md
├── perl
│ ├── content.md
│ ├── github-repo
│ ├── license.md
│ ├── logo.png
│ ├── maintainer.md
│ ├── metadata.json
│ ├── README-short.txt
│ └── README.md
├── photon
│ ├── content.md
│ ├── github-repo
│ ├── license.md
│ ├── logo.png
│ ├── maintainer.md
│ ├── metadata.json
│ ├── README-short.txt
│ └── README.md
├── php
│ ├── content.md
│ ├── github-repo
│ ├── license.md
│ ├── logo.png
│ ├── maintainer.md
│ ├── metadata.json
│ ├── README-short.txt
│ ├── README.md
│ ├── variant-apache.md
│ ├── variant-cli.md
│ ├── variant-fpm.md
│ └── variant.md
├── php-zendserver
│ ├── content.md
│ ├── deprecated.md
│ ├── github-repo
│ ├── issues.md
│ ├── license.md
│ ├── logo.png
│ ├── maintainer.md
│ ├── metadata.json
│ ├── README-short.txt
│ └── README.md
├── phpmyadmin
│ ├── compose.yaml
│ ├── content.md
│ ├── github-repo
│ ├── license.md
│ ├── logo.png
│ ├── maintainer.md
│ ├── metadata.json
│ ├── README-short.txt
│ └── README.md
├── plone
│ ├── content.md
│ ├── github-repo
│ ├── license.md
│ ├── logo.svg
│ ├── maintainer.md
│ ├── metadata.json
│ ├── README-short.txt
│ └── README.md
├── postfixadmin
│ ├── compose.yaml
│ ├── content.md
│ ├── github-repo
│ ├── license.md
│ ├── logo.png
│ ├── maintainer.md
│ ├── metadata.json
│ ├── README-short.txt
│ ├── README.md
│ ├── variant-apache.md
│ ├── variant-fpm-alpine.md
│ └── variant-fpm.md
├── postgres
│ ├── compose.yaml
│ ├── content.md
│ ├── github-repo
│ ├── license.md
│ ├── logo.png
│ ├── maintainer.md
│ ├── metadata.json
│ ├── README-short.txt
│ └── README.md
├── push.pl
├── push.sh
├── pypy
│ ├── content.md
│ ├── github-repo
│ ├── license.md
│ ├── logo.png
│ ├── maintainer.md
│ ├── metadata.json
│ ├── README-short.txt
│ └── README.md
├── python
│ ├── content.md
│ ├── github-repo
│ ├── license.md
│ ├── logo.png
│ ├── maintainer.md
│ ├── metadata.json
│ ├── README-short.txt
│ ├── README.md
│ └── variant-slim.md
├── r-base
│ ├── content.md
│ ├── github-repo
│ ├── issues.md
│ ├── license.md
│ ├── logo.png
│ ├── maintainer.md
│ ├── metadata.json
│ ├── README-short.txt
│ └── README.md
├── rabbitmq
│ ├── content.md
│ ├── github-repo
│ ├── license.md
│ ├── logo.png
│ ├── maintainer.md
│ ├── metadata.json
│ ├── README-short.txt
│ └── README.md
├── rakudo-star
│ ├── content.md
│ ├── github-repo
│ ├── license.md
│ ├── logo.png
│ ├── maintainer.md
│ ├── metadata.json
│ ├── README-short.txt
│ └── README.md
├── README.md
├── redis
│ ├── content.md
│ ├── github-repo
│ ├── license.md
│ ├── logo.png
│ ├── maintainer.md
│ ├── metadata.json
│ ├── README-short.txt
│ └── README.md
├── redmine
│ ├── compose.yaml
│ ├── content.md
│ ├── github-repo
│ ├── license.md
│ ├── logo.png
│ ├── maintainer.md
│ ├── metadata.json
│ ├── README-short.txt
│ └── README.md
├── registry
│ ├── content.md
│ ├── get-help.md
│ ├── github-repo
│ ├── license.md
│ ├── logo.png
│ ├── maintainer.md
│ ├── metadata.json
│ ├── README-short.txt
│ └── README.md
├── rethinkdb
│ ├── content.md
│ ├── github-repo
│ ├── license.md
│ ├── logo.png
│ ├── maintainer.md
│ ├── metadata.json
│ ├── README-short.txt
│ └── README.md
├── rocket.chat
│ ├── content.md
│ ├── github-repo
│ ├── license.md
│ ├── logo.svg
│ ├── maintainer.md
│ ├── metadata.json
│ ├── README-short.txt
│ └── README.md
├── rockylinux
│ ├── content.md
│ ├── github-repo
│ ├── issues.md
│ ├── license.md
│ ├── logo.png
│ ├── maintainer.md
│ ├── metadata.json
│ ├── README-short.txt
│ └── README.md
├── ros
│ ├── content.md
│ ├── github-repo
│ ├── license.md
│ ├── logo.png
│ ├── maintainer.md
│ ├── metadata.json
│ ├── README-short.txt
│ └── README.md
├── ruby
│ ├── content.md
│ ├── github-repo
│ ├── license.md
│ ├── logo.png
│ ├── maintainer.md
│ ├── metadata.json
│ ├── README-short.txt
│ └── README.md
├── rust
│ ├── content.md
│ ├── github-repo
│ ├── license.md
│ ├── logo.png
│ ├── maintainer.md
│ ├── metadata.json
│ ├── README-short.txt
│ └── README.md
├── sapmachine
│ ├── content.md
│ ├── get-help.md
│ ├── github-repo
│ ├── issues.md
│ ├── license.md
│ ├── logo.png
│ ├── maintainer.md
│ ├── metadata.json
│ ├── README-short.txt
│ └── README.md
├── satosa
│ ├── content.md
│ ├── get-help.md
│ ├── github-repo
│ ├── license.md
│ ├── logo.svg
│ ├── maintainer.md
│ ├── metadata.json
│ ├── README-short.txt
│ └── README.md
├── scratch
│ ├── metadata.json
│ ├── README-short.txt
│ └── README.md
├── silverpeas
│ ├── content.md
│ ├── get-help.md
│ ├── github-repo
│ ├── license.md
│ ├── logo.png
│ ├── maintainer.md
│ ├── metadata.json
│ ├── README-short.txt
│ └── README.md
├── solr
│ ├── content.md
│ ├── get-help.md
│ ├── github-repo
│ ├── issues.md
│ ├── license.md
│ ├── logo.png
│ ├── maintainer.md
│ ├── metadata.json
│ ├── README-short.txt
│ └── README.md
├── sonarqube
│ ├── content.md
│ ├── get-help.md
│ ├── github-repo
│ ├── license.md
│ ├── logo.png
│ ├── maintainer.md
│ ├── metadata.json
│ ├── README-short.txt
│ └── README.md
├── spark
│ ├── content.md
│ ├── get-help.md
│ ├── github-repo
│ ├── issues.md
│ ├── license.md
│ ├── logo.png
│ ├── maintainer.md
│ ├── metadata.json
│ ├── README-short.txt
│ └── README.md
├── spiped
│ ├── content.md
│ ├── github-repo
│ ├── license.md
│ ├── maintainer.md
│ ├── metadata.json
│ ├── README-short.txt
│ └── README.md
├── storm
│ ├── compose.yaml
│ ├── content.md
│ ├── get-help.md
│ ├── github-repo
│ ├── issues.md
│ ├── license.md
│ ├── logo.png
│ ├── maintainer.md
│ ├── metadata.json
│ ├── README-short.txt
│ └── README.md
├── swift
│ ├── content.md
│ ├── get-help.md
│ ├── github-repo
│ ├── issues.md
│ ├── license.md
│ ├── logo.png
│ ├── maintainer.md
│ ├── metadata.json
│ ├── README-short.txt
│ └── README.md
├── swipl
│ ├── content.md
│ ├── get-help.md
│ ├── github-repo
│ ├── license.md
│ ├── logo.png
│ ├── maintainer.md
│ ├── metadata.json
│ ├── README-short.txt
│ └── README.md
├── teamspeak
│ ├── compose.yaml
│ ├── content.md
│ ├── github-repo
│ ├── license.md
│ ├── logo.png
│ ├── maintainer.md
│ ├── metadata.json
│ ├── README-short.txt
│ └── README.md
├── telegraf
│ ├── content.md
│ ├── github-repo
│ ├── license.md
│ ├── logo.png
│ ├── maintainer.md
│ ├── metadata.json
│ ├── README-short.txt
│ └── README.md
├── tomcat
│ ├── content.md
│ ├── github-repo
│ ├── license.md
│ ├── logo.png
│ ├── maintainer.md
│ ├── metadata.json
│ ├── README-short.txt
│ └── README.md
├── tomee
│ ├── content.md
│ ├── github-repo
│ ├── license.md
│ ├── logo.png
│ ├── maintainer.md
│ ├── metadata.json
│ ├── README-short.txt
│ └── README.md
├── traefik
│ ├── content.md
│ ├── github-repo
│ ├── license.md
│ ├── logo.png
│ ├── maintainer.md
│ ├── metadata.json
│ ├── README-short.txt
│ ├── README.md
│ └── variant-alpine.md
├── ubuntu
│ ├── content.md
│ ├── github-repo
│ ├── issues.md
│ ├── license.md
│ ├── logo.png
│ ├── maintainer.md
│ ├── metadata.json
│ ├── README-short.txt
│ └── README.md
├── unit
│ ├── content.md
│ ├── get-help.md
│ ├── github-repo
│ ├── license.md
│ ├── logo.svg
│ ├── maintainer.md
│ ├── metadata.json
│ ├── README-short.txt
│ └── README.md
├── update.sh
├── varnish
│ ├── content.md
│ ├── github-repo
│ ├── license.md
│ ├── logo.png
│ ├── maintainer.md
│ ├── metadata.json
│ ├── README-short.txt
│ └── README.md
├── websphere-liberty
│ ├── content.md
│ ├── get-help.md
│ ├── github-repo
│ ├── license.md
│ ├── logo.png
│ ├── maintainer.md
│ ├── metadata.json
│ ├── README-short.txt
│ └── README.md
├── wordpress
│ ├── compose.yaml
│ ├── content.md
│ ├── github-repo
│ ├── license.md
│ ├── logo.png
│ ├── maintainer.md
│ ├── metadata.json
│ ├── README-short.txt
│ ├── README.md
│ ├── variant-cli.md
│ └── variant-fpm.md
├── xwiki
│ ├── content.md
│ ├── get-help.md
│ ├── github-repo
│ ├── issues.md
│ ├── license.md
│ ├── logo.png
│ ├── maintainer.md
│ ├── metadata.json
│ ├── README-short.txt
│ └── README.md
├── ymlfmt.sh
├── yourls
│ ├── compose.yaml
│ ├── content.md
│ ├── github-repo
│ ├── license.md
│ ├── logo.svg
│ ├── maintainer.md
│ ├── metadata.json
│ ├── README-short.txt
│ ├── README.md
│ └── variant-fpm.md
├── znc
│ ├── content.md
│ ├── github-repo
│ ├── license.md
│ ├── logo.png
│ ├── maintainer.md
│ ├── metadata.json
│ ├── README-short.txt
│ ├── README.md
│ └── variant-slim.md
└── zookeeper
├── compose.yaml
├── content.md
├── github-repo
├── license.md
├── logo.png
├── maintainer.md
├── metadata.json
├── README-short.txt
└── README.md
```
# Files
--------------------------------------------------------------------------------
/gazebo/content.md:
--------------------------------------------------------------------------------
```markdown
# What is [Gazebo](http://www.gazebosim.org/)?
Robot simulation is an essential tool in every roboticist's toolbox. A well-designed simulator makes it possible to rapidly test algorithms, design robots, and perform regression testing using realistic scenarios. Gazebo offers the ability to accurately and efficiently simulate populations of robots in complex indoor and outdoor environments. At your fingertips is a robust physics engine, high-quality graphics, and convenient programmatic interfaces. Best of all, Gazebo is free with a vibrant community.
> [wikipedia.org/wiki/Gazebo_simulator](https://en.wikipedia.org/wiki/Gazebo_simulator)
[%%LOGO%%](http://www.gazebosim.org/)
# How to use this image
## Create a `Dockerfile` in your Gazebo project
```dockerfile
FROM %%IMAGE%%:gzserver8
# place here your application's setup specifics
CMD [ "gzserver", "my-gazebo-app-args" ]
```
You can then build and run the Docker image:
```console
$ docker build -t my-gazebo-app .
$ docker run -it -v="/tmp/.gazebo/:/root/.gazebo/" --name my-running-app my-gazebo-app
```
## Deployment use cases
This dockerized image of Gazebo is intended to provide a simplified and consistent platform to build and deploy cloud based robotic simulations. Built from the [official Ubuntu image](https://hub.docker.com/_/ubuntu/) and Gazebo's official Debian packages, it includes recent supported releases for quick access and download. This provides roboticists in research and industry with an easy way to develop continuous integration and testing on training for autonomous actions and task planning, control dynamics and regions of stability, kinematic modeling and prototype characterization, localization and mapping algorithms, swarm behavior and networking, as well as general system integration and validation.
Conducting such complex simulations with high validity remains computationally demanding, and oftentimes outside the capacity of a modest local workstation. With the added complexity of the algorithms being benchmarked, we can soon exceed the capacity of even the most formidable servers. This is why a more distributed approach remains attractive for those who begin to encounter limitations of a centralized computing host. However, the added complication of building and maintaining a distributed testbed over a set of clusters has for a while required more time and effort than many smaller labs and businesses would have deemed appropriate to implement.
With the advancements and standardization of software containers, roboticists are primed to acquire a host of improved developer tooling for building and shipping software. To help alleviate the growing pains and technical challenges of adopting new practices, we have focused on providing an official resource for using Gazebo with these new technologies.
## Deployment suggestions
The `gzserver` tags are designed to have a small footprint and simple configuration, thus only include required Gazebo dependencies. The standard messaging port `11345` is exposed to allow for client connections and messages API.
### Volumes
Gazebo uses the `~/.gazebo/` directory for storing logs, models and scene info. If you wish to persist these files beyond the lifecycle of the containers which produced them, the `~/.gazebo/` folder can be mounted to an external volume on the host, or a derived image can specify volumes to be managed by the Docker engine. By default, the container runs as the `root` user, so `/root/.gazebo/` would be the full path to these files.
For example, if one wishes to use their own `.gazebo` folder that already resides in their local home directory, with a username of `ubuntu`, we can simple launch the container with an additional volume argument:
```console
$ docker run -v "/home/ubuntu/.gazebo/:/root/.gazebo/" %%IMAGE%%
```
One thing to be careful about is that gzserver logs to files named `/root/.gazebo/server-<port>/*.log`, where `<port>` is the port number that server is listening on (11345 by default). If you run and mount multiple containers using the same default port and same host side directory, then they will collide and attempt writing to the same file. If you want to run multiple gzservers on the same docker host, then a bit more clever volume mounting of `~/.gazebo/` subfolders would be required.
### Devices
As of Gazebo version 5.0, physics simulation under a headless instances of gzserver works fine. However some application may require image rendering camera views and ray traces for other sensor modalities. For Gazebo, this requires a running X server for rendering and capturing scenes. In addition, graphical hardware acceleration is also needed for reasonable realtime framerates. To this extent, mounting additional graphic devices into the container and linking to a running X server is required. In the interest of maintaining a general purpose and minimalistic image which is not tightly coupled to host system software and hardware, we do not include tags here with these additional requirements and instructions. You can however use this repo to build and customize your own images to fit your software/hardware configuration. The OSRF's Docker Hub organization profile contains a Gazebo repo at [osrf/gazebo](https://hub.docker.com/u/osrf/gazebo/) which is based on this repo but includes additional tags for these advanced use cases.
### Development
If you not only wish to run Gazebo, but develop for it too, i.e. compile custom plug-ins or build upon messaging interfaces for ROS, this will require the development package included in the `libgazebo` tag. If you simply need to run Gazebo as a headless server, then the `gzserver` tag consist of a smaller image size.
## Deployment example
In this short example, we'll spin up a new container running gazebo server, connect to it using a local gazebo client, then spawn a double inverted pendulum and record the simulation for later playback.
> First launch a gazebo server with a mounted volume for logging and name the container gazebo:
```console
$ docker run -d -v="/tmp/.gazebo/:/root/.gazebo/" --name=gazebo %%IMAGE%%
```
> Now open a new bash session in the container using the same entrypoint to configure the environment. Then download the double_pendulum model and load it into the simulation.
```console
$ docker exec -it %%IMAGE%% bash
$ apt-get update && apt-get install -y curl
$ curl -o double_pendulum.sdf http://models.gazebosim.org/double_pendulum_with_base/model-1_4.sdf
$ gz model --model-name double_pendulum --spawn-file double_pendulum.sdf
```
> To start recording the running simulation, simply use [`gz log`](http://www.gazebosim.org/tutorials?tut=log_filtering&cat=tools_utilities) to do so.
```console
$ gz log --record 1
```
> After a few seconds, go ahead and stop recording by disabling the same flag.
```console
$ gz log --record 0
```
> To introspect our logged recording, we can navigate to log directory and use `gz log` to open and examine the motion and joint state of the pendulum. This will allow you to step through the poses of the pendulum links.
```console
$ cd ~/.gazebo/log/*/gzserver/
$ gz log --step --hz 10 --filter *.pose/*.pose --file state.log
```
> If you have an equivalent release of Gazebo installed locally, you can connect to the gzserver inside the container using gzclient GUI by setting the address of the master URI to the containers public address.
```console
$ export GAZEBO_MASTER_IP=$(docker inspect --format '{{ .NetworkSettings.IPAddress }}' gazebo)
$ export GAZEBO_MASTER_URI=$GAZEBO_MASTER_IP:11345
$ gzclient --verbose
```
> In the rendered OpenGL view with gzclient you should see the moving double pendulum created prior still oscillating. From here you can control or monitor state of the simulation using the graphical interface, add more pendulums, reset the world, make more logs, etc. To quit the simulation, close the gzclient window and stop the container.
```console
$ docker stop gazebo
$ docker rm gazebo
```
> Even though our old gazebo container has been removed, we can still see that our record log has been preserved in the host volume directory.
```console
$ cd /tmp/.gazebo/log/
$ ls
```
> Again, if you have an equivalent release of Gazebo installed on your host system, you can play back the simulation with gazebo by using the recorded log file.
```console
$ export GAZEBO_MASTER_IP=127.0.0.1
$ export GAZEBO_MASTER_URI=$GAZEBO_MASTER_IP:11345
$ cd /tmp/.gazebo/log/*/gzserver/
$ gazebo --verbose --play state.log
```
# More Resources
[Gazebosim.org](http://www.gazebosim.org/): Main Gazebo website
[Answers](http://answers.gazebosim.org/): Find answers and ask questions
[Wiki](https://bitbucket.org/osrf/gazebo/wiki): General information and tutorials
[Mailing List](https://groups.google.com/a/osrfoundation.org/d/forum/gazebo): Join for news and announcements
[Simulation Models](https://bitbucket.org/osrf/gazebo_models/src): Robots, objects, and other simulation models
[Blog](http://wiki.gazebosim.org/blog.html): Stay up-to-date
[OSRF](http://www.osrfoundation.org/): Open Source Robotics Foundation
```
--------------------------------------------------------------------------------
/php/content.md:
--------------------------------------------------------------------------------
```markdown
# What is PHP?
PHP is a server-side scripting language designed for web development, but which can also be used as a general-purpose programming language. PHP can be added to straight HTML or it can be used with a variety of templating engines and web frameworks. PHP code is usually processed by an interpreter, which is either implemented as a native module on the web-server or as a common gateway interface (CGI).
> [wikipedia.org/wiki/PHP](https://en.wikipedia.org/wiki/PHP)
%%LOGO%%
# How to use this image
### Create a `Dockerfile` in your PHP project
```dockerfile
FROM %%IMAGE%%:8.2-cli
COPY . /usr/src/myapp
WORKDIR /usr/src/myapp
CMD [ "php", "./your-script.php" ]
```
Then, run the commands to build and run the Docker image:
```console
$ docker build -t my-php-app .
$ docker run -it --rm --name my-running-app my-php-app
```
### Run a single PHP script
For many simple, single file projects, you may find it inconvenient to write a complete `Dockerfile`. In such cases, you can run a PHP script by using the PHP Docker image directly:
```console
$ docker run -it --rm --name my-running-script -v "$PWD":/usr/src/myapp -w /usr/src/myapp %%IMAGE%%:8.2-cli php your-script.php
```
## How to install more PHP extensions
Many extensions are already compiled into the image, so it's worth checking the output of `php -m` or `php -i` before going through the effort of compiling more.
We provide the helper scripts `docker-php-ext-configure`, `docker-php-ext-install`, and `docker-php-ext-enable` to more easily install PHP extensions.
In order to keep the images smaller, PHP's source is kept in a compressed tar file. To facilitate linking of PHP's source with any extension, we also provide the helper script `docker-php-source` to easily extract the tar or delete the extracted source. Note: if you do use `docker-php-source` to extract the source, be sure to delete it in the same layer of the docker image.
```Dockerfile
FROM %%IMAGE%%:8.2-cli
RUN docker-php-source extract \
# do important things \
&& docker-php-source delete
```
### PHP Core Extensions
For example, if you want to have a PHP-FPM image with the `gd` extension, you can inherit the base image that you like, and write your own `Dockerfile` like this:
```dockerfile
FROM %%IMAGE%%:8.2-fpm
RUN apt-get update && apt-get install -y \
libfreetype-dev \
libjpeg62-turbo-dev \
libpng-dev \
&& docker-php-ext-configure gd --with-freetype --with-jpeg \
&& docker-php-ext-install -j$(nproc) gd
```
Remember, you must install dependencies for your extensions manually. If an extension needs custom `configure` arguments, you can use the `docker-php-ext-configure` script like this example. There is no need to run `docker-php-source` manually in this case, since that is handled by the `configure` and `install` scripts.
If you are having difficulty figuring out which Debian or Alpine packages need to be installed before `docker-php-ext-install`, then have a look at [the `install-php-extensions` project](https://github.com/mlocati/docker-php-extension-installer). This script builds upon the `docker-php-ext-*` scripts and simplifies the installation of PHP extensions by automatically adding and removing Debian (apt) and Alpine (apk) packages. For example, to install the GD extension you simply have to run `install-php-extensions gd`. This tool is contributed by community members and is not included in the images, please refer to their Git repository for installation, usage, and issues.
See also ["Dockerizing Compiled Software"](https://tianon.xyz/post/2017/12/26/dockerize-compiled-software.html) for a description of the technique Tianon uses for determining the necessary build-time dependencies for any bit of software (which applies directly to compiling PHP extensions).
### Default extensions
Some extensions are compiled by default. This depends on the PHP version you are using. Run `php -m` in the container to get a list for your specific version.
### PECL extensions
Some extensions are not provided with the PHP source, but are instead available through [PECL](https://pecl.php.net/). To install a PECL extension, use `pecl install` to download and compile it, then use `docker-php-ext-enable` to enable it:
```dockerfile
FROM %%IMAGE%%:8.2-cli
RUN pecl install redis-5.3.7 \
&& pecl install xdebug-3.2.1 \
&& docker-php-ext-enable redis xdebug
```
```dockerfile
FROM %%IMAGE%%:8.2-cli
RUN apt-get update && apt-get install -y libmemcached-dev libssl-dev zlib1g-dev \
&& pecl install memcached-3.2.0 \
&& docker-php-ext-enable memcached
```
It is *strongly* recommended that users use an explicit version number in their `pecl install` invocations to ensure proper PHP version compatibility (PECL does not check the PHP version compatibility when choosing a version of the extension to install, but does when trying to install it). Beyond the compatibility issue, it's also a good practice to ensure you know when your dependencies receive updates and can control those updates directly.
Unlike PHP core extensions, PECL extensions should be installed in series to fail properly if something went wrong. Otherwise errors are just skipped by PECL. For example, `pecl install memcached-3.2.0 && pecl install redis-5.3.7` instead of `pecl install memcached-3.2.0 redis-5.3.7`. However, `docker-php-ext-enable memcached redis` is fine to be all in one command.
### Other extensions
Some extensions are not provided via either Core or PECL; these can be installed too, although the process is less automated:
```dockerfile
FROM %%IMAGE%%:8.2-cli
RUN curl -fsSL '[url-to-custom-php-module]' -o module-name.tar.gz \
&& mkdir -p module-name \
&& sha256sum -c "[shasum-value] module-name.tar.gz" \
&& tar -xf module-name.tar.gz -C module-name --strip-components=1 \
&& rm module-name.tar.gz \
&& ( \
cd module-name \
&& phpize \
&& ./configure --enable-module-name \
&& make -j "$(nproc)" \
&& make install \
) \
&& rm -r module-name \
&& docker-php-ext-enable module-name
```
The `docker-php-ext-*` scripts *can* accept an arbitrary path, but it must be absolute (to disambiguate from built-in extension names), so the above example could also be written as the following:
```dockerfile
FROM %%IMAGE%%:8.2-cli
RUN curl -fsSL '[url-to-custom-php-module]' -o module-name.tar.gz \
&& mkdir -p /tmp/module-name \
&& sha256sum -c "[shasum-value] module-name.tar.gz" \
&& tar -xf module-name.tar.gz -C /tmp/module-name --strip-components=1 \
&& rm module-name.tar.gz \
&& docker-php-ext-configure /tmp/module-name --enable-module-name \
&& docker-php-ext-install /tmp/module-name \
&& rm -r /tmp/module-name
```
## Running as an arbitrary user
For running the Apache variants as an arbitrary user, there are a couple choices:
- If your kernel [is version 4.11 or newer](https://github.com/moby/moby/issues/8460#issuecomment-312459310), you can add `--sysctl net.ipv4.ip_unprivileged_port_start=0` (which [will be the default in a future version of Docker](https://github.com/moby/moby/pull/41030)) and then `--user` should work as it does for FPM.
- If you adjust the Apache configuration to use an "unprivileged" port (greater than 1024 by default), then `--user` should work as it does for FPM regardless of kernel version.
For running the FPM variants as an arbitrary user, the `--user` flag to `docker run` should be used (which can accept both a username/group in the container's `/etc/passwd` file like `--user daemon` or a specific UID/GID like `--user 1000:1000`).
## "`E: Package 'php-XXX' has no installation candidate`"
As of [docker-library/php#542](https://github.com/docker-library/php/pull/542), this image blocks the installation of Debian's PHP packages. There is some additional discussion of this change in [docker-library/php#551 (comment)](https://github.com/docker-library/php/issues/551#issuecomment-354849074), but the gist is that installing Debian's PHP packages in this image leads to two conflicting installations of PHP in a single image, which is almost certainly not the intended outcome.
For those broken by this change and looking for a workaround to apply in the meantime while a proper fix is developed, adding the following simple line to your `Dockerfile` should remove the block (**with the strong caveat that this will allow the installation of a second installation of PHP, which is definitely not what you're looking for unless you *really* know what you're doing**):
```dockerfile
RUN rm /etc/apt/preferences.d/no-debian-php
```
The *proper* solution to this error is to either use `FROM debian:XXX` and install Debian's PHP packages directly, or to use `docker-php-ext-install`, `pecl`, and/or `phpize` to install the necessary additional extensions and utilities.
## Configuration
This image ships with the default [`php.ini-development`](https://github.com/php/php-src/blob/master/php.ini-development) and [`php.ini-production`](https://github.com/php/php-src/blob/master/php.ini-production) configuration files.
It is *strongly* recommended to use the production config for images used in production environments!
The default config can be customized by copying configuration files into the `$PHP_INI_DIR/conf.d/` directory.
### Example
```dockerfile
FROM %%IMAGE%%:8.2-fpm-alpine
# Use the default production configuration
RUN mv "$PHP_INI_DIR/php.ini-production" "$PHP_INI_DIR/php.ini"
```
In many production environments, it is also recommended to (build and) enable the PHP core OPcache extension for performance. See [the upstream OPcache documentation](https://www.php.net/manual/en/book.opcache.php) for more details.
```
--------------------------------------------------------------------------------
/zookeeper/content.md:
--------------------------------------------------------------------------------
```markdown
# What is Apache Zookeeper?
Apache ZooKeeper is a software project of the Apache Software Foundation, providing an open source distributed configuration service, synchronization service, and naming registry for large distributed systems. ZooKeeper was a sub-project of Hadoop but is now a top-level project in its own right.
> [wikipedia.org/wiki/Apache_ZooKeeper](https://en.wikipedia.org/wiki/Apache_ZooKeeper)
%%LOGO%%
# How to use this image
## Start a Zookeeper server instance
```console
$ docker run --name some-zookeeper --restart always -d %%IMAGE%%
```
This image includes `EXPOSE 2181 2888 3888 8080` (the zookeeper client port, follower port, election port, AdminServer port respectively), so standard container linking will make it automatically available to the linked containers. Since the Zookeeper "fails fast" it's better to always restart it.
## Connect to Zookeeper from an application in another Docker container
```console
$ docker run --name some-app --link some-zookeeper:zookeeper -d application-that-uses-zookeeper
```
## Connect to Zookeeper from the Zookeeper command line client
```console
$ docker run -it --rm --link some-zookeeper:zookeeper %%IMAGE%% zkCli.sh -server zookeeper
```
## %%COMPOSE%%
This will start Zookeeper in [replicated mode](https://zookeeper.apache.org/doc/current/zookeeperStarted.html#sc_RunningReplicatedZooKeeper). Run `docker compose up` and wait for it to initialize completely. Ports `2181-2183` will be exposed.
> Please be aware that setting up multiple servers on a single machine will not create any redundancy. If something were to happen which caused the machine to die, all of the zookeeper servers would be offline. Full redundancy requires that each server have its own machine. It must be a completely separate physical server. Multiple virtual machines on the same physical host are still vulnerable to the complete failure of that host.
Consider using [Docker Swarm](https://www.docker.com/products/docker-swarm) when running Zookeeper in replicated mode.
## Configuration
Zookeeper configuration is located in `/conf`. One way to change it is mounting your config file as a volume:
```console
$ docker run --name some-zookeeper --restart always -d -v $(pwd)/zoo.cfg:/conf/zoo.cfg %%IMAGE%%
```
## Environment variables
ZooKeeper recommended defaults are used if `zoo.cfg` file is not provided. They can be overridden using the following environment variables.
```console
$ docker run -e "ZOO_INIT_LIMIT=10" --name some-zookeeper --restart always -d %%IMAGE%%
```
### `ZOO_TICK_TIME`
Defaults to `2000`. ZooKeeper's `tickTime`
> The length of a single tick, which is the basic time unit used by ZooKeeper, as measured in milliseconds. It is used to regulate heartbeats, and timeouts. For example, the minimum session timeout will be two ticks
### `ZOO_INIT_LIMIT`
Defaults to `5`. ZooKeeper's `initLimit`
> Amount of time, in ticks (see tickTime), to allow followers to connect and sync to a leader. Increased this value as needed, if the amount of data managed by ZooKeeper is large.
### `ZOO_SYNC_LIMIT`
Defaults to `2`. ZooKeeper's `syncLimit`
> Amount of time, in ticks (see tickTime), to allow followers to sync with ZooKeeper. If followers fall too far behind a leader, they will be dropped.
### `ZOO_MAX_CLIENT_CNXNS`
Defaults to `60`. ZooKeeper's `maxClientCnxns`
> Limits the number of concurrent connections (at the socket level) that a single client, identified by IP address, may make to a single member of the ZooKeeper ensemble.
### `ZOO_STANDALONE_ENABLED`
Defaults to `true`. Zookeeper's [`standaloneEnabled`](https://zookeeper.apache.org/doc/r3.5.7/zookeeperReconfig.html#sc_reconfig_standaloneEnabled)
> Prior to 3.5.0, one could run ZooKeeper in Standalone mode or in a Distributed mode. These are separate implementation stacks, and switching between them during run time is not possible. By default (for backward compatibility) standaloneEnabled is set to true. The consequence of using this default is that if started with a single server the ensemble will not be allowed to grow, and if started with more than one server it will not be allowed to shrink to contain fewer than two participants.
### `ZOO_ADMINSERVER_ENABLED`
Defaults to `true`. Zookeeper's [`admin.enableServer`](http://zookeeper.apache.org/doc/r3.5.7/zookeeperAdmin.html#sc_adminserver_config)
> The AdminServer is an embedded Jetty server that provides an HTTP interface to the four letter word commands. By default, the server is started on port 8080, and commands are issued by going to the URL "/commands/[command name]", e.g., http://localhost:8080/commands/stat.
### `ZOO_AUTOPURGE_PURGEINTERVAL`
Defaults to `0`. Zookeeper's [`autoPurge.purgeInterval`](https://zookeeper.apache.org/doc/current/zookeeperAdmin.html#sc_advancedConfiguration)
> The time interval in hours for which the purge task has to be triggered. Set to a positive integer (1 and above) to enable the auto purging. Defaults to 0.
### `ZOO_AUTOPURGE_SNAPRETAINCOUNT`
Defaults to `3`. Zookeeper's [`autoPurge.snapRetainCount`](https://zookeeper.apache.org/doc/current/zookeeperAdmin.html#sc_advancedConfiguration)
> When enabled, ZooKeeper auto purge feature retains the autopurge.snapRetainCount most recent snapshots and the corresponding transaction logs in the dataDir and dataLogDir respectively and deletes the rest. Defaults to 3. Minimum value is 3.
### `ZOO_4LW_COMMANDS_WHITELIST`
Defaults to `srvr`. Zookeeper's [`4lw.commands.whitelist`](https://zookeeper.apache.org/doc/current/zookeeperAdmin.html#sc_clusterOptions)
> A list of comma separated Four Letter Words commands that user wants to use. A valid Four Letter Words command must be put in this list else ZooKeeper server will not enable the command. By default the whitelist only contains "srvr" command which zkServer.sh uses. The rest of four letter word commands are disabled by default.
## Advanced configuration
### `ZOO_CFG_EXTRA`
Not every Zookeeper configuration setting is exposed via the environment variables listed above. These variables are only meant to cover minimum configuration keywords and some often changing options. If [mounting your custom config file](#configuration) as a volume doesn't work for you, consider using `ZOO_CFG_EXTRA` environment variable. You can add arbitrary configuration parameters to Zookeeper configuration file using this variable. The following example shows how to enable Prometheus metrics exporter on port `7070`:
```console
$ docker run --name some-zookeeper --restart always -e ZOO_CFG_EXTRA="metricsProvider.className=org.apache.zookeeper.metrics.prometheus.PrometheusMetricsProvider metricsProvider.httpPort=7070" %%IMAGE%%
```
### `JVMFLAGS`
Many of the Zookeeper advanced configuration options can be set there using Java system properties in the form of `-Dproperty=value`. For example, you can use Netty instead of NIO (default option) as a server communication framework:
```console
$ docker run --name some-zookeeper --restart always -e JVMFLAGS="-Dzookeeper.serverCnxnFactory=org.apache.zookeeper.server.NettyServerCnxnFactory" %%IMAGE%%
```
See [Advanced Configuration](https://zookeeper.apache.org/doc/current/zookeeperAdmin.html#sc_advancedConfiguration) for the full list of supported Java system properties.
Another example use case for the `JVMFLAGS` is setting a maximum JWM heap size of 1 GB:
```console
$ docker run --name some-zookeeper --restart always -e JVMFLAGS="-Xmx1024m" %%IMAGE%%
```
## Replicated mode
Environment variables below are mandatory if you want to run Zookeeper in replicated mode.
### `ZOO_MY_ID`
The id must be unique within the ensemble and should have a value between 1 and 255. Do note that this variable will not have any effect if you start the container with a `/data` directory that already contains the `myid` file.
### `ZOO_SERVERS`
This variable allows you to specify a list of machines of the Zookeeper ensemble. Each entry should be specified as such: `server.id=<address1>:<port1>:<port2>[:role];[<client port address>:]<client port>` [Zookeeper Dynamic Reconfiguration](https://zookeeper.apache.org/doc/r3.5.7/zookeeperReconfig.html). Entries are separated with space. Do note that this variable will not have any effect if you start the container with a `/conf` directory that already contains the `zoo.cfg` file.
## Where to store data
This image is configured with volumes at `/data` and `/datalog` to hold the Zookeeper in-memory database snapshots and the transaction log of updates to the database, respectively.
> Be careful where you put the transaction log. A dedicated transaction log device is key to consistent good performance. Putting the log on a busy device will adversely affect performance.
## How to configure logging
By default, ZooKeeper redirects stdout/stderr outputs to the console. Since 3.8 ZooKeeper is shipped with [LOGBack](https://logback.qos.ch/) as the logging backend. The ZooKeeper default `logback.xml` file resides in the `/conf` directory. To override default logging configuration mount your custom config as a volume:
```console
$ docker run --name some-zookeeper --restart always -d -v $(pwd)/logback.xml:/conf/logback.xml %%IMAGE%%
```
Check [ZooKeeper Logging](https://zookeeper.apache.org/doc/current/zookeeperAdmin.html#sc_logging) for more details.
### Logging in 3.7
You can redirect to a file located in `/logs` by passing environment variable `ZOO_LOG4J_PROP` as follows:
```console
$ docker run --name some-zookeeper --restart always -e ZOO_LOG4J_PROP="INFO,ROLLINGFILE" %%IMAGE%%
```
This will write logs to `/logs/zookeeper.log`. This image is configured with a volume at `/logs` for your convenience.
```
--------------------------------------------------------------------------------
/docker/content.md:
--------------------------------------------------------------------------------
```markdown
# What is Docker in Docker?
Although running Docker inside Docker is generally not recommended, there are some legitimate use cases, such as development of Docker itself.
*Docker is an open-source project that automates the deployment of applications inside software containers, by providing an additional layer of abstraction and automation of operating-system-level virtualization on Linux, Mac OS and Windows.*
> [wikipedia.org/wiki/Docker_(software)](https://en.wikipedia.org/wiki/Docker_%28software%29)
%%LOGO%%
Before running Docker-in-Docker, be sure to read through [Jérôme Petazzoni's excellent blog post on the subject](https://jpetazzo.github.io/2015/09/03/do-not-use-docker-in-docker-for-ci/), where he outlines some of the pros and cons of doing so (and some nasty gotchas you might run into).
If you are still convinced that you need Docker-in-Docker and not just access to a container's host Docker server, then read on.
# How to use this image
[](https://asciinema.org/a/378669)
## TLS
Starting in 18.09+, the `dind` variants of this image will automatically generate TLS certificates in the directory specified by the `DOCKER_TLS_CERTDIR` environment variable.
**Warning:** in 18.09, this behavior is disabled by default (for compatibility). If you use `--network=host`, shared network namespaces (as in Kubernetes pods), or otherwise have network access to the container (including containers started within the `dind` instance via their gateway interface), this is a potential security issue (which can lead to access to the host system, for example). It is recommended to enable TLS by setting the variable to an appropriate value (`-e DOCKER_TLS_CERTDIR=/certs` or similar). In 19.03+, this behavior is enabled by default.
When enabled, the Docker daemon will be started with `--host=tcp://0.0.0.0:2376 --tlsverify ...` (and when disabled, the Docker daemon will be started with `--host=tcp://0.0.0.0:2375`).
Inside the directory specified by `DOCKER_TLS_CERTDIR`, the entrypoint scripts will create/use three directories:
- `ca`: the certificate authority files (`cert.pem`, `key.pem`)
- `server`: the `dockerd` (daemon) certificate files (`cert.pem`, `ca.pem`, `key.pem`)
- `client`: the `docker` (client) certificate files (`cert.pem`, `ca.pem`, `key.pem`; suitable for `DOCKER_CERT_PATH`)
In order to make use of this functionality from a "client" container, at least the `client` subdirectory of the `$DOCKER_TLS_CERTDIR` directory needs to be shared (as illustrated in the following examples).
To disable this image behavior, simply override the container command or entrypoint to run `dockerd` directly (`... %%IMAGE%%:dind dockerd ...` or `... --entrypoint dockerd %%IMAGE%%:dind ...`).
## Start a daemon instance
```console
$ docker run --privileged --name some-docker -d \
--network some-network --network-alias docker \
-e DOCKER_TLS_CERTDIR=/certs \
-v some-docker-certs-ca:/certs/ca \
-v some-docker-certs-client:/certs/client \
%%IMAGE%%:dind
```
**Note:** `--privileged` is required for Docker-in-Docker to function properly, but it should be used with care as it provides full access to the host environment, as explained [in the relevant section of the Docker documentation](https://docs.docker.com/engine/reference/run/#runtime-privilege-and-linux-capabilities).
## Connect to it from a second container
```console
$ docker run --rm --network some-network \
-e DOCKER_TLS_CERTDIR=/certs \
-v some-docker-certs-client:/certs/client:ro \
%%IMAGE%%:latest version
Client: Docker Engine - Community
Version: 18.09.8
API version: 1.39
Go version: go1.10.8
Git commit: 0dd43dd87f
Built: Wed Jul 17 17:38:58 2019
OS/Arch: linux/amd64
Experimental: false
Server: Docker Engine - Community
Engine:
Version: 18.09.8
API version: 1.39 (minimum version 1.12)
Go version: go1.10.8
Git commit: 0dd43dd87f
Built: Wed Jul 17 17:48:49 2019
OS/Arch: linux/amd64
Experimental: false
```
```console
$ docker run -it --rm --network some-network \
-e DOCKER_TLS_CERTDIR=/certs \
-v some-docker-certs-client:/certs/client:ro \
%%IMAGE%%:latest sh
/ # docker version
Client: Docker Engine - Community
Version: 18.09.8
API version: 1.39
Go version: go1.10.8
Git commit: 0dd43dd87f
Built: Wed Jul 17 17:38:58 2019
OS/Arch: linux/amd64
Experimental: false
Server: Docker Engine - Community
Engine:
Version: 18.09.8
API version: 1.39 (minimum version 1.12)
Go version: go1.10.8
Git commit: 0dd43dd87f
Built: Wed Jul 17 17:48:49 2019
OS/Arch: linux/amd64
Experimental: false
```
```console
$ docker run --rm --network some-network \
-e DOCKER_TLS_CERTDIR=/certs \
-v some-docker-certs-client:/certs/client:ro \
%%IMAGE%%:latest info
Containers: 0
Running: 0
Paused: 0
Stopped: 0
Images: 0
Server Version: 18.09.8
Storage Driver: overlay2
Backing Filesystem: extfs
Supports d_type: true
Native Overlay Diff: true
Logging Driver: json-file
Cgroup Driver: cgroupfs
Plugins:
Volume: local
Network: bridge host macvlan null overlay
Log: awslogs fluentd gcplogs gelf journald json-file local logentries splunk syslog
Swarm: inactive
Runtimes: runc
Default Runtime: runc
Init Binary: docker-init
containerd version: 894b81a4b802e4eb2a91d1ce216b8817763c29fb
runc version: 425e105d5a03fabd737a126ad93d62a9eeede87f
init version: fec3683
Security Options:
apparmor
seccomp
Profile: default
Kernel Version: 4.19.0-5-amd64
Operating System: Alpine Linux v3.10 (containerized)
OSType: linux
Architecture: x86_64
CPUs: 12
Total Memory: 62.79GiB
Name: e174d61a4a12
ID: HJXG:3OT7:MGDL:Y2BL:WCYP:CKSP:CGAM:4BLH:NEI4:IURF:4COF:AH6N
Docker Root Dir: /var/lib/docker
Debug Mode (client): false
Debug Mode (server): false
Registry: https://index.docker.io/v1/
Labels:
Experimental: false
Insecure Registries:
127.0.0.0/8
Live Restore Enabled: false
Product License: Community Engine
WARNING: bridge-nf-call-iptables is disabled
WARNING: bridge-nf-call-ip6tables is disabled
```
```console
$ docker run --rm -v /var/run/docker.sock:/var/run/docker.sock %%IMAGE%%:latest version
Client: Docker Engine - Community
Version: 18.09.8
API version: 1.39
Go version: go1.10.8
Git commit: 0dd43dd87f
Built: Wed Jul 17 17:38:58 2019
OS/Arch: linux/amd64
Experimental: false
Server: Docker Engine - Community
Engine:
Version: 18.09.7
API version: 1.39 (minimum version 1.12)
Go version: go1.10.8
Git commit: 2d0083d
Built: Thu Jun 27 17:23:02 2019
OS/Arch: linux/amd64
Experimental: false
```
## Custom daemon flags
```console
$ docker run --privileged --name some-docker -d \
--network some-network --network-alias docker \
-e DOCKER_TLS_CERTDIR=/certs \
-v some-docker-certs-ca:/certs/ca \
-v some-docker-certs-client:/certs/client \
%%IMAGE%%:dind --storage-driver overlay2
```
## Runtime Settings Considerations
Inspired by the [official systemd `docker.service` configuration](https://github.com/docker/docker-ce-packaging/blob/57ae892b13de399171fc33f878b70e72855747e6/systemd/docker.service#L30-L45), you may want to consider different values for the following runtime configuration options, especially for production Docker instances:
```console
$ docker run --privileged --name some-docker -d \
... \
--ulimit nofile=-1 \
--ulimit nproc=-1 \
--ulimit core=-1 \
--pids-limit -1 \
--oom-score-adj -500 \
%%IMAGE%%:dind
```
Some of these will not be supported based on the settings on the host's `dockerd`, such as `--ulimit nofile=-1`, giving errors that look like `error setting rlimit type 7: operation not permitted`, and some may inherit sane values from the host `dockerd` instance or may not apply for your usage of Docker-in-Docker (for example, you likely want to set `--oom-score-adj` to a value that's higher than `dockerd` on the host so that your Docker-in-Docker instance is killed before the host Docker instance is).
## Where to Store Data
Important note: There are several ways to store data used by applications that run in Docker containers. We encourage users of the `%%REPO%%` images to familiarize themselves with the options available, including:
- Let Docker manage the storage of your data [by writing to disk on the host system using its own internal volume management](https://docs.docker.com/storage/volumes/). This is the default and is easy and fairly transparent to the user. The downside is that the files may be hard to locate for tools and applications that run directly on the host system, i.e. outside containers.
- Create a data directory on the host system (outside the container) and [mount this to a directory visible from inside the container](https://docs.docker.com/storage/bind-mounts/). This places the files in a known location on the host system, and makes it easy for tools and applications on the host system to access the files. The downside is that the user needs to make sure that the directory exists, and that e.g. directory permissions and other security mechanisms on the host system are set up correctly.
The Docker documentation is a good starting point for understanding the different storage options and variations, and there are multiple blogs and forum postings that discuss and give advice in this area. We will simply show the basic procedure here for the latter option above:
1. Create a data directory on a suitable volume on your host system, e.g. `/my/own/var-lib-docker`.
2. Start your `%%REPO%%` container like this:
```console
$ docker run --privileged --name some-docker -v /my/own/var-lib-docker:/var/lib/docker -d %%IMAGE%%:dind
```
The `-v /my/own/var-lib-docker:/var/lib/docker` part of the command mounts the `/my/own/var-lib-docker` directory from the underlying host system as `/var/lib/docker` inside the container, where Docker by default will write its data files.
```
--------------------------------------------------------------------------------
/cassandra/content.md:
--------------------------------------------------------------------------------
```markdown
# What is Cassandra?
Apache Cassandra is an open source distributed database management system designed to handle large amounts of data across many commodity servers, providing high availability with no single point of failure. Cassandra offers robust support for clusters spanning multiple datacenters, with asynchronous masterless replication allowing low latency operations for all clients.
> [wikipedia.org/wiki/Apache_Cassandra](https://en.wikipedia.org/wiki/Apache_Cassandra)
%%LOGO%%
# How to use this image
## Start a `%%REPO%%` server instance
Starting a Cassandra instance is simple:
```console
$ docker run --name some-%%REPO%% --network some-network -d %%IMAGE%%:tag
```
... where `some-%%REPO%%` is the name you want to assign to your container and `tag` is the tag specifying the Cassandra version you want. See the list above for relevant tags.
## Make a cluster
Using the environment variables documented below, there are two cluster scenarios: instances on the same machine and instances on separate machines. For the same machine, start the instance as described above. To start other instances, just tell each new node where the first is.
```console
$ docker run --name some-%%REPO%%2 -d --network some-network -e CASSANDRA_SEEDS=some-%%REPO%% %%IMAGE%%:tag
```
For separate machines (ie, two VMs on a cloud provider), you need to tell Cassandra what IP address to advertise to the other nodes (since the address of the container is behind the docker bridge).
Assuming the first machine's IP address is `10.42.42.42` and the second's is `10.43.43.43`, start the first with exposed gossip port:
```console
$ docker run --name some-%%REPO%% -d -e CASSANDRA_BROADCAST_ADDRESS=10.42.42.42 -p 7000:7000 %%IMAGE%%:tag
```
Then start a Cassandra container on the second machine, with the exposed gossip port and seed pointing to the first machine:
```console
$ docker run --name some-%%REPO%% -d -e CASSANDRA_BROADCAST_ADDRESS=10.43.43.43 -p 7000:7000 -e CASSANDRA_SEEDS=10.42.42.42 %%IMAGE%%:tag
```
## Connect to Cassandra from `cqlsh`
The following command starts another Cassandra container instance and runs `cqlsh` (Cassandra Query Language Shell) against your original Cassandra container, allowing you to execute CQL statements against your database instance:
```console
$ docker run -it --network some-network --rm %%IMAGE%% cqlsh some-%%REPO%%
```
More information about the CQL can be found in the [Cassandra documentation](https://cassandra.apache.org/doc/latest/cql/index.html).
## Container shell access and viewing Cassandra logs
The `docker exec` command allows you to run commands inside a Docker container. The following command line will give you a bash shell inside your `%%REPO%%` container:
```console
$ docker exec -it some-%%REPO%% bash
```
The Cassandra Server log is available through Docker's container log:
```console
$ docker logs some-%%REPO%%
```
## Configuring Cassandra
The best way to provide configuration to the `%%REPO%%` image is to provide a custom `/etc/cassandra/cassandra.yaml` file. There are many ways to provide this file to the container (via short `Dockerfile` with `FROM` + `COPY`, via [Docker Configs](https://docs.docker.com/engine/swarm/configs/), via runtime bind-mount, etc), the details of which are left as an exercise for the reader.
To use a different file name (for example, to avoid all image-provided configuration behavior), use `-Dcassandra.config=/path/to/cassandra.yaml` as an argument to the image (as in, `docker run ... %%IMAGE%% -Dcassandra.config=/path/to/cassandra.yaml`).
There are a small number of environment variables supported by the image which will modify `/etc/cassandra/cassandra.yaml` in some way (but the script is modifying YAML, so is naturally fragile):
- `CASSANDRA_LISTEN_ADDRESS`: This variable is for controlling which IP address to listen for incoming connections on. The default value is `auto`, which will set the [`listen_address`](http://docs.datastax.com/en/cassandra/3.0/cassandra/configuration/configCassandra_yaml.html?scroll=configCassandra_yaml__listen_address) option in `cassandra.yaml` to the IP address of the container as it starts. This default should work in most use cases.
- `CASSANDRA_BROADCAST_ADDRESS`: This variable is for controlling which IP address to advertise to other nodes. The default value is the value of `CASSANDRA_LISTEN_ADDRESS`. It will set the [`broadcast_address`](http://docs.datastax.com/en/cassandra/3.0/cassandra/configuration/configCassandra_yaml.html?scroll=configCassandra_yaml__broadcast_address) and [`broadcast_rpc_address`](http://docs.datastax.com/en/cassandra/3.0/cassandra/configuration/configCassandra_yaml.html?scroll=configCassandra_yaml__broadcast_rpc_address) options in `cassandra.yaml`.
- `CASSANDRA_RPC_ADDRESS`: This variable is for controlling which address to bind the thrift rpc server to. If you do not specify an address, the wildcard address (`0.0.0.0`) will be used. It will set the [`rpc_address`](http://docs.datastax.com/en/cassandra/3.0/cassandra/configuration/configCassandra_yaml.html?scroll=configCassandra_yaml__rpc_address) option in `cassandra.yaml`.
- `CASSANDRA_START_RPC`: This variable is for controlling if the thrift rpc server is started. It will set the [`start_rpc`](http://docs.datastax.com/en/cassandra/3.0/cassandra/configuration/configCassandra_yaml.html?scroll=configCassandra_yaml__start_rpc) option in `cassandra.yaml`.
- `CASSANDRA_SEEDS`: This variable is the comma-separated list of IP addresses used by gossip for bootstrapping new nodes joining a cluster. It will set the `seeds` value of the [`seed_provider`](http://docs.datastax.com/en/cassandra/3.0/cassandra/configuration/configCassandra_yaml.html?scroll=configCassandra_yaml__seed_provider) option in `cassandra.yaml`. The `CASSANDRA_BROADCAST_ADDRESS` will be added the seeds passed in so that the server will talk to itself as well.
- `CASSANDRA_CLUSTER_NAME`: This variable sets the name of the cluster and must be the same for all nodes in the cluster. It will set the [`cluster_name`](http://docs.datastax.com/en/cassandra/3.0/cassandra/configuration/configCassandra_yaml.html?scroll=configCassandra_yaml__cluster_name) option of `cassandra.yaml`.
- `CASSANDRA_NUM_TOKENS`: This variable sets number of tokens for this node. It will set the [`num_tokens`](http://docs.datastax.com/en/cassandra/3.0/cassandra/configuration/configCassandra_yaml.html?scroll=configCassandra_yaml__num_tokens) option of `cassandra.yaml`.
- `CASSANDRA_DC`: This variable sets the datacenter name of this node. It will set the [`dc`](http://docs.datastax.com/en/cassandra/3.0/cassandra/architecture/archsnitchGossipPF.html) option of `cassandra-rackdc.properties`. You must set `CASSANDRA_ENDPOINT_SNITCH` to use the ["GossipingPropertyFileSnitch"](https://docs.datastax.com/en/cassandra/3.0/cassandra/architecture/archsnitchGossipPF.html) in order for Cassandra to apply `cassandra-rackdc.properties`, otherwise this variable will have no effect.
- `CASSANDRA_RACK`: This variable sets the rack name of this node. It will set the [`rack`](http://docs.datastax.com/en/cassandra/3.0/cassandra/architecture/archsnitchGossipPF.html) option of `cassandra-rackdc.properties`. You must set `CASSANDRA_ENDPOINT_SNITCH` to use the ["GossipingPropertyFileSnitch"](https://docs.datastax.com/en/cassandra/3.0/cassandra/architecture/archsnitchGossipPF.html) in order for Cassandra to apply `cassandra-rackdc.properties`, otherwise this variable will have no effect.
- `CASSANDRA_ENDPOINT_SNITCH`: This variable sets the snitch implementation this node will use. It will set the [`endpoint_snitch`](http://docs.datastax.com/en/cassandra/3.0/cassandra/configuration/configCassandra_yaml.html?scroll=configCassandra_yaml__endpoint_snitch) option of `cassandra.yml`.
# Caveats
## Where to Store Data
Important note: There are several ways to store data used by applications that run in Docker containers. We encourage users of the `%%REPO%%` images to familiarize themselves with the options available, including:
- Let Docker manage the storage of your database data [by writing the database files to disk on the host system using its own internal volume management](https://docs.docker.com/storage/volumes/). This is the default and is easy and fairly transparent to the user. The downside is that the files may be hard to locate for tools and applications that run directly on the host system, i.e. outside containers.
- Create a data directory on the host system (outside the container) and [mount this to a directory visible from inside the container](https://docs.docker.com/storage/bind-mounts/). This places the database files in a known location on the host system, and makes it easy for tools and applications on the host system to access the files. The downside is that the user needs to make sure that the directory exists, and that e.g. directory permissions and other security mechanisms on the host system are set up correctly.
The Docker documentation is a good starting point for understanding the different storage options and variations, and there are multiple blogs and forum postings that discuss and give advice in this area. We will simply show the basic procedure here for the latter option above:
1. Create a data directory on a suitable volume on your host system, e.g. `/my/own/datadir`.
2. Start your `%%REPO%%` container like this:
```console
$ docker run --name some-%%REPO%% -v /my/own/datadir:/var/lib/cassandra -d %%IMAGE%%:tag
```
The `-v /my/own/datadir:/var/lib/cassandra` part of the command mounts the `/my/own/datadir` directory from the underlying host system as `/var/lib/cassandra` inside the container, where Cassandra by default will write its data files.
## No connections until Cassandra init completes
If there is no database initialized when the container starts, then a default database will be created. While this is the expected behavior, this means that it will not accept incoming connections until such initialization completes. This may cause issues when using automation tools, such as Docker Compose, which start several containers simultaneously.
```
--------------------------------------------------------------------------------
/geonetwork/content.md:
--------------------------------------------------------------------------------
```markdown
# What is GeoNetwork?
GeoNetwork is a catalog application to **manage spatially referenced resources**. It provides powerful **metadata editing** and **search** functions as well as an interactive **web map viewer**.
The GeoNetwork project started out in year 2001 as a Spatial Data Catalogue System for the Food and Agriculture organisation of the United Nations (FAO), the United Nations World Food Programme (WFP) and the United Nations Environmental Programme (UNEP).
At present the project is widely used as the basis of **Spatial Data Infrastructures** all around the world.
GeoNetwork has been developed to connect spatial information communities and their data using a modern architecture, which is at the same time powerful and low cost, based on the principles of Free and Open Source Software (FOSS) and International and Open Standards for services and protocols (e.g.: ISO/TC211, OGC).
The project is part of the Open Source Geospatial Foundation ( [OSGeo](http://www.osgeo.org/) ) and can be found at [GeoNetwork opensource](http://www.geonetwork-opensource.org). GeoNetwork has been developed to connect spatial information communities and their data using a modern architecture, which is at the same time powerful and low cost.
%%LOGO%%
## How to use this image
GeoNetwork 4 uses an Elasticsearch server to store the index of the documents it manages so **it can't be run without configuring the URL of the Elasticsearch server**.
This is a quick example of how to get GeoNetwork 4.4 Latest up and running for demo purposes. This configuration doesn't keep the data if containers are removed.
```console
docker pull elasticsearch:7.17.15
docker pull %%IMAGE%%:4
docker network create gn-network
docker run -d --name my-es-host --network gn-network -e "discovery.type=single-node" elasticsearch:7.17.15
docker run --name %%REPO%%-host --network gn-network -e GN_CONFIG_PROPERTIES="-Des.host=my-es-host -Des.protocol=http -Des.port=9200 -Des.url=http://my-es-host:9200" -p 8080:8080 %%IMAGE%%:4
```
For GeoNetwork 4.2 Stable:
```console
docker pull elasticsearch:7.17.15
docker pull %%IMAGE%%:4.2
docker network create gn-network
docker run -d --name my-es-host --network gn-network -e "discovery.type=single-node" elasticsearch:7.17.15
docker run --name %%REPO%%-host --network gn-network -e ES_HOST=my-es-host -e ES_PROTOCOL=http -e ES_PORT=9200 -p 8080:8080 %%IMAGE%%:4.2
```
To be sure about what Elasticsearch version to use you can check the [GeoNetwork documentation](https://docs.geonetwork-opensource.org/4.4/install-guide/installing-index/) for your GN version or the `es.version` property in the [`pom.xml`](https://github.com/geonetwork/core-geonetwork/blob/main/pom.xml#L1528C17-L1528C24) file of the GeoNetwork release used.
### Default credentials
After installation, use the default credentials: **`admin`** (username) and **`admin`** (password). It is recommended to update the default password after installation.
### Elasticsearch configuration
#### Java properties (version 4.4.0 and newer)
Since GeoNetwork 4.4.0, use Java properties passed in the `GN_CONFIG_PROPERTIES` environment variable for Elasticsearch connection configuration:
- `es.host`: *optional* (default `localhost`): The host name of the Elasticsearch server.
- `es.port` *optional* (default `9200`): The port where Elasticsearch server is listening to.
- `es.protocol` *optional* (default `http`): The protocol used to talk to Elasticsearch. Can be `http` or `https`.
- `es.url`: **mandatory if host, port or protocol aren't the default values** (default `http://localhost:9200`): Full URL of the Elasticsearch server.
- `es.index.records` *optional* (default `gn_records`): In case you have more than GeoNetwork instance using the same Elasticsearch cluster each one needs to use a different index name. Use this variable to define the name of the index used by each GeoNetwork.
- `es.username` *optional* (default empty): username used to connect to Elasticsearch.
- `es.password` *optional* (default empty): password used to connect to Elasticsearch.
- `kb.url` *optional* (default `http://localhost:5601`): The URL where Kibana is listening.
Example Docker Compose YAML snippet:
```yaml
services:
%%REPO%%:
image: %%IMAGE%%:4.4
environment:
GN_CONFIG_PROPERTIES: >-
-Des.host=elasticsearch
-Des.protocol=http
-Des.port=9200
-Des.url=http://elasticsearch:9200
-Des.username=my_es_username
-Des.password=my_es_password
-Dkb.url=http://kibana:5601
```
#### Environment variables (version 4.2 and older)
For versions older than 4.4.0, configure Elasticsearch using environment variables:
- `ES_HOST` **mandatory**: The host name of the Elasticsearch server.
- `ES_PORT` *optional* (default `9200`): The port where Elasticsearch server is listening to.
- `ES_PROTOCOL` *optional* (default `http`): The protocol used to talk to Elasticsearch. Can be `http` or `https`.
- `ES_INDEX_RECORDS` *optional* (default `gn_records`): In case you have more than GeoNetwork instance using the same Elasticsearch cluster each one needs to use a different index name. Use this variable to define the name of the index used by each GeoNetwork.
- `ES_USERNAME` *optional* (default empty): username used to connect to Elasticsearch.
- `ES_PASSWORD` *optional* (default empty): password used to connect to Elasticsearch.
- `KB_URL` *Optional* (default `http://localhost:5601`): The URL where Kibana is listening.
### Database configuration
By default GeoNetwork uses a local **H2 database** for demo use (this one is **not recommended for production**). The image contains JDBC drivers for PostgreSQL and MySQL. To configure the database connection use these environment variables:
- `GEONETWORK_DB_TYPE`: The type of database to use. Valid values are `postgres`, `postgres-postgis`, `mysql`. The image can be extended including other drivers and these other types could be used too: `db2`, `h2`, `oracle`, `sqlserver`. The JAR drivers for these other databases would need to be added to `/opt/geonetwork/WEB-INF/lib` mounting them as binds or extending the official image.
- `GEONETWORK_DB_HOST`: The database host name.
- `GEONETWORK_DB_PORT`: The database port.
- `GEONETWORK_DB_NAME`: The database name.
- `GEONETWORK_DB_USERNAME`: The username used to connect to the database.
- `GEONETWORK_DB_PASSWORD`: The password used to connect to the database.
- `GEONETWORK_DB_CONNECTION_PROPERTIES`: Additional properties to be added to the connection string, for example `search_path=test,public&ssl=true` will produce a JDBC connection string like `jdbc:postgresql://localhost:5432/postgres?search_path=test,public&ssl=true`
### Start GeoNetwork
This command will start a debian-based container, running a Tomcat (GN 3) or Jetty (GN 4) web server, with a GeoNetwork WAR deployed on the server:
```console
docker run --name some-%%REPO%% -d %%IMAGE%%
```
### Publish port
GeoNetwork listens on port `8080`. If you want to access the container at the host, **you must publish this port**. For instance, this, will redirect all the container traffic on port 8080, to the same port on the host:
```console
docker run --name some-%%REPO%% -d -p 8080:8080 %%IMAGE%%
```
Then, if you are running docker on Linux, you may access geonetwork at http://localhost:8080/geonetwork.
### Set the data directory and H2 db file
The data directory is the location on the file system where the catalog stores much of its custom configuration and uploaded files. It is also where it stores a number of support files, used for various purposes (e.g.: spatial index, thumbnails). The default variant also uses a local H2 database to store the metadata catalog itself.
By default, GeoNetwork sets the data directory on `/opt/geonetwork/WEB-INF/data` and H2 database file to the Jetty dir `/var/lib/jetty/gn.h2.db` (since GN 4.0.0) or Tomcat `/usr/local/tomcat/gn.h2.db` (for GN 3), but you may override these values by injecting environment variables into the container: - `-e DATA_DIR=...` (defaults to `/opt/geonetwork/WEB-INF/data`) and `-e GEONETWORK_DB_NAME=...` (defaults to `gn` which sets up database `gn.h2.db` in tomcat bin dir `/usr/local/tomcat`). Note that setting the database location via `GEONETWORK_DB_NAME` only works from version 3.10.3 onwards.
Since version 4.4.0 the data directory needs to be configued using Java properties passed in the `GN_CONFIG_PROPERTIES` environment variable. For example:
```console
docker run --name some-%%REPO%% -d -p 8080:8080 -e GN_CONFIG_PROPERTIES="-Dgeonetwork.dir=/catalogue-data" -e GEONETWORK_DB_NAME=/catalogue-data/db/gn %%IMAGE%%
```
### Persisting data
To set the data directory to `/catalogue-data/data` and H2 database file to `/catalogue-data/db/gn.h2.db` so they both persist through restarts:
- GeoNetwork 4.2 and older
```console
docker run --name some-%%REPO%% -d -p 8080:8080 -e DATA_DIR=/catalogue-data/data -e GEONETWORK_DB_NAME=/catalogue-data/db/gn %%IMAGE%%:3
```
- Since GeoNetwork 4.4.0
```console
docker run --name some-%%REPO%% -d -p 8080:8080 -e GN_CONFIG_PROPERTIES="-Dgeonetwork.dir=/catalogue-data" -e GEONETWORK_DB_NAME=/catalogue-data/db/gn %%IMAGE%%
```
If you want the data directory to live beyond restarts, or even destruction of the container, you can mount a directory from the docker engine's host into the container. - `-v /host/path:/path/to/data/directory`. For instance this, will mount the host directory `/host/%%REPO%%-docker` into `/catalogue-data` on the container:
- GeoNetwork 4.2 and older
```console
docker run --name some-%%REPO%% -d -p 8080:8080 -e DATA_DIR=/catalogue-data/data -e GEONETWORK_DB_NAME=/catalogue-data/db/gn -v /host/%%REPO%%-docker:/catalogue-data %%IMAGE%%:3
```
- GeoNetwork 4.4.0 and newer
```console
docker run --name some-%%REPO%% -d -p 8080:8080 -e GN_CONFIG_PROPERTIES="-Dgeonetwork.dir=/catalogue-data" -e GEONETWORK_DB_NAME=/catalogue-data/db/gn -v /host/%%REPO%%-docker:/catalogue-data %%IMAGE%%
```
### %%COMPOSE%%
Run `docker compose up`, wait for it to initialize completely, and visit `http://localhost:8080/geonetwork` or `http://host-ip:8080/geonetwork` (as appropriate).
### Default credentials
After installation a default user with name `admin` and password `admin` is created. Use this credentials to start with. It is recommended to update the default password after installation.
```
--------------------------------------------------------------------------------
/couchdb/content.md:
--------------------------------------------------------------------------------
```markdown
# What is Apache CouchDB?
Apache CouchDB™ lets you access your data where you need it by defining the Couch Replication Protocol that is implemented by a variety of projects and products that span every imaginable computing environment from globally distributed server-clusters, over mobile phones to web browsers. Software that is compatible with the Couch Replication Protocol include PouchDB and Cloudant.
Store your data safely, on your own servers, or with any leading cloud provider. Your web- and native applications love CouchDB, because it speaks JSON natively and supports binary for all your data storage needs. The Couch Replication Protocol lets your data flow seamlessly between server clusters to mobile phones and web browsers, enabling a compelling, offline-first user-experience while maintaining high performance and strong reliability. CouchDB comes with a developer-friendly query language, and optionally MapReduce for simple, efficient, and comprehensive data retrieval.
> [couchdb.apache.org](https://couchdb.apache.org)
%%LOGO%%
# How to use this image
## Start a CouchDB instance
Starting a CouchDB instance is simple:
```console
$ docker run -d --name my-couchdb %%IMAGE%%:tag
```
where `my-couchdb` is the name you want to assign to your container, and `tag` is the tag specifying the CouchDB version you want. See the list above for relevant tags.
## Connect to CouchDB from an application in another Docker container
This image exposes the standard CouchDB port `5984`, so standard container linking will make it automatically available to the linked containers. Start your application container like this in order to link it to the Cassandra container:
```console
$ docker run --name my-couchdb-app --link my-%%REPO%%:%%REPO%% -d app-that-uses-couchdb
```
## Exposing CouchDB to the outside world
If you want to expose the port to the outside world, run
```console
$ docker run -p 5984:5984 -d %%IMAGE%%
```
*WARNING*: Do not do this until you have established an admin user and setup permissions correctly on any databases you have created.
If you intend to network this CouchDB instance with others in a cluster, you will need to map additional ports; see the [official CouchDB documentation](http://docs.couchdb.org/en/stable/setup/cluster.html) for details.
## Make a cluster
Start your multiple CouchDB instances, then follow the Setup Wizard in the [official CouchDB documentation](http://docs.couchdb.org/en/stable/setup/cluster.html) to complete the process.
For a CouchDB cluster you need to provide the `NODENAME` setting as well as the erlang cookie. Settings to Erlang can be made with the environment variable `ERL_FLAGS`, e.g. `ERL_FLAGS=-setcookie "brumbrum"`. Further information can be found [here](http://docs.couchdb.org/en/stable/cluster/setup.html).
There is also a [Kubernetes helm chart](https://github.com/helm/charts/tree/master/incubator/couchdb) available.
## Container shell access, `remsh`, and viewing logs
The `docker exec` command allows you to run commands inside a Docker container. The following command line will give you a bash shell inside your `%%REPO%%` container:
```console
$ docker exec -it my-%%REPO%% bash
```
If you need direct access to the Erlang runtime:
```console
$ docker exec -it my-%%REPO%% /opt/couchdb/bin/remsh
```
The CouchDB log is available through Docker's container log:
```console
$ docker logs my-%%REPO%%
```
## Configuring CouchDB
The best way to provide configuration to the `%%REPO%%` image is to provide a custom `ini` file to CouchDB, preferably stored in the `/opt/couchdb/etc/local.d/` directory. There are many ways to provide this file to the container (via short `Dockerfile` with `FROM` + `COPY`, via [Docker Configs](https://docs.docker.com/engine/swarm/configs/), via runtime bind-mount, etc), the details of which are left as an exercise for the reader.
Keep in mind that run-time reconfiguration of CouchDB will overwrite the [last file in the configuration chain](http://docs.couchdb.org/en/stable/config/intro.html#configuration-files), and that this Docker container creates the `/opt/couchdb/etc/local.d/docker.ini` file at startup.
CouchDB also uses `/opt/couchdb/etc/vm.args` to store Erlang runtime-specific changes. Changing these values is less common. If you need to change the epmd port, for instance, you will want to bind mount this file as well. (Note: files cannot be bind-mounted on Windows hosts.)
In addition, a few environment variables are provided to set very common parameters:
- `COUCHDB_USER` and `COUCHDB_PASSWORD` will create an ini-file based local admin user with the given username and password in the file `/opt/couchdb/etc/local.d/docker.ini`.
- `COUCHDB_SECRET` will set the CouchDB shared cluster secret value, in the file `/opt/couchdb/etc/local.d/docker.ini`.
- `NODENAME` will set the name of the CouchDB node inside the container to `couchdb@${NODENAME}`, in the file `/opt/couchdb/etc/vm.args`. This is used for clustering purposes and can be ignored for single-node setups.
- Erlang Environment Variables like `ERL_FLAGS` will be used by Erlang itself. For a complete list have a look [here](http://erlang.org/doc/man/erl.html#environment-variables)
# Caveats
## Where to Store Data
Important note: There are several ways to store data used by applications that run in Docker containers. We encourage users of the `%%REPO%%` images to familiarize themselves with the options available, including:
- Let Docker manage the storage of your database data [by writing the database files to disk on the host system using its own internal volume management](https://docs.docker.com/storage/volumes/). This is the default and is easy and fairly transparent to the user. The downside is that the files may be hard to locate for tools and applications that run directly on the host system, i.e. outside containers.
- Create a data directory on the host system (outside the container) and [mount this to a directory visible from inside the container](https://docs.docker.com/storage/bind-mounts/). This places the database files in a known location on the host system, and makes it easy for tools and applications on the host system to access the files. The downside is that the user needs to make sure that the directory exists, and that e.g. directory permissions and other security mechanisms on the host system are set up correctly.
The Docker documentation is a good starting point for understanding the different storage options and variations, and there are multiple blogs and forum postings that discuss and give advice in this area. We will simply show the basic procedure here for the latter option above:
1. Create a data directory on a suitable volume on your host system, e.g. `/home/couchdb/data`.
2. Start your `%%REPO%%` container like this:
```bash
$ docker run --name some-%%REPO% -v /home/couchdb/data:/opt/couchdb/data -d %%IMAGE%%:tag
```
The `-v /home/couchdb/data:/opt/couchdb/data` part of the command mounts the `/home/couchdb/data` directory from the underlying host system as `/opt/couchdb/data` inside the container, where CouchDB by default will write its data files.
## No system databases until the installation is finalized
Please note that CouchDB no longer autocreates system databases for you, as it is not known at startup time if this is a single-node or clustered CouchDB installation. In a cluster, the databases must only be created once all nodes have been joined together.
If you use the [Cluster Setup Wizard](http://docs.couchdb.org/en/stable/setup/cluster.html#the-cluster-setup-wizard) or the [Cluster Setup API](http://docs.couchdb.org/en/stable/setup/cluster.html#the-cluster-setup-api), these databases will be created for you when you complete the process.
If you choose not to use the Cluster Setup wizard or API, you will have to create `_global_changes`, `_replicator` and `_users` manually.
## Admin party mode
The node will also start in [admin party mode](https://docs.couchdb.org/en/stable/intro/security.html#the-admin-party). Be sure to create an admin user! The [Cluster Setup Wizard](http://docs.couchdb.org/en/stable/setup/cluster.html#the-cluster-setup-wizard) or the [Cluster Setup API](http://docs.couchdb.org/en/stable/setup/cluster.html#the-cluster-setup-api) will do this for you.
You can also use the two environment variables `COUCHDB_USER` and `COUCHDB_PASSWORD` to set up an admin user:
```console
$ docker run -e COUCHDB_USER=admin -e COUCHDB_PASSWORD=password -d %%IMAGE%%
```
Note that if you are setting up a clustered CouchDB, you will want to pre-hash this password and use the identical hashed text across all nodes to ensure sessions work correctly when a load balancer is placed in front of the cluster. Hashing can be accomplished by running the container with the `/opt/couchdb/etc/local.d` directory mounted as a volume, allowing CouchDB to hash the password you set, then copying out the hashed version and using this value in the future.
## Using a persistent CouchDB configuration file
The CouchDB configuration is specified in `.ini` files in `/opt/couchdb/etc`. Take a look at the [CouchDB configuration documentation](http://docs.couchdb.org/en/stable/config/index.html) to learn more about CouchDB's configuration structure.
If you want to use a customized CouchDB configuration, you can create your configuration file in a directory on the host machine and then mount that directory as `/opt/couchdb/etc/local.d` inside the `%%REPO%%` container.
```console
$ docker run --name my-couchdb -v /home/couchdb/etc:/opt/couchdb/etc/local.d -d %%IMAGE%%
```
The `-v /home/couchdb/etc:/opt/couchdb/etc/local.d` part of the command mounts the `/home/couchdb/etc` directory from the underlying host system as `/opt/couchdb/etc/local.d` inside the container, where CouchDB by default will write its dynamic configuration files.
You can also use `couchdb` as the base image for your own couchdb instance and provide your own version of the `local.ini` config file:
Example Dockerfile:
```dockerfile
FROM %%IMAGE%%
COPY local.ini /opt/couchdb/etc/
```
and then build and run
```console
$ docker build -t you/awesome-couchdb .
$ docker run -d -p 5984:5984 you/awesome-couchdb
```
Remember that, with this approach, any newly written changes will still appear in the `/opt/couchdb/etc/local.d` directory, so it is still recommended to map this to a host path for persistence.
## Logging
By default containers run from this image only log to `stdout`. You can enable logging to file in the [configuration](http://docs.couchdb.org/en/2.1.0/config/logging.html).
For example in `local.ini`:
```ini
[log]
writer = file
file = /opt/couchdb/log/couch.log
```
It is recommended to then mount this path to a directory on the host, as CouchDB logging can be quite voluminous.
```
--------------------------------------------------------------------------------
/arangodb/content.md:
--------------------------------------------------------------------------------
```markdown
# What is ArangoDB?
ArangoDB is a scalable graph database system to drive value from connected data, faster. Native graphs, an integrated search engine, and JSON support, via a single query language.
ArangoDB runs everywhere: On-prem, in the cloud, and as a managed cloud service: [ArangoGraph Insights Platform](https://cloud.arangodb.com/home).
> [arangodb.com](https://arangodb.com)
%%LOGO%%
## Key Features in ArangoDB
**Native Graph** Store both data and relationships, for faster queries even with multiple levels of joins and deeper insights that simply aren't possible with traditional relational and document database systems.
**Document Store** Every node in your graph is a JSON document: flexible, extensible, and easily imported from your existing document database.
**ArangoSearch** Natively integrated cross-platform indexing, text-search and ranking engine for information retrieval, optimized for speed and memory.
#### ArangoDB Documentation
- [Learn ArangoDB](https://arangodb.com/learn/)
- [Documentation](https://docs.arangodb.com/)
## How to use this image
### Start an ArangoDB instance
In order to start an ArangoDB instance, run:
```console
docker run -d -p 8529:8529 -e ARANGO_RANDOM_ROOT_PASSWORD=1 --name arangodb-instance %%IMAGE%%
```
Docker chooses the processor architecture for the image that matches your host CPU by default. If this is not the case, for example, because you have the `DOCKER_DEFAULT_PLATFORM` environment variable set to a different architecture, you can pass the `--platform` flag to the `docker run` command to specify the appropriate operating system and architecture for the container. For x86-64, use `linux/amd64`. On ARM, especially Apple silicon with no emulation for the required AVX instruction set extension, use `linux/arm64/v8`:
```console
docker run -d -p 8529:8529 -e ARANGO_RANDOM_ROOT_PASSWORD=1 --name arangodb-instance --platform linux/arm64/v8 %%IMAGE%%
```
This creates and launches the %%IMAGE%% Docker instance as a background process. The Identifier of the process is printed. By default, ArangoDB listens on port `8529` for requests.
In order to get the IP ArangoDB listens on, run:
```console
docker inspect --format '{{ .NetworkSettings.IPAddress }}' arangodb-instance
```
### Initialize the server language
When using Docker, you need to specify the language you want to initialize the server to on the first run in one of the following ways:
- Set the environment variable `LANG` to a locale in the `docker run` command, e.g. `-e LANG=sv` for a Swedish locale.
- Use an `arangod.conf` configuration file that sets a language and mount it into the container. For example, create a configuration file on your host system in which you set `icu-language = sv` at the top (before any `[section]`) and then mount the file over the default configuration file like `docker run -v /your-host-path/arangod.conf:/etc/arangodb3/arangod.conf ...`.
Note that you cannot set the language using only a startup option on the command-line, like `docker run ... %%IMAGE%% --icu-language sv`.
If you don't specify a language explicitly, the default is `en_US` up to ArangoDB v3.11 and `en_US_POSIX` from ArangoDB v3.12 onward.
### Using the instance
To use the running instance from an application, link the container:
```console
docker run -e ARANGO_RANDOM_ROOT_PASSWORD=1 --name my-app --link arangodb-instance:db-link %%IMAGE%%
```
This uses the instance named `arangodb-instance` and links it into the application container. The application container contains environment variables, which can be used to access the database.
DB_LINK_PORT_8529_TCP=tcp://172.17.0.17:8529
DB_LINK_PORT_8529_TCP_ADDR=172.17.0.17
DB_LINK_PORT_8529_TCP_PORT=8529
DB_LINK_PORT_8529_TCP_PROTO=tcp
DB_LINK_NAME=/naughty_ardinghelli/db-link
### Exposing the port to the outside world
If you want to expose the port to the outside world, run:
```console
docker run -e ARANGO_RANDOM_ROOT_PASSWORD=1 -p 8529:8529 -d %%IMAGE%%
```
ArangoDB listen on port 8529 for request and the image includes `EXPOSE
8529`. The `-p 8529:8529` exposes this port on the host.
### Choosing an authentication method
The ArangoDB image provides several authentication methods which can be specified via environment variables (-e) when using `docker run`
1. `ARANGO_RANDOM_ROOT_PASSWORD=1`
Generate a random root password when starting. The password will be printed to stdout (may be inspected later using `docker logs`)
2. `ARANGO_NO_AUTH=1`
Disable authentication. Useful for testing.
**WARNING** Doing so in production will expose all your data. Make sure that ArangoDB is not directly accessible from the internet!
3. `ARANGO_ROOT_PASSWORD=somepassword`
Specify your own root password.
Note: this way of specifying logins only applies to single server installations. With clusters you have to provision the users via the root user with empty password once the system is up.
### Command line options
You can pass arguments to the ArangoDB server by appending them to the end of the Docker command:
```console
docker run -e ARANGO_RANDOM_ROOT_PASSWORD=1 %%IMAGE%% --help
```
The entrypoint script starts the `arangod` binary by default and forwards your arguments.
You may also start other binaries, such as the ArangoShell:
```console
docker run -it %%IMAGE%% arangosh --server.database myDB ...
```
Note that you need to set up networking for containers if `arangod` runs in one container and you want to access it with `arangosh` running in another container. It is easier to execute it in the same container instead. Use `docker ps` to find out the container ID / name of a running container:
```console
docker ps
```
It prints something similar to the following:
```console
CONTAINER ID IMAGE COMMAND CREATED STATUS PORTS NAMES
1234567890ab arangodb "/entrypoint.sh aran…" 2 hours ago Up 2 hours 0.0.0.0:8529->8529/tcp jolly_joker
```
Then use `docker exec` and the ID / name to run something inside of the existing container:
```console
docker exec -it jolly_joker arangosh
```
For more information, see the ArangoDB documentation about [Configuration](https://docs.arangodb.com/stable/operations/administration/configuration/).
### Limiting resource utilization
`arangod` checks the following environment variables, which can be used to restrict how much memory and how many CPU cores it should use:
- `ARANGODB_OVERRIDE_DETECTED_TOTAL_MEMORY` *(introduced in v3.6.3)*
This variable can be used to override the automatic detection of the total amount of RAM present on the system. One can specify a decimal number (in bytes). Furthermore, if `G` or `g` is appended, the value is multiplied by `2^30`. If `M` or `m` is appended, the value is multiplied by `2^20`. If `K` or `k` is appended, the value is multiplied by `2^10`. That is, `64G` means 64 gigabytes.
The total amount of RAM detected is logged as an INFO message at server start. If the variable is set, the overridden value is shown. Various default sizes are calculated based on this value (e.g. RocksDB buffer cache size).
Setting this option can in particular be useful in two cases:
1. If `arangod` is running in a container and its cgroup has a RAM limitation, then one should specify this limitation in this environment variable, since it is currently not automatically detected.
2. If `arangod` is running alongside other services on the same machine and thus sharing the RAM with them, one should limit the amount of memory using this environment variable.
- `ARANGODB_OVERRIDE_DETECTED_NUMBER_OF_CORES` *(introduced in v3.7.1)*
This variable can be used to override the automatic detection of the number of CPU cores present on the system.
The number of CPU cores detected is logged as an INFO message at server start. If the variable is set, the overridden value is shown. Various default values for threading are calculated based on this value.
Setting this option is useful if `arangod` is running in a container or alongside other services on the same machine and shall not use all available CPUs.
## Persistent Data
ArangoDB supports two different storage engines from version 3.2 to 3.6. You can choose them while instantiating the container with the environment variable `ARANGO_STORAGE_ENGINE`. With `mmfiles` you choose the classic storage engine (not available in 3.7 and later), `rocksdb` will choose the storage engine based on [RocksDB](http://rocksdb.org/). The default choice is `rocksdb` from version 3.4 on.
ArangoDB uses the volume `/var/lib/arangodb3` as database directory to store the collection data and the volume `/var/lib/arangodb3-apps` as apps directory to store any extensions. These directories are marked as docker volumes.
See `docker inspect --format "{{ .Config.Volumes }}" %%IMAGE%%` for all volumes.
A good explanation about persistence and docker container can be found here: [Docker In-depth: Volumes](http://container42.com/2014/11/03/docker-indepth-volumes/), [Why Docker Data Containers are Good](https://medium.com/@ramangupta/why-docker-data-containers-are-good-589b3c6c749e)
### Using host directories
You can map the container's volumes to a directory on the host, so that the data is kept between runs of the container. This path `/tmp/arangodb` is in general not the correct place to store you persistent files - it is just an example!
```console
unix> mkdir /tmp/arangodb
unix> docker run -e ARANGO_RANDOM_ROOT_PASSWORD=1 -p 8529:8529 -d \
-v /tmp/arangodb:/var/lib/arangodb3 \
%%IMAGE%%
```
This will use the `/tmp/arangodb` directory of the host as database directory for ArangoDB inside the container.
### Using a data container
Alternatively you can create a container holding the data.
```console
docker create --name arangodb-persist %%IMAGE%% true
```
And use this data container in your ArangoDB container.
```console
docker run -e ARANGO_RANDOM_ROOT_PASSWORD=1 --volumes-from arangodb-persist -p 8529:8529 %%IMAGE%%
```
If want to save a few bytes you can alternatively use [busybox](https://hub.docker.com/_/busybox) or [alpine](https://hub.docker.com/_/alpine) for creating the volume only containers. Please note that you need to provide the used volumes in this case. For example
```console
docker run -d --name arangodb-persist -v /var/lib/arangodb3 busybox true
```
### Usage as a base image
If you are using the image as a base image please make sure to wrap any CMD in the [exec](https://docs.docker.com/reference/dockerfile/#cmd) form. Otherwise the default entrypoint will not do its bootstrapping work.
When deriving the image, you can control the instantiation via putting files into `/docker-entrypoint-initdb.d/`.
- `*.sh` - files ending with .sh will be run as a bash shellscript.
- `*.js` - files will be executed with arangosh. You can specify additional arangosh arguments via the `ARANGOSH_ARGS` environment variable.
- `dumps/` - in this directory you can place subdirectories containing database dumps generated using [arangodump](https://docs.arangodb.com/stable/components/tools/arangodump/). They can be restored using [arangorestore](https://docs.arangodb.com/stable/components/tools/arangorestore/).
```
--------------------------------------------------------------------------------
/aerospike/content.md:
--------------------------------------------------------------------------------
```markdown
# Aerospike Database Docker Images
## What is Aerospike?
[Aerospike](http://aerospike.com) is a distributed NoSQL database purposefully designed for high performance web scale applications. Aerospike supports key-value and document data models, and has multiple data types including List, Map, HyperLogLog, GeoJSON, and Blob. Aerospike's patented hybrid memory architecture delivers predictable high performance at scale and high data density per node.
%%LOGO%%
## Getting Started
Aerospike Enterprise Edition requires a feature key file to start and to ungate certain features in the database, such as compression. Enterprise customers can use their production or development keys.
Anyone can [sign up](https://www.aerospike.com/lp/try-now/) to get an evaluation feature key file for a full-featured, single-node Aerospike Enterprise Edition.
Aerospike Community Edition supports the same developer APIs as Aerospike Enterprise Edition, and differs in ease of operation and enterprise features. See the [product matrix](https://www.aerospike.com/products/product-matrix/) for more.
### Running an Aerospike EE node with a feature key file in a mapped directory
```console
docker run -d -v DIR:/opt/aerospike/etc/ -e "FEATURE_KEY_FILE=/opt/aerospike/etc/features.conf" --name aerospike -p 3000-3002:3000-3002 %%IMAGE%%:ee-[version]
```
Above, *DIR* is a directory on your machine where you drop your feature key file. Make sure Docker Desktop has file sharing permission to bind mount it into Docker containers.
### Running a node with a feature key file in an environment variable
```console
FEATKEY=$(base64 ~/Desktop/evaluation-features.conf)
docker run -d -e "FEATURES=$FEATKEY" -e "FEATURE_KEY_FILE=env-b64:FEATURES" --name aerospike -p 3000-3002:3000-3002 %%IMAGE%%:ee-[version]
```
### Running an Aerospike CE node
```console
docker run -d --name aerospike -p 3000-3002:3000-3002 %%IMAGE%%:ce-[version]
```
## Advanced Configuration
The Aerospike Docker image has a default configuration file template that can be populated with individual configuration parameters, as we did before with `FEATURE_KEY_FILE`. Alternatively, it can be replaced with a custom configuration file.
The following sections describe both advanced options.
### Injecting configuration parameters
You can inject parameters into the configuration template using container-side environment variables with the `-e` flag.
For example, to set the default [namespace](https://www.aerospike.com/docs/architecture/data-model.html) name to *demo*:
```console
docker run -d --name aerospike -e "NAMESPACE=demo" -p 3000-3002:3000-3002 -v /my/dir:/opt/aerospike/etc/ -e "FEATURE_KEY_FILE=/opt/aerospike/etc/features.conf" %%IMAGE%%:ee-[version]
```
Injecting configuration parameters into the configuration template isn't compatible with using a custom configuration file. You can use one or the other.
#### List of template variables
- `FEATURE_KEY_FILE` - the [`feature_key_file`](https://www.aerospike.com/docs/reference/configuration/index.html#feature-key-file) is only required for the EE image. Default: /etc/aerospike/features.conf
- `SERVICE_THREADS` - the [`service_threads`](https://www.aerospike.com/docs/reference/configuration/index.html#service-threads). Default: Number of vCPUs
- `LOGFILE` - the [`file`](https://www.aerospike.com/docs/reference/configuration/index.html#file) param of the `logging` context. Default: /dev/null, do not log to file, log to stdout
- `SERVICE_ADDRESS` - the bind [`address`](https://www.aerospike.com/docs/reference/configuration/index.html#address) of the `networking.service` subcontext. Default: any
- `SERVICE_PORT` - the [`port`](https://www.aerospike.com/docs/reference/configuration/index.html#port) of the `networking.service` subcontext. Default: 3000
- `HB_ADDRESS` - the `networking.heartbeat` [`address`](https://www.aerospike.com/docs/reference/configuration/index.html#address) for cross cluster mesh. Default: any
- `HB_PORT` - the [`port`](https://www.aerospike.com/docs/reference/configuration/index.html#port) for `networking.heartbeat` communications. Default: 3002
- `FABRIC_ADDRESS` - the [`address`](https://www.aerospike.com/docs/reference/configuration/index.html#address) of the `networking.fabric` subcontext. Default: any
- `FABRIC_PORT` - the [`port`](https://www.aerospike.com/docs/reference/configuration/index.html#port) of the `networking.fabric` subcontext. Default: 3001
The single preconfigured namespace is [in-memory with filesystem persistence](https://www.aerospike.com/docs/operations/configure/namespace/storage/#recipe-for-a-hdd-storage-engine-with-data-in-index-engine)
- `NAMESPACE` - the name of the namespace. Default: test
- `REPL_FACTOR` - the namespace [`replication-factor`](https://www.aerospike.com/docs/reference/configuration/index.html#replication-factor). Default: 2
- `MEM_GB` - the namespace [`memory-size`](https://www.aerospike.com/docs/reference/configuration/index.html#memory-size). Default: 1, the unit is always `G` (GB)
- `DEFAULT_TTL` - the namespace [`default-ttl`](https://www.aerospike.com/docs/reference/configuration/index.html#default-ttl). Default: 30d
- `STORAGE_GB` - the namespace persistence `file` size. Default: 4, the unit is always `G` (GB)
- `NSUP_PERIOD` - the namespace [`nsup-period`](https://www.aerospike.com/docs/reference/configuration/index.html#nsup-period). Default: 120 , nsup-period in seconds
### Using a custom configuration file
You can override the use of the configuration file template by providing your own aerospike.conf, as described in [Configuring Aerospike Database](https://www.aerospike.com/docs/operations/configure/index.html).
You should first `-v` map a local directory, which Docker will bind mount. Next, drop your aerospike.conf file into this directory. Finally, use the `--config-file` option to tell Aerospike where in the container the configuration file is (the default path is /etc/aerospike/aerospike.conf). Remember that the feature key file is required, so use `feature-key-file` in your config file to point to a mounted path (such as /opt/aerospike/etc/feature.conf).
For example:
```console
docker run -d -v /opt/aerospike/etc/:/opt/aerospike/etc/ --name aerospike -p 3000-3002:3000-3002 %%IMAGE%%:ee-[version] --config-file /opt/aerospike/etc/aerospike.conf
```
### Persistent Data Directory
With Docker, the files within the container are not persisted past the life of the container. To persist data, you will want to mount a directory from the host to the container's /opt/aerospike/data using the `-v` option:
For example:
```console
docker run -d -v /opt/aerospike/data:/opt/aerospike/data -v /opt/aerospike/etc:/opt/aerospike/etc/ --name aerospike -p 3000-3002:3000-3002 -e "FEATURE_KEY_FILE=/opt/aerospike/etc/features.conf" %%IMAGE%%:ee-[version]
```
The example above uses the configuration template, where the single defined namespace is in-memory with file-based persistence. Just mounting the predefined /opt/aerospike/data directory enables the data to be persisted on the host.
Alternatively, a custom configuration file is used with the parameter `file` set to be a file in the mounted /opt/aerospike/data, such as in the following config snippet:
namespace test {
# :
storage-engine device {
file /opt/aerospike/data/test.dat
filesize 4G
data-in-memory true
}
}
In this example we also mount the data directory in a similar way, using a custom configuration file.
```console
docker run -d -v /opt/aerospike/data:/opt/aerospike/data -v /opt/aerospike/etc/:/opt/aerospike/etc/ --name aerospike -p 3000-3002:3000-3002 %%IMAGE%%:ee-[version] --config-file /opt/aerospike/etc/aerospike.conf
```
### Block Storage
Docker provides an ability to expose a host's block devices to a running container. The `--device` option can be used to map a host block device within a container.
Update the `storage-engine device` section of the namespace in the custom aerospike configuration file.
namespace test {
# :
storage-engine device {
device /dev/xvdc
write-block-size 128k
}
}
Now to map a host drive /dev/sdc to /dev/xvdc on a container
```console
docker run -d --device '/dev/sdc:/dev/xvdc' -v /opt/aerospike/etc/:/opt/aerospike/etc/ --name aerospike -p 3000-3002:3000-3002 %%IMAGE%%:ee-[version] --config-file /opt/aerospike/etc/aerospike.conf
```
### Persistent Lua Cache
Upon restart, your lua cache will become emptied. To persist the cache, you will want to mount a directory from the host to the container's `/opt/aerospike/usr/udf/lua` using the `-v` option:
```sh
docker run -d -v /opt/aerospike/lua:/opt/aerospike/usr/udf/lua -v /opt/aerospike/data:/opt/aerospike/data --name aerospike -p 3000-3002:3000-3002 -e "FEATURE_KEY_FILE=/opt/etc/aerospike/features.conf" %%IMAGE%%:ee-[version]
```
## Clustering
Developers using the Aerospike EE single-node evaluation, and most others using Docker Desktop on their machine for development, will not need to configure the node for clustering. If you're interested in using clustering and have a feature key file without a single node limit, read the following sections.
### Configuring the node's access address
In order for the Aerospike node to properly broadcast its address to the cluster and applications, the [`access-address`](https://www.aerospike.com/docs/reference/configuration/index.html#access-address) configuration parameter needs to be set in the configuration file. If it is not set, then the IP address within the container will be used, which is not accessible to other nodes.
network {
service {
address any # Listening IP Address
port 3000 # Listening Port
access-address 192.168.1.100 # IP Address used by cluster nodes and applications
}
### Mesh Clustering
Mesh networking requires setting up links between each node in the cluster. This can be achieved in two ways:
1. Add a configuration for each node in the cluster, as defined in [Network Heartbeat Configuration](http://www.aerospike.com/docs/operations/configure/network/heartbeat/#mesh-unicast-heartbeat).
2. Use `asinfo` to send the `tip` command, to make the node aware of another node, as defined in [tip command in asinfo](http://www.aerospike.com/docs/tools/asinfo/#tip).
For more, see [How do I get a 2 nodes Aerospike cluster running quickly in Docker without editing a single file?](https://medium.com/aerospike-developer-blog/how-do-i-get-a-2-node-aerospike-cluster-running-quickly-in-docker-without-editing-a-single-file-1c2a94564a99?source=friends_link&sk=4ff6a22f0106596c42aa4b77d6cdc3a5)
## Image Versions
These images are based on [ubuntu:24.04](https://hub.docker.com/_/ubuntu).
### ee-[version]
These tags are for Aerospike EE images, and will require a feature key file, such as the one you get with the single-node EE evaluation, or one associated with a commercial enterprise license agreement.
### ce-[version]
These tags are for Aerospike CE images, and do not require a feature key file to start. As mentioned above, the developer API for both is the same, but the editions differ in operational features.
## Reporting Issues
If you have any problems with or questions about this image, please post on the [Aerospike discussion forum](https://discuss.aerospike.com).
Enterprise customers are welcome to participate in the community forum, but can also report issues through the enterprise support system.
Aerospike EE evaluation users can open an issue in [aerospike/aerospike-server-enterprise.docker](https://github.com/aerospike/aerospike-server-enterprise.docker/issues).
Aerospike CE users can open an issue in [aerospike/aerospike-server.docker](https://github.com/aerospike/aerospike-server.docker/issues).
```
--------------------------------------------------------------------------------
/percona/content.md:
--------------------------------------------------------------------------------
```markdown
# Percona Server for MySQL
Percona Server for MySQL is a fork of the MySQL relational database management system created by Percona.
It aims to retain close compatibility to the official MySQL releases, while focusing on performance and increased visibility into server operations. Also included in Percona Server is XtraDB, Percona's fork of the InnoDB Storage Engine.
> [wikipedia.org/wiki/Percona_Server](https://en.wikipedia.org/wiki/Percona_Server)
%%LOGO%%
# How to use this image
## Start a `%%IMAGE%%` server instance
Starting a Percona Server for MySQL instance is simple:
```console
$ docker run --name some-%%REPO%% -e MYSQL_ROOT_PASSWORD=my-secret-pw -d %%IMAGE%%:tag
```
... where `some-%%REPO%%` is the name you want to assign to your container, `my-secret-pw` is the password to be set for the MySQL root user and `tag` is the tag specifying the MySQL version you want. See the list above for relevant tags.
## Connect to Percona Server from the MySQL command line client
The following command starts another `%%IMAGE%%` container instance and runs the `mysql` command line client against your original `%%IMAGE%%` container, allowing you to execute SQL statements against your database instance:
```console
$ docker run -it --network some-network --rm %%IMAGE%% mysql -hsome-%%REPO%% -uexample-user -p
```
... where `some-%%REPO%%` is the name of your original `%%IMAGE%%` container (connected to the `some-network` Docker network).
This image can also be used as a client for non-Docker or remote instances:
```console
$ docker run -it --rm %%IMAGE%% mysql -hsome.mysql.host -usome-mysql-user -p
```
More information about the MySQL command line client can be found in the [MySQL documentation](http://dev.mysql.com/doc/en/mysql.html)
## %%COMPOSE%%
Run `docker compose up`, wait for it to initialize completely, and visit `http://localhost:8080` or `http://host-ip:8080` (as appropriate).
## Container shell access and viewing MySQL logs
The `docker exec` command allows you to run commands inside a Docker container. The following command line will give you a bash shell inside your `%%IMAGE%%` container:
```console
$ docker exec -it some-%%REPO%% bash
```
The log is available through Docker's container log:
```console
$ docker logs some-%%REPO%%
```
## Using a custom MySQL configuration file
The startup configuration is specified in the file `/etc/my.cnf`, and that file in turn includes any files found in the `/etc/my.cnf.d` directory that end with `.cnf`. Settings in files in this directory will augment and/or override settings in `/etc/my.cnf`. If you want to use a customized MySQL configuration, you can create your alternative configuration file in a directory on the host machine and then mount that directory location as `/etc/my.cnf.d` inside the `%%IMAGE%%` container.
If `/my/custom/config-file.cnf` is the path and name of your custom configuration file, you can start your `%%IMAGE%%` container like this (note that only the directory path of the custom config file is used in this command):
```console
$ docker run --name some-%%REPO%% -v /my/custom:/etc/my.cnf.d -e MYSQL_ROOT_PASSWORD=my-secret-pw -d %%IMAGE%%:tag
```
This will start a new container `some-%%REPO%%` where the Percona Server for MySQL instance uses the combined startup settings from `/etc/my.cnf` and `/etc/my.cnf.d/config-file.cnf`, with settings from the latter taking precedence.
### Configuration without a `cnf` file
Many configuration options can be passed as flags to `mysqld`. This will give you the flexibility to customize the container without needing a `cnf` file. For example, if you want to change the default encoding and collation for all tables to use UTF-8 (`utf8mb4`) just run the following:
```console
$ docker run --name some-%%REPO%% -e MYSQL_ROOT_PASSWORD=my-secret-pw -d %%IMAGE%%:tag --character-set-server=utf8mb4 --collation-server=utf8mb4_unicode_ci
```
If you would like to see a complete list of available options, just run:
```console
$ docker run -it --rm %%IMAGE%%:tag --verbose --help
```
## Environment Variables
When you start the `%%IMAGE%%` image, you can adjust the configuration of the instance by passing one or more environment variables on the `docker run` command line. Do note that none of the variables below will have any effect if you start the container with a data directory that already contains a database: any pre-existing database will always be left untouched on container startup.
### `MYSQL_ROOT_PASSWORD`
This variable is mandatory and specifies the password that will be set for the `root` superuser account. In the above example, it was set to `my-secret-pw`.
### `MYSQL_ROOT_HOST`
By default, `root` can connect from anywhere. This option restricts root connections to be from the specified host only. Also `localhost` can be used here for the local-only root access.
### `MYSQL_DATABASE`
This variable is optional and allows you to specify the name of a database to be created on image startup. If a user/password was supplied (see below) then that user will be granted superuser access ([corresponding to `GRANT ALL`](https://dev.mysql.com/doc/refman/en/creating-accounts.html)) to this database.
### `MYSQL_USER`, `MYSQL_PASSWORD`
These variables are optional, used in conjunction to create a new user and to set that user's password. This user will be granted superuser permissions (see above) for the database specified by the `MYSQL_DATABASE` variable. Both variables are required for a user to be created.
Do note that there is no need to use this mechanism to create the root superuser, that user gets created by default with the password specified by the `MYSQL_ROOT_PASSWORD` variable.
### `MYSQL_ALLOW_EMPTY_PASSWORD`
This is an optional variable. Set to `yes` to allow the container to be started with a blank password for the root user. *NOTE*: Setting this variable to `yes` is not recommended unless you really know what you are doing, since this will leave your instance completely unprotected, allowing anyone to gain complete superuser access.
### `MYSQL_RANDOM_ROOT_PASSWORD`
This is an optional variable. Set to `yes` to generate a random initial password for the root user (using `pwmake`). The generated root password will be printed to stdout (`GENERATED ROOT PASSWORD: .....`).
### `MYSQL_ONETIME_PASSWORD`
Sets root (*not* the user specified in `MYSQL_USER`!) user as expired once init is complete, forcing a password change on first login. *NOTE*: This feature is supported on MySQL 5.6+ only. Using this option on MySQL 5.5 will throw an appropriate error during initialization.
### `MYSQL_INITDB_SKIP_TZINFO`
At first run MySQL automatically loads from the local system the timezone information needed for the `CONVERT_TZ()` function. If it's is not what is intended, this option disables timezone loading.
### `INIT_TOKUDB`
Tuns on TokuDB Engine. It can be activated only when *transparent huge pages* (THP) are disabled.
### `INIT_ROCKSDB`
Tuns on RocksDB Engine.
## Docker Secrets
As an alternative to passing sensitive information via environment variables, `_FILE` may be appended to the previously listed environment variables, causing the initialization script to load the values for those variables from files present in the container. In particular, this can be used to load passwords from Docker secrets stored in `/run/secrets/<secret_name>` files. For example:
```console
$ docker run --name some-mysql -e MYSQL_ROOT_PASSWORD_FILE=/run/secrets/mysql-root -d %%IMAGE%%:tag
```
Currently, this is only supported for `MYSQL_ROOT_PASSWORD`, `MYSQL_ROOT_HOST`, `MYSQL_DATABASE`, `MYSQL_USER`, and `MYSQL_PASSWORD`.
## Telemetry
Starting with Percona Server 8.0.35-27, telemetry will be enabled by default. If you decide not to send usage data to Percona, you can set the `PERCONA_TELEMETRY_DISABLE=1` environment variable. For example:
```console
$ docker run --name some-mysql -e PERCONA_TELEMETRY_DISABLE=1 -d %%IMAGE%%:tag
```
# Initializing a fresh instance
When a container is started for the first time, a new database with the specified name will be created and initialized with the provided configuration variables. Furthermore, it will execute files with extensions `.sh`, `.sql` and `.sql.gz` that are found in `/docker-entrypoint-initdb.d`. Files will be executed in alphabetical order. You can easily populate your `%%IMAGE%%` services by [mounting a SQL dump into that directory](https://docs.docker.com/storage/bind-mounts/) and provide [custom images](https://docs.docker.com/reference/dockerfile/) with contributed data. SQL files will be imported by default to the database specified by the `MYSQL_DATABASE` variable.
# Caveats
## Where to Store Data
Important note: There are several ways to store data used by applications that run in Docker containers. We encourage users of the `%%IMAGE%%` images to familiarize themselves with the options available, including:
- Let Docker manage the storage of your database data [by writing the database files to disk on the host system using its own internal volume management](https://docs.docker.com/storage/volumes/). This is the default and is easy and fairly transparent to the user. The downside is that the files may be hard to locate for tools and applications that run directly on the host system, i.e. outside containers.
- Create a data directory on the host system (outside the container) and [mount this to a directory visible from inside the container](https://docs.docker.com/storage/bind-mounts/). This places the database files in a known location on the host system, and makes it easy for tools and applications on the host system to access the files. The downside is that the user needs to make sure that the directory exists, and that e.g. directory permissions and other security mechanisms on the host system are set up correctly.
The Docker documentation is a good starting point for understanding the different storage options and variations, and there are multiple blogs and forum postings that discuss and give advice in this area. We will simply show the basic procedure here for the latter option above:
1. Create a data directory on a suitable volume on your host system, e.g. `/my/own/datadir`.
2. Start your `%%IMAGE%%` container like this:
```console
$ docker run --name some-%%REPO%% -v /my/own/datadir:/var/lib/mysql -e MYSQL_ROOT_PASSWORD=my-secret-pw -d %%IMAGE%%:tag
```
The `-v /my/own/datadir:/var/lib/mysql` part of the command mounts the `/my/own/datadir` directory from the underlying host system as `/var/lib/mysql` inside the container, where MySQL by default will write its data files.
## No connections until MySQL init completes
If there is no database initialized when the container starts, then a default database will be created. While this is the expected behavior, this means that it will not accept incoming connections until such initialization completes. This may cause issues when using automation tools, such as Docker Compose, which start several containers simultaneously.
If the application you're trying to connect to MySQL does not handle MySQL downtime or waiting for MySQL to start gracefully, then a putting a connect-retry loop before the service starts might be necessary. For an example of such an implementation in the official images, see [WordPress](https://github.com/docker-library/wordpress/blob/1b48b4bccd7adb0f7ea1431c7b470a40e186f3da/docker-entrypoint.sh#L195-L235) or [Bonita](https://github.com/docker-library/docs/blob/9660a0cccb87d8db842f33bc0578d769caaf3ba9/bonita/stack.yml#L28-L44).
## Usage against an existing database
If you start your `%%IMAGE%%` container instance with a data directory that already contains a database (specifically, a `mysql` subdirectory), the `$MYSQL_ROOT_PASSWORD` variable should be omitted from the run command line; it will in any case be ignored, and the pre-existing database will not be changed in any way.
## Creating database dumps
Most of the normal tools will work, although their usage might be a little convoluted in some cases to ensure they have access to the `mysqld` server. A simple way to ensure this is to use `docker exec` and run the tool from the same container, similar to the following:
```console
$ docker exec some-%%REPO%% sh -c 'exec mysqldump --all-databases -uroot -p"$MYSQL_ROOT_PASSWORD"' > /some/path/on/your/host/all-databases.sql
```
## Restoring data from dump files
For restoring data. You can use `docker exec` command with `-i` flag, similar to the following:
```console
$ docker exec -i some-%%REPO%% sh -c 'exec mysql -uroot -p"$MYSQL_ROOT_PASSWORD"' < /some/path/on/your/host/all-databases.sql
```
```
--------------------------------------------------------------------------------
/mysql/content.md:
--------------------------------------------------------------------------------
```markdown
# What is MySQL?
MySQL is the world's most popular open source database. With its proven performance, reliability and ease-of-use, MySQL has become the leading database choice for web-based applications, covering the entire range from personal projects and websites, via e-commerce and information services, all the way to high profile web properties including Facebook, Twitter, YouTube, Yahoo! and many more.
For more information and related downloads for MySQL Server and other MySQL products, please visit [www.mysql.com](http://www.mysql.com).
%%LOGO%%
# How to use this image
## Start a `%%IMAGE%%` server instance
Starting a MySQL instance is simple:
```console
$ docker run --name some-%%REPO%% -e MYSQL_ROOT_PASSWORD=my-secret-pw -d %%IMAGE%%:tag
```
... where `some-%%REPO%%` is the name you want to assign to your container, `my-secret-pw` is the password to be set for the MySQL root user and `tag` is the tag specifying the MySQL version you want. See the list above for relevant tags.
## Connect to MySQL from the MySQL command line client
The following command starts another `%%IMAGE%%` container instance and runs the `mysql` command line client against your original `%%IMAGE%%` container, allowing you to execute SQL statements against your database instance:
```console
$ docker run -it --network some-network --rm %%IMAGE%% mysql -hsome-%%REPO%% -uexample-user -p
```
... where `some-%%REPO%%` is the name of your original `%%IMAGE%%` container (connected to the `some-network` Docker network).
This image can also be used as a client for non-Docker or remote instances:
```console
$ docker run -it --rm %%IMAGE%% mysql -hsome.mysql.host -usome-mysql-user -p
```
More information about the MySQL command line client can be found in the [MySQL documentation](http://dev.mysql.com/doc/en/mysql.html)
## %%COMPOSE%%
Run `docker compose up`, wait for it to initialize completely, and visit `http://localhost:8080` or `http://host-ip:8080` (as appropriate).
## Container shell access and viewing MySQL logs
The `docker exec` command allows you to run commands inside a Docker container. The following command line will give you a bash shell inside your `%%IMAGE%%` container:
```console
$ docker exec -it some-%%REPO%% bash
```
The log is available through Docker's container log:
```console
$ docker logs some-%%REPO%%
```
## Using a custom MySQL configuration file
The default configuration for MySQL can be found in `/etc/mysql/my.cnf`, which may `!includedir` additional directories such as `/etc/mysql/conf.d` or `/etc/mysql/mysql.conf.d`. Please inspect the relevant files and directories within the `%%IMAGE%%` image itself for more details.
If `/my/custom/config-file.cnf` is the path and name of your custom configuration file, you can start your `%%IMAGE%%` container like this (note that only the directory path of the custom config file is used in this command):
```console
$ docker run --name some-%%REPO%% -v /my/custom:/etc/mysql/conf.d -e MYSQL_ROOT_PASSWORD=my-secret-pw -d %%IMAGE%%:tag
```
This will start a new container `some-%%REPO%%` where the MySQL instance uses the combined startup settings from `/etc/mysql/my.cnf` and `/etc/mysql/conf.d/config-file.cnf`, with settings from the latter taking precedence.
### Configuration without a `cnf` file
Many configuration options can be passed as flags to `mysqld`. This will give you the flexibility to customize the container without needing a `cnf` file. For example, if you want to change the default encoding and collation for all tables to use UTF-8 (`utf8mb4`) just run the following:
```console
$ docker run --name some-%%REPO%% -e MYSQL_ROOT_PASSWORD=my-secret-pw -d %%IMAGE%%:tag --character-set-server=utf8mb4 --collation-server=utf8mb4_unicode_ci
```
If you would like to see a complete list of available options, just run:
```console
$ docker run -it --rm %%IMAGE%%:tag --verbose --help
```
## Environment Variables
When you start the `%%IMAGE%%` image, you can adjust the configuration of the MySQL instance by passing one or more environment variables on the `docker run` command line. Do note that none of the variables below will have any effect if you start the container with a data directory that already contains a database: any pre-existing database will always be left untouched on container startup.
See also https://dev.mysql.com/doc/refman/5.7/en/environment-variables.html for documentation of environment variables which MySQL itself respects (especially variables like `MYSQL_HOST`, which is known to cause issues when used with this image).
### `MYSQL_ROOT_PASSWORD`
This variable is mandatory and specifies the password that will be set for the MySQL `root` superuser account. In the above example, it was set to `my-secret-pw`.
### `MYSQL_DATABASE`
This variable is optional and allows you to specify the name of a database to be created on image startup. If a user/password was supplied (see below) then that user will be granted superuser access ([corresponding to `GRANT ALL`](https://dev.mysql.com/doc/refman/en/creating-accounts.html)) to this database.
### `MYSQL_USER`, `MYSQL_PASSWORD`
These variables are optional, used in conjunction to create a new user and to set that user's password. This user will be granted superuser permissions (see above) for the database specified by the `MYSQL_DATABASE` variable. Both variables are required for a user to be created.
Do note that there is no need to use this mechanism to create the root superuser, that user gets created by default with the password specified by the `MYSQL_ROOT_PASSWORD` variable.
### `MYSQL_ALLOW_EMPTY_PASSWORD`
This is an optional variable. Set to a non-empty value, like `yes`, to allow the container to be started with a blank password for the root user. *NOTE*: Setting this variable to `yes` is not recommended unless you really know what you are doing, since this will leave your MySQL instance completely unprotected, allowing anyone to gain complete superuser access.
### `MYSQL_RANDOM_ROOT_PASSWORD`
This is an optional variable. Set to a non-empty value, like `yes`, to generate a random initial password for the root user (using `openssl`). The generated root password will be printed to stdout (`GENERATED ROOT PASSWORD: .....`).
### `MYSQL_ONETIME_PASSWORD`
Sets root (*not* the user specified in `MYSQL_USER`!) user as expired once init is complete, forcing a password change on first login. Any non-empty value will activate this setting. *NOTE*: This feature is supported on MySQL 5.6+ only. Using this option on MySQL 5.5 will throw an appropriate error during initialization.
### `MYSQL_INITDB_SKIP_TZINFO`
By default, the entrypoint script automatically loads the timezone data needed for the `CONVERT_TZ()` function. If it is not needed, any non-empty value disables timezone loading.
## Docker Secrets
As an alternative to passing sensitive information via environment variables, `_FILE` may be appended to the previously listed environment variables, causing the initialization script to load the values for those variables from files present in the container. In particular, this can be used to load passwords from Docker secrets stored in `/run/secrets/<secret_name>` files. For example:
```console
$ docker run --name some-mysql -e MYSQL_ROOT_PASSWORD_FILE=/run/secrets/mysql-root -d %%IMAGE%%:tag
```
Currently, this is only supported for `MYSQL_ROOT_PASSWORD`, `MYSQL_ROOT_HOST`, `MYSQL_DATABASE`, `MYSQL_USER`, and `MYSQL_PASSWORD`.
# Initializing a fresh instance
When a container is started for the first time, a new database with the specified name will be created and initialized with the provided configuration variables. Furthermore, it will execute files with extensions `.sh`, `.sql` and `.sql.gz` that are found in `/docker-entrypoint-initdb.d`. Files will be executed in alphabetical order. You can easily populate your `%%IMAGE%%` services by [mounting a SQL dump into that directory](https://docs.docker.com/storage/bind-mounts/) and provide [custom images](https://docs.docker.com/reference/dockerfile/) with contributed data. SQL files will be imported by default to the database specified by the `MYSQL_DATABASE` variable.
# Caveats
## Where to Store Data
Important note: There are several ways to store data used by applications that run in Docker containers. We encourage users of the `%%IMAGE%%` images to familiarize themselves with the options available, including:
- Let Docker manage the storage of your database data [by writing the database files to disk on the host system using its own internal volume management](https://docs.docker.com/storage/volumes/). This is the default and is easy and fairly transparent to the user. The downside is that the files may be hard to locate for tools and applications that run directly on the host system, i.e. outside containers.
- Create a data directory on the host system (outside the container) and [mount this to a directory visible from inside the container](https://docs.docker.com/storage/bind-mounts/). This places the database files in a known location on the host system, and makes it easy for tools and applications on the host system to access the files. The downside is that the user needs to make sure that the directory exists, and that e.g. directory permissions and other security mechanisms on the host system are set up correctly.
The Docker documentation is a good starting point for understanding the different storage options and variations, and there are multiple blogs and forum postings that discuss and give advice in this area. We will simply show the basic procedure here for the latter option above:
1. Create a data directory on a suitable volume on your host system, e.g. `/my/own/datadir`.
2. Start your `%%IMAGE%%` container like this:
```console
$ docker run --name some-%%REPO%% -v /my/own/datadir:/var/lib/mysql -e MYSQL_ROOT_PASSWORD=my-secret-pw -d %%IMAGE%%:tag
```
The `-v /my/own/datadir:/var/lib/mysql` part of the command mounts the `/my/own/datadir` directory from the underlying host system as `/var/lib/mysql` inside the container, where MySQL by default will write its data files.
## No connections until MySQL init completes
If there is no database initialized when the container starts, then a default database will be created. While this is the expected behavior, this means that it will not accept incoming connections until such initialization completes. This may cause issues when using automation tools, such as Docker Compose, which start several containers simultaneously.
If the application you're trying to connect to MySQL does not handle MySQL downtime or waiting for MySQL to start gracefully, then putting a connect-retry loop before the service starts might be necessary. For an example of such an implementation in the official images, see [WordPress](https://github.com/docker-library/wordpress/blob/1b48b4bccd7adb0f7ea1431c7b470a40e186f3da/docker-entrypoint.sh#L195-L235) or [Bonita](https://github.com/docker-library/docs/blob/9660a0cccb87d8db842f33bc0578d769caaf3ba9/bonita/stack.yml#L28-L44).
## Usage against an existing database
If you start your `%%IMAGE%%` container instance with a data directory that already contains a database (specifically, a `mysql` subdirectory), the `$MYSQL_ROOT_PASSWORD` variable should be omitted from the run command line; it will in any case be ignored, and the pre-existing database will not be changed in any way.
## Running as an arbitrary user
If you know the permissions of your directory are already set appropriately (such as running against an existing database, as described above) or you have need of running `mysqld` with a specific UID/GID, it is possible to invoke this image with `--user` set to any value (other than `root`/`0`) in order to achieve the desired access/configuration:
```console
$ mkdir data
$ ls -lnd data
drwxr-xr-x 2 1000 1000 4096 Aug 27 15:54 data
$ docker run -v "$PWD/data":/var/lib/mysql --user 1000:1000 --name some-%%REPO%% -e MYSQL_ROOT_PASSWORD=my-secret-pw -d %%IMAGE%%:tag
```
## Creating database dumps
Most of the normal tools will work, although their usage might be a little convoluted in some cases to ensure they have access to the `mysqld` server. A simple way to ensure this is to use `docker exec` and run the tool from the same container, similar to the following:
```console
$ docker exec some-%%REPO%% sh -c 'exec mysqldump --all-databases -uroot -p"$MYSQL_ROOT_PASSWORD"' > /some/path/on/your/host/all-databases.sql
```
## Restoring data from dump files
For restoring data. You can use `docker exec` command with `-i` flag, similar to the following:
```console
$ docker exec -i some-%%REPO%% sh -c 'exec mysql -uroot -p"$MYSQL_ROOT_PASSWORD"' < /some/path/on/your/host/all-databases.sql
```
```
--------------------------------------------------------------------------------
/couchbase/content.md:
--------------------------------------------------------------------------------
```markdown
# Introduction to Couchbase Server
Built on the most powerful NoSQL technology, Couchbase Server delivers unparalleled performance at scale, in any cloud. With features like memory-first architecture, geo-distributed deployments, and workload isolation, Couchbase Server excels at supporting mission-critical applications at scale while maintaining sub-millisecond latencies and 99.999% availability. Plus, with the most comprehensive SQL-compatible query language (N1QL), migrating from RDBMS to Couchbase Server is easy with ANSI join.
## Unmatched agility and flexibility
Support rapidly changing business requirements with the flexibility of JSON and the power of a comprehensive query language (N1QL). Develop engaging applications with multiple access methods from a single platform: key-value, query, and search. Event-driven workloads allow you to execute data-driven business logic from a centralized platform.
## Unparalleled performance at any scale
Deliver consistent, fast experiences at scale, powered by a memory-first architecture. High-performance indexes and index partitioning provides unparalleled query performance with complex joins, predicates, and aggregate evaluations. And, with end-to-end data compression, Couchbase significantly reduces the cost of network, memory, and storage required for your existing workloads.
## Easiest platform to manage
Deploy Couchbase Server in any cloud, at any scale. Reduce operational overhead with cloud integrations like Kubernetes, and support multi-cloud deployments globally with built-in support for active-active cross datacenter replication (XDCR).
%%LOGO%%
## QuickStart with Couchbase Server and Docker
Here is how to get a single node Couchbase Server cluster running on Docker containers:
**Step - 1 :** Run Couchbase Server docker container
`docker run -d --name db -p 8091-8097:8091-8097 -p 9123:9123 -p 11207:11207 -p 11210:11210 -p 11280:11280 -p 18091-18097:18091-18097 couchbase`
Note: Couchbase Server can require a variety of ports to be exposed depending on the usage scenario. Please see https://docs.couchbase.com/server/current/install/install-ports.html for further information.
**Step - 2 :** Next, visit `http://localhost:8091` on the host machine to see the Web Console to start Couchbase Server setup.
Walk through the Setup wizard and accept the default values.
- Note: You may need to lower the RAM allocated to various services to fit within the bounds of the resource of the containers.
- Enable the beer-sample bucket to load some sample data.
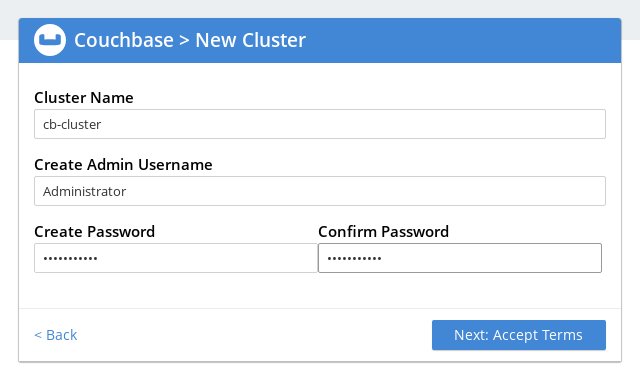
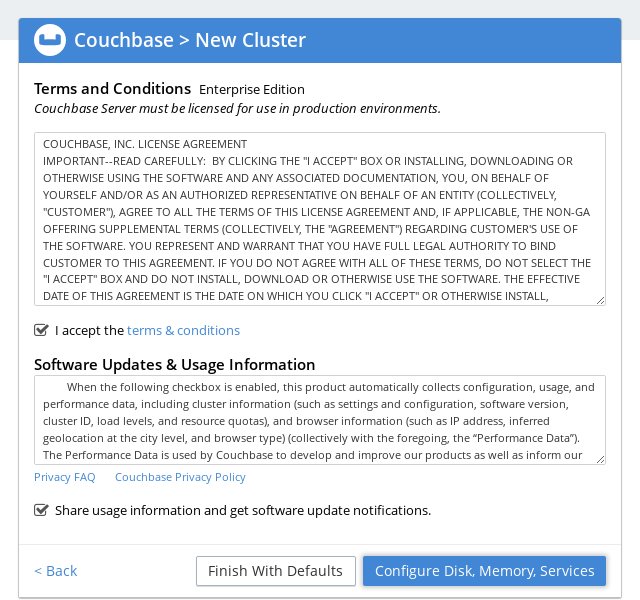
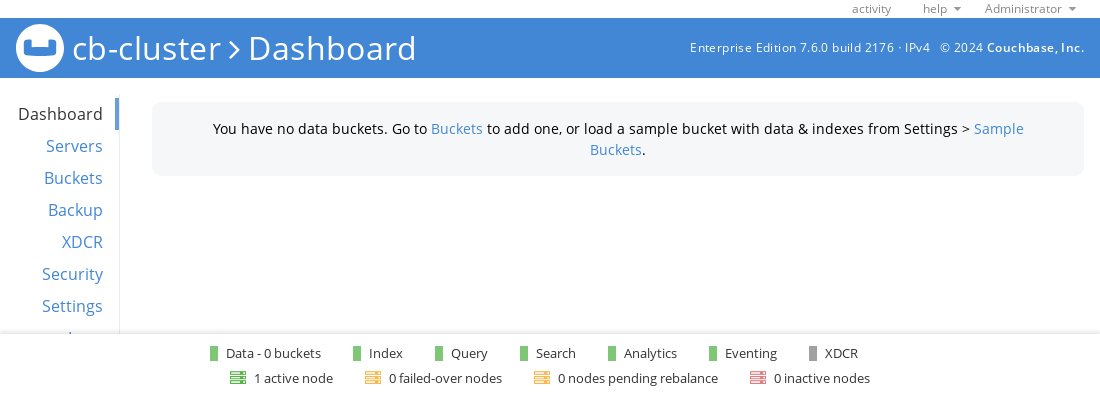
**Note :** For detailed information on configuring the Server, see [Deployment Guidelines](https://docs.couchbase.com/server/current/install/install-production-deployment.html).
### Running A N1QL Query on the Couchbase Server Cluster
N1QL is the SQL based query language for Couchbase Server. Simply switch to the Query tab on the Web Console at `http://localhost:8091` and run the following N1QL Query in the query window:
SELECT name FROM `beer-sample` WHERE brewery_id="mishawaka_brewing";
You can also execute N1QL queries from the command line. To run a query from command line query tool, run the cbq command line tool, authenticating using the credentials you provided to the wizard, and execute the N1QL Query on the beer-sample bucket
```console
$ docker exec -it db cbq --user Administrator
cbq> SELECT name FROM `beer-sample` WHERE brewery_id ="mishawaka_brewing";
```
For more query samples, refer to [Run your first N1QL query](https://docs.couchbase.com/server/current/getting-started/try-a-query.html).
### Connect to the Couchbase Server Cluster via Applications and SDKs
Couchbase Server SDKs comes in many languages: C, Go, Java, .NET, Node.js, PHP, Python. Simply run your application through the Couchbase Server SDK of your choice on the host, and point it to [http://localhost:8091/pools](http://localhost:8091/pools) to connect to the container.
For running a sample application, refer to the [Sample Application](https://docs.couchbase.com/java-sdk/current/hello-world/sample-application.html) guide.
## Requirements and Best Practices
### Container Requirements
Official Couchbase Server images on Docker Hub are based on the latest supported version of Ubuntu.
**Docker Container Resource Requirements :** For minimum container requirements, you can follow [System Resource Requirements](https://docs.couchbase.com/server/current/install/pre-install.html) for development, test and production environments.
### Best Practices
**Avoid a Single Point of Failure :** Couchbase Server's resilience and high-availability are achieved through creating a cluster of independent nodes and replicating data between them so that any individual node failure doesn't lead to loss of access to your data. In a containerized environment, if you were to run multiple nodes on the same piece of physical hardware, you can inadvertently re-introduce a single point of failure. In environments where you control VM placement, we advise ensuring each Couchbase Server node runs on a different piece of physical hardware.
**Sizing your containers :** Physical hardware performance characteristics are well understood. Even though containers insert a lightweight layer between Couchbase Server and the underlying OS, there is still a small overhead in running Couchbase Server in containers. For stability and better performance predictability, It is recommended to have at least 2 cores dedicated to the container in development environments and 4 cores dedicated to the container rather than shared across multiple containers for Couchbase Server instances running in production. With an over-committed environment you can end up with containers competing with each other causing unpredictable performance and sometimes stability issues.
**Map Couchbase Node Specific Data to a Local Folder :** A Couchbase Server Docker container will write all persistent and node-specific data under the directory `/opt/couchbase/var` by default. It is recommended to map this directory to a directory on the host file system using the `-v` option to `docker run` to get persistence and performance.
- Persistence: Storing `/opt/couchbase/var` outside the container with the `-v` option allows you to delete the container and recreate it later without losing the data in Couchbase Server. You can even update to a container running a later release/version of Couchbase Server without losing your data.
- Performance: In a standard Docker environment using a union file system, leaving `/opt/couchbase/var` inside the container results in some amount of performance degradation.
NOTE for SELinux : If you have SELinux enabled, mounting the host volumes in a container requires an extra step. Assuming you are mounting the `~/couchbase` directory on the host file system, you need to run the following command once before running your first container on that host:
`mkdir ~/couchbase && chcon -Rt svirt_sandbox_file_t ~/couchbase`
**Increase ULIMIT in Production Deployments :** Couchbase Server normally expects the following changes to ulimits:
ulimit -n 200000 # nofile: max number of open files
ulimit -l unlimited # memlock: maximum locked-in-memory address space
These ulimit settings are necessary when running under heavy load. If you are just doing light testing and development, you can omit these settings, and everything will still work.
To set the ulimits in your container, you will need to run Couchbase Docker containers with the following additional `--ulimit` flags:
`docker run -d --ulimit nofile=40960:40960 --ulimit core=100000000:100000000 --ulimit memlock=100000000:100000000 --name db -p 8091-8097:8091-8097 -p 9123:9123 -p 11207:11207 -p 11210:11210 -p 11280:11280 -p 18091-18097:18091-18097 couchbase`
Since "unlimited" is not supported as a value, it sets the core and memlock values to 100 GB. If your system has more than 100 GB RAM, you will want to increase this value to match the available RAM on the system.
Note: The `--ulimit` flags only work on Docker 1.6 or later.
**Network Configuration and Ports :** Couchbase Server communicates on many different ports (see the [Couchbase Server documentation](https://docs.couchbase.com/server/current/install/install-ports.html#ports-listed-by-communication-path)). Also, it is generally not supported that the cluster nodes be placed behind any NAT. For these reasons, Docker's default networking configuration is not ideally suited to Couchbase Server deployments. For production deployments it is recommended to use `--net=host` setting to avoid performance and reliability issues.
## Multi Node Couchbase Server Cluster Deployment Topologies
With multi node Couchbase Server clusters, there are 2 popular topologies.
### All Couchbase Server containers on one physical machine
This model is commonly used for scale-minimized deployments simulating production deployments for development and test purposes. Placing all containers on a single physical machine means all containers will compete for the same resources. Placing all containers on a single physical machine also eliminates the built-in protection against Couchbase Server node failures afforded by replication. When the single physical machine fails, all containers experience unavailability at the same time, losing all replicas. These restrictions may be acceptable for test systems, however it isn't recommended for applications in production.
You can find more details on setting up Couchbase Server in this topology in Couchbase Server [documentation](https://docs.couchbase.com/server/current/install/getting-started-docker.html#multi-node-cluster-one-host).
┌──────────────────────────────────────────────────────────┐
│ Host OS (Linux) │
│ │
│ ┌───────────────┐ ┌───────────────┐ ┌───────────────┐ │
│ │ Container OS │ │ Container OS │ │ Container OS │ │
│ │ (Ubuntu) │ │ (Ubuntu) │ │ (Ubuntu) │ │
│ │ ┌───────────┐ │ │ ┌───────────┐ │ │ ┌───────────┐ │ │
│ │ │ Couchbase │ │ │ │ Couchbase │ │ │ │ Couchbase │ │ │
│ │ │ Server │ │ │ │ Server │ │ │ │ Server │ │ │
│ │ └───────────┘ │ │ └───────────┘ │ │ └───────────┘ │ │
│ └───────────────┘ └───────────────┘ └───────────────┘ │
└──────────────────────────────────────────────────────────┘
### Each Couchbase Server container on its own machine
This model is commonly used for production deployments. It prevents Couchbase Server nodes from stepping over each other and gives you better performance predictability. This is the supported topology in production with Couchbase Server 5.5 and higher.
You can find more details on setting up Couchbase Server in this topology in Couchbase Server [documentation](https://docs.couchbase.com/server/current/install/getting-started-docker.html#multi-node-cluster-many-hosts).
┌───────────────────────┐ ┌───────────────────────┐ ┌───────────────────────┐
│ Host OS (Linux) │ │ Host OS (Linux) │ │ Host OS (Linux) │
│ ┌─────────────────┐ │ │ ┌─────────────────┐ │ │ ┌─────────────────┐ │
│ │ Container OS │ │ │ │ Container OS │ │ │ │ Container OS │ │
│ │ (Ubuntu) │ │ │ │ (Ubuntu) │ │ │ │ (Ubuntu) │ │
│ │ ┌───────────┐ │ │ │ │ ┌───────────┐ │ │ │ │ ┌───────────┐ │ │
│ │ │ Couchbase │ │ │ │ │ │ Couchbase │ │ │ │ │ │ Couchbase │ │ │
│ │ │ Server │ │ │ │ │ │ Server │ │ │ │ │ │ Server │ │ │
│ │ └───────────┘ │ │ │ │ └───────────┘ │ │ │ │ └───────────┘ │ │
│ └─────────────────┘ │ │ └─────────────────┘ │ │ └─────────────────┘ │
└───────────────────────┘ └───────────────────────┘ └───────────────────────┘
## Try Couchbase Cloud Free
Couchbase Cloud is a fully managed NoSQL Database-as-a-Service (DBaaS) for mission-critical applications. We deploy Couchbase Cloud in your AWS VPC and manage the workload. You'll enjoy incredible price-performance and operational transparency.
Start Free Trial - https://cloud.couchbase.com/sign-up
# Additional References
- [Couchbase Server and Containers](https://docs.couchbase.com/server/current/cloud/couchbase-cloud-deployment.html)
- [Getting Started with Couchbase Server and Docker](https://docs.couchbase.com/server/current/install/getting-started-docker.html)
```
--------------------------------------------------------------------------------
/silverpeas/content.md:
--------------------------------------------------------------------------------
```markdown
# What is Silverpeas
[Silverpeas](https://www.silverpeas.org) is a Collaborative and Social-Networking Portal built to facilitate and to leverage the collaboration, the knowledge-sharing and the feedback of persons, teams and organizations.
Accessible from a simple web browser or from a smartphone, Silverpeas is used every days by ourselves. With about 30 ready-to-use applications and with its conversional and relational functions, it makes possible for users to work together, share their knowledge and good practices, and in general to improve their reciprocal empathy, therefore their willingness to collaborate.
Silverpeas is usually used as an intranet and extranet platform dedicated to collaboration and information sharing.
%%LOGO%%
# How to use this image
Docker images of Silverpeas require one of the following database system in order to be used:
- the open-source, powerful and recommended PostgreSQL database system,
- the Microsoft SQLServer database system,
- the Oracle database system.
The Silverpeas images support actually only the two first database systems; because of the non-free licensing issues with the Oracle JDBC drivers, Silverpeas cannot include these drivers by default and consequently it cannot use transparently an Oracle database system as a persistence backend.
For the same reasons, the Docker images of Silverpeas aren't shipped with the Oracle JVM but with OpenJDK. Silverpeas uses the Wildfly application server as runtime.
The Silverpeas images use the following environment variables to set the database access parameters:
- `DB_SERVERTYPE` to specify the database system to use with Silverpeas: POSTGRESQL for PostgreSQL, MSSQL for Microsoft SQLServer, ORACLE for Oracle. By default, it is set to POSTGRESQL.
- `DB_SERVER` to specify the IP address or the name of the host on which the database system is running. By default, it is set to `database`, so that any container running a database can be linked to the Silverpeas container with this name.
- `DB_NAME` to specify the database to use with Silverpeas. By default, it is set to `Silverpeas`.
- `DB_USER` to specify the user identifier to use by Silverpeas to access the database. By default, it is set to `silverpeas` (it is recommended to dedicate a user account in the database for each application).
- `DB_PASSWORD` to specify the password associated with the user identifier above.
These environment variables can be also defined as properties into the Silverpeas global configuration file `config.properties` (see below).
## Start a Silverpeas instance with a database from a Docker container
In [Docker Hub](https://hub.docker.com/), no Docker images of Microsoft SQLServer are currently available, but you will find a lot of images of PostgreSQL. For example, with an [official PostgreSQL docker image](https://hub.docker.com/_/postgres/), you can start a PostgreSQL instance initialized with a superuser `postgres` with as password `mysecretpassword`:
```console
$ docker run --name postgresql -d \
-e POSTGRES_PASSWORD="mysecretpassword" \
-v postgresql-data:/var/lib/postgresql/data \
postgres:12.3
```
We recommend strongly to mount the directory with the database file on the host so the data won't be lost when upgrading PostgreSQL to a newer version (a Data Volume Container can be used instead). For any information how to start a PostgreSQL container, you can refer its [documentation](https://hub.docker.com/_/postgres/).
Once the database system is running, a database for Silverpeas has to be created and a user with administrative rights on this database (and only on this database) should be added; it is recommended for a security reason to create a dedicated user account in the database for each application and therefore for Silverpeas. In this document, and by default, a database `Silverpeas` and a user `silverpeas` for that database are created. For example:
```console
$ docker exec -it postgresql psql -U postgres
psql (12.3 (Debian 12.3-1.pgdg100+1))
Type "help" for help.
postgres=# create database "Silverpeas";
CREATE DATABASE
postgres=# create user silverpeas with password 'thesilverpeaspassword';
CREATE ROLE
postgres=# grant all privileges on database "Silverpeas" to silverpeas;
GRANT
postgres=# \q
$
```
### Start a Silverpeas instance with the default configuration
Finally, a Silverpeas instance can be started by specifying the required database access parameters with the environment variables. In the example, the database is named `Silverpeas` and the priviledged user is `silverpeas` with as password `thesilverpeaspassword`:
```console
$ docker run --name silverpeas -p 8080:8000 -d \
-e DB_NAME="Silverpeas" \
-e DB_USER="silverpeas" \
-e DB_PASSWORD="thesilverpeaspassword" \
-v silverpeas-log:/opt/silverpeas/log \
-v silverpeas-data:/opt/silverpeas/data \
--link postgresql:database \
%%IMAGE%%
```
By default, `database` is the default hostname used by Silverpeas for its persistence backend. So, as the PostgreSQL database is linked here under the alias `database`, we don't have to explicitly indicate its hostname with the `DB_SERVER` environment variable. The Silverpeas images expose the 8000 port and here this port is mapped to the 8080 port of the host.
Silverpeas is then accessible at [http://localhost:8080/silverpeas](http://localhost:8080/silverpeas). You can sign in Silverpeas with the administrator account `SilverAdmin` and with as password `SilverAdmin`. Don't forget to change the password of the administrator account.
By default, some volumes are created inside the container, so that we can access them in the host. (Refers the [Docker Documentation](https://docs.docker.com/engine/tutorials/dockervolumes/#locating-a-volume) to locate them.) Among them `/opt/silverpeas/log` and `/opt/silverpeas/data`: the first volume contains the logs produced by Silverpeas whereas the second volume contains all the data that are created and managed by the users in Silverpeas. Because the latter has already a directories structure created at image creation, a host directory cannot be mounted into the container at `opt/silverpeas/data` without losing the volume's content (the mount point overlays the pre-existing content of the volume). In our example, in order to easily locate the two volumes, we label them explicitly with respectively the labels `silverpeas-log` and `silverpeas-data`. (Using a [Data Volume Container](https://docs.docker.com/engine/userguide/containers/dockervolumes/) to map `/opt/silverpeas/log` and `/opt/silverpeas/data` is a better solution.)
Silverpeas takes some time to start, so we recommend you to glance at the logs the complete starting of Silverpeas (see the section about the logs).
### Start a Silverpeas instance with a finer configuration
The Silverpeas global configuration is defined in the `/opt/silverpeas/configuration/config.properties` file whose a sample can be found [here](https://raw.githubusercontent.com/Silverpeas/Silverpeas-Distribution/master/src/main/dist/configuration/sample_config.properties) or in the container directory `/opt/silverpeas/configuration/`. You can explicitly create the `config.properties` file with, additionally to the database access parameters (don't forget in that case to specify the `DB_SERVER` property with as value `database`), your peculiar configuration parameters and then start a Silverpeas instance with this configuration file:
```console
$ docker run --name silverpeas -p 8080:8000 -d \
-v /etc/silverpeas/config.properties:/opt/silverpeas/configuration/config.properties
-v silverpeas-log:/opt/silverpeas/log \
-v silverpeas-data:/opt/silverpeas/data \
--link postgresql:database \
%%IMAGE%%
```
where `/etc/silverpeas/config.properties` is your own configuration file on the host. For security reason, we strongly recommend to set explicitly the administrator's credentials with the properties `SILVERPEAS_ADMIN_LOGIN` and `SILVERPEAS_ADMIN_PASSWORD` in the `config.properties` file. (Don't forget to set also the administrator email address with the property `SILVERPEAS_ADMIN_EMAIL`.)
Below an example of such a configuration file:
SILVERPEAS_ADMIN_LOGIN=SilverAdmin
SILVERPEAS_ADMIN_PASSWORD=theadministratorpassword
[email protected]
DB_SERVERTYPE=POSTGRESQL
DB_SERVER=database
DB_NAME=Silverpeas
DB_USER=silverpeas
DB_PASSWORD=thesilverpeaspassword
CONVERTER_HOST=libreoffice
CONVERTER_PORT=8997
SMTP_SERVER=smtp.foo.com
SMTP_AUTHENTICATION=true
SMTP_DEBUG=false
SMTP_PORT=465
SMTP_USER=silverpeas
SMTP_PASSWORD=thesmtpsilverpeaspassword
SMTP_SECURE=true
## Start a Silverpeas instance with a database on the host
For a database system running on the host (or on a remote host) with 192.168.1.14 as IP address, you have to specify this host both to the container at starting and to Silverpeas by defining it into its global configuration file:
```console
$ docker run --name silverpeas -p 8080:8000 -d \
--add-host=database:192.168.1.14 \
-v /etc/silverpeas/config.properties:/opt/silverpeas/configuration/config.properties \
-v silverpeas-log:/opt/silverpeas/log \
-v silverpeas-data:/opt/silverpeas/data \
%%IMAGE%%
```
where `database` is the hostname referred by the `DB_SERVER` parameter in your `/etc/silverpeas/config.properties` file as the host running the database system and that is mapped here to the actual IP address of this host. The hostname is added in the `/etc/hosts` file in the container.
For a PostgreSQL database system, some configurations are required in order to be accessed from the Silverpeas container:
- In the file `postgresql.conf`, edit the parameter `listen_addresses` to add the address of the PostgreSQL host (`192.168.1.14` in our example)
listen_addresses = 'localhost,192.168.1.14'
- In the file `pg_hba.conf`, add an entry for the Docker subnetwork
host all all 172.17.0.0/16 md5
- Don't forget to restart PostgreSQL for the changes to be taken into account.
# Using a Data Volume Container
The data produced by Silverpeas mean to be persistent, available to the next versions of Silverpeas, and they have to be accessible to other containers like the one running LibreOffice. For doing, the Docker team recommends to use a Data Volume Container.
In Silverpeas, there are four types of data produced by the application:
- the logging stored in `/opt/silverpeas/log`,
- the user data and those produced by Silverpeas from the user data in `/opt/silverpeas/data`,
- the workflows created by the workflow editor in `/opt/silverpeas/xmlcomponents/workflows`.
Beside these directories, according to your specific needs, custom configuration scripts can be added in the directories `/opt/silverpeas/configuration/jboss` and `/opt/silverpeas/configuration/silverpeas`.
The directories `/opt/silverpeas/log`, `/opt/silverpeas/data`, and `/opt/silverpeas/xmlcomponents/workflows` are all defined as volumes in the Docker image.
All these different kind of data have to be consistent for a given state of Silverpeas; they form a coherent whole set. Then, defining a Data Volume Container to gather all of these volumes is a better solution over multiple shared-storage volume definitions. You can, with a such Data Volume Container, backup, restore or migrate more easily the full set of the data of Silverpeas.
To define a Data Volume Container for Silverpeas, for example:
```console
$ docker create --name silverpeas-store \
-v silverpeas-data:/opt/silverpeas/data \
-v silverpeas-log:/opt/silverpeas/log \
-v silverpeas-workflows:/opt/silverpeas/xmlcomponents/workflows \
-v /etc/silverpeas/config.properties:/opt/silverpeas/configuration/config.properties \
%%IMAGE%% \
/bin/true
```
Then to mount the volumes in the Silverpeas container:
```console
$ docker run --name silverpeas -p 8080:8000 -d \
--link postgresql:database \
--volumes-from silverpeas-store \
%%IMAGE%%
```
If you have to customize the settings of Silverpeas or add, for example, a new database definition, then specify these settings with the Data Volume Container, so that they will be available to the next versions of Silverpeas which will be then configured correctly like your previous Silverpeas installation:
```console
$ docker create --name silverpeas-store \
-v silverpeas-data:/opt/silverpeas/data \
-v silverpeas-log:/opt/silverpeas/log \
-v silverpeas-properties:/opt/silverpeas/properties \
-v /etc/silverpeas/config.properties:/opt/silverpeas/configuration/config.properties \
-v /etc/silverpeas/CustomerSettings.xml:/opt/silverpeas/configuration/silverpeas/CustomerSettings.xml \
-v /etc/silverpeas/my-datasource.cli:/opt/silverpeas/configuration/jboss/my-datasource.cli \
%%IMAGE%% \
/bin/true
```
# Logs
You can follow the activity of Silverpeas by watching the logs generated in the mounted `/opt/silverpeas/log` directory.
The output of Wildfly is redirected into the container standard output and so it can be watched as following:
```console
$ docker logs -f silverpeas
```
Silverpeas takes some time to start, so we recommend you to glance at the logs for the complete starting of Silverpeas.
```
--------------------------------------------------------------------------------
/websphere-liberty/content.md:
--------------------------------------------------------------------------------
```markdown
# Overview
All of the images in this repository use Ubuntu as the Operating System. For variants that use the Universal Base Image, please see [this repository](https://hub.docker.com/r/ibmcom/websphere-liberty/).
For more information on these images please see our [GitHub repository](https://github.com/WASdev/ci.docker#container-images).
# Image User
This image runs by default with `USER 1001` (non-root), as part of group `0`. Please make sure you read below to set the appropriate folder and file permissions.
## Updating folder permissions
All of the folders accessed by WebSphere Liberty have been given the appropriate permissions, but if your extending Dockerfile needs permission to another location you can simply temporarily switch into root and provide the needed permissions, example:
```dockerfile
USER root
RUN mkdir -p /myFolder && chown -R 1001:0 /myFolder
USER 1001
```
## Updating file permissions
You have to make sure that **all** the artifacts you are copying into the image (via `COPY` or `ADD`) have the correct permissions to be `read` and `executed` by user `1001` or group `0`, because the ownership of the file is changed to be `root:0` when transferring into the docker image.
You have a few options for doing this: before copying the file, during copy, or after copy.
### Updating permissions before copying
Since the ownership of the file will change to `root:0`, you can simply set the permissions for the owner's group to be able to read/execute the artifact (i.e. the middle digit of a `chmod` command). For example, you can do `chmod g+rx server.xml` to ensure your `server.xml` can be `read` and `executed` by group `0`, as well as any artifacts such as the application's `EAR` or `WAR` file, JDBC driver, or other files that are placed on the image via `COPY` or `ADD`.
### Updating permissions during copy
If you're using Docker v17.09.0-ce and newer you can take advantage of the flag `--chown=<user>:<group>` during either `ADD` or `COPY`. For example: `COPY --chown=1001:0 jvm.options /config/jvm.options`. This is the preferred approach as you don't need to worry about changing permissions before calling `docker build` and you also do not duplicate layers in the resulting image.
### Updating permissions after copy
If you need your Dockerfile to work with older versions of Docker CE and don't want to pre-process the permissions of the files you can temporarily switch into root to change the permissions of the needed files. For example:
```dockerfile
USER root
RUN chown 1001:0 /config/jvm.options
RUN chown 1001:0 /output/resources/security/ltpa.keys
USER 1001
```
Please note that this pattern will duplicate the docker layers for those artifacts, which can heavily bloat your resulting docker image (depending on the size of the artifact). So it is recommended to set the permissions before or during copy.
# Tags
There are multiple tags available in this repository. The image with the tag `beta` contains the contents of the install archive for the latest monthly beta. The other images are all based on the latest generally available fix pack.
The `kernel` image contains just the Liberty kernel and no additional runtime features. This image is the recommended basis for custom built images, so that they can contain only the features required for a specific application. For example, the following Dockerfile starts with this image, copies in the `server.xml` that lists the features required by the application, and then uses the `configure.sh` script to download those features from the online repository.
```dockerfile
FROM %%IMAGE%%:kernel
COPY --chown=1001:0 Sample1.war /config/dropins/
COPY --chown=1001:0 server.xml /config/
RUN configure.sh
```
# Usage
The images are designed to support a number of different usage patterns. The following examples are based on the Java EE8 Liberty [application deployment sample](https://developer.ibm.com/wasdev/docs/article_appdeployment/) and assume that [DefaultServletEngine.zip](https://github.com/WASdev/sample.servlet/releases/download/V1/DefaultServletEngine.zip) has been extracted to `/tmp` and the `server.xml` updated to accept HTTP connections from outside of the container by adding the following element inside the `server` stanza (if not using one of the pre-packaged `server.xml` files with our tags):
```xml
<httpEndpoint host="*" httpPort="9080" httpsPort="-1"/>
```
## Application Image
It is a very strong best practice to create an extending Docker image, we called it the `application image`, that encapsulates an application and its configuration. This creates a robust, self-contained and predictable Docker image that can span new containers upon request, without relying on volumes or other external runtime artifacts that may behave different over time.
If you want to build the smallest possible WebSphere Liberty application image you can start with our `kernel` tag, add your artifacts, and run `configure.sh` to grow the set of features to be fit-for-purpose. Please see our [GitHub page](https://github.com/WASdev/ci.docker#building-an-application-image) for more details.
## Enabling Enterprise functionality
The WebSphere Liberty images have a set of built-in XML snippets that enable and configure enterprise functionality such as session cache and monitoring. These are toggled by specific `ARG`s in your application image Dockerfile and configured via the `configure.sh` script. Please see the [instructions](https://github.com/wasdev/ci.docker#enterprise-functionality) on our GitHub page for more information.
## Using volumes for configuration
This pattern can be useful for quick experiments / early development (i.e. `I just want to run the application as I iterate over it`), but should not be used for development scenarios that involve different teams and environments - for these cases the `Application Image` pattern described above is the way to go.
When using `volumes`, an application file can be mounted in the `dropins` directory of this server and run. The following example starts a container in the background running a .WAR file from the host file system with the HTTP and HTTPS ports mapped to 80 and 443 respectively.
```console
$ docker run -d -p 80:9080 -p 443:9443 \
-v /tmp/DefaultServletEngine/dropins/Sample1.war:/config/dropins/Sample1.war \
%%IMAGE%%:webProfile8
```
When the server is started, you can browse to http://localhost/Sample1/SimpleServlet on the Docker host.
Note: If you are using the boot2docker virtual machine on OS X or Windows, you need to get the IP of the virtual host by using the command `boot2docker ip` instead of by using localhost.
For greater flexibility over configuration, it is possible to mount an entire server configuration directory from the host and then specify the server name as a parameter to the run command. Note: This particular example server configuration provides only HTTP access.
```console
$ docker run -d -p 80:9080 \
-v /tmp/DefaultServletEngine:/config \
%%IMAGE%%:webProfile8
```
# Using Spring Boot with WebSphere Liberty
The `full` images introduce capabilities specific to the support of all Liberty features, including Spring Boot applications. This image thus includes the `springBootUtility` used to separate Spring Boot applications into thin applications and dependency library caches. To get these same capabilities without including features you are not using, build instead on top of `kernel` images and run configure.sh for your server.xml, ensuring that it enables either the `springBoot-1.5` or `springBoot-2.0` feature.
To elaborate these capabilities this section assumes the standalone Spring Boot 2.0.x application `hellospringboot.jar` exists in the `/tmp` directory.
1. A Spring Boot application JAR deploys to the `dropins/spring` directory within the default server configuration, not the `dropins` directory. Liberty allows one Spring Boot application per server configuration. You can create a Spring Boot application layer over this image by adding the application JAR to the `dropins/spring` directory. In this example we copied `hellospringboot.jar` from `/tmp` to the same directory containing the following Dockerfile.
```dockerfile
FROM %%IMAGE%%:kernel
COPY --chown=1001:0 hellospringboot.jar /config/dropins/spring/
COPY --chown=1001:0 server.xml /config/
RUN configure.sh
```
The custom image can be built and run as follows.
```console
$ docker build -t app .
$ docker run -d -p 8080:9080 app
```
2. The `full` images provide the library cache directory, `lib.index.cache`, which contains an indexed library cache created by the `springBootUtility` command. Use `lib.index.cache` to provide the library cache for a thin application.
You can use the `springBootUtility` command to create thin application and library cache layers over a `full` image. The following example uses docker staging to efficiently build an image that deploys a fat Spring Boot application as two layers containing a thin application and a library cache.
```dockerfile
FROM %%IMAGE%%:kernel as staging
COPY --chown=1001:0 hellospringboot.jar /staging/myFatApp.jar
COPY --chown=1001:0 server.xml /config/
RUN springBootUtility thin \
--sourceAppPath=/staging/myFatApp.jar \
--targetThinAppPath=/staging/myThinApp.jar \
--targetLibCachePath=/staging/lib.index.cache
FROM %%IMAGE%%:kernel
COPY --chown=1001:0 server.xml /config
COPY --from=staging /staging/lib.index.cache /lib.index.cache
COPY --from=staging /staging/myThinApp.jar /config/dropins/spring/myThinApp.jar
RUN configure.sh
```
For Spring Boot applications packaged with library dependencies that rarely change across continuous application updates, you can use the capabilities mentioned above to to share library caches across containers and to create even more efficient docker layers that leverage the docker build cache.
# Providing your own keystore/truststore
By default, when a `websphere-liberty` image starts, a Liberty server XML snippet is generated in `/config/configDropins/defaults/keystore.xml` that specifies a `keyStore` stanza with a generated password. This causes Liberty to generate a default keystore and truststore with a self-signed certificate when it starts (see the [Knowledge Center](https://www.ibm.com/support/knowledgecenter/SSEQTP_liberty/com.ibm.websphere.wlp.doc/ae/rwlp_liberty_ssl_defaults.html) for more information). When providing your own keystore/truststore, this default behavior can be disabled by ensuring that a file already exists at `/config/configDropins/defaults/keystore.xml` (for example, added as part of your Docker build). This file can contain your keystore configuration or could just contain an empty `<server></server>` stanza.
# Using IBM JRE Class data sharing
The IBM JRE provides a feature [Class data sharing](http://www-01.ibm.com/support/knowledgecenter/SSYKE2_8.0.0/com.ibm.java.lnx.80.doc/diag/understanding/shared_classes.html) which offers transparent and dynamic sharing of data between multiple Java Virtual Machines running on the same host by using shared memory backed by a file. When running the Liberty Docker image, it looks for the file at `/opt/ibm/wlp/output/.classCache`. To benefit from Class data sharing, this location needs to be shared between containers either through the host or a data volume container.
Taking the application image from example 3 above, containers can share the host file location (containing the shared cache) `/tmp/websphere-liberty/classCache` as follows:
```console
docker run -d -p 80:9080 -p 443:9443 \
-v /tmp/websphere-liberty/classCache:/opt/ibm/wlp/output/.classCache app
```
Or, create a named data volume container that exposes a volume at the location of the shared file:
```console
docker run -e LICENSE=accept -v /opt/ibm/wlp/output/.classCache \
--name classcache %%IMAGE%% true
```
Then, run the WebSphere Liberty image with the volumes from the data volume container classcache mounted as follows:
```console
docker run -d -p 80:9080 -p 443:9443 --volumes-from classcache app
```
# Running WebSphere Liberty in read-only mode
Liberty writes to two different directories when running: `/opt/ibm/wlp/output` and `/logs`. In order to run the Liberty image in read-only mode these may be mounted as temporary file systems. If using the provided image, the keystore will be generated on initial start up in the server configuration. This means that the server configuration directory either needs to be read-write or the keystore will need to be built into the image. In the example command `/config` is mounted as a read-write volume.
```console
docker run -d -p 80:9080 -p 443:9443 \
--tmpfs /opt/ibm/wlp/output --tmpfs /logs -v /config --read-only \
%%IMAGE%%:javaee8
```
# Changing locale
The base Ubuntu image does not include additional language packs. To use an alternative locale, build your own image that installs the required language pack and then sets the `LANG` environment variable. For example, the following Dockerfile starts with the `%%IMAGE%%:full` image, installs the Portuguese language pack, and sets Brazilian Portuguese as the default locale:
```dockerfile
FROM %%IMAGE%%:full
RUN apt-get update \
&& apt-get install -y language-pack-pt-base \
&& rm -rf /var/lib/apt/lists/*
ENV LANG pt_BR.UTF-8
```
```